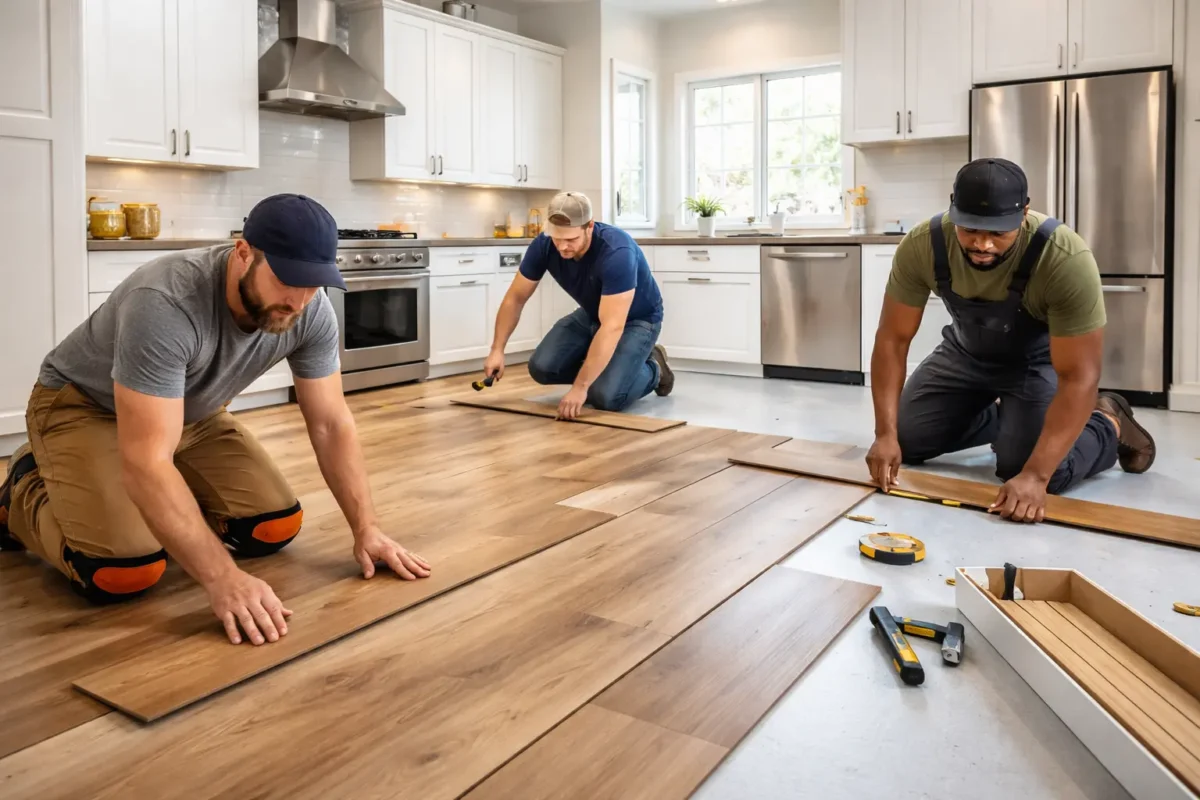
Are you looking for DIY Kitchen Floor Installation?
Or maybe you’re trying to understand the full process before hiring a professional in Brooklyn, NYC. Either way, you’re in the right place.
Kitchen floor installation is not just about placing new flooring; it’s about proper planning, correct materials, subfloor preparation, moisture control, and clean finishing. When done right, it improves your kitchen’s durability, safety, and overall value. In this detailed guide, we’ll explain what kitchen floor installation really means, the step-by-step installation process, material-specific tips, and cost considerations for Brooklyn homes and apartments.
What Is Kitchen Floor Installation?
Kitchen floor installation is the process of removing (or prepping around) the existing surface, preparing the base layers, and putting in a new finished floor you can walk on. Your finished flooring sits on a solid subfloor, and some installs also use an underlayment layer in between for smoothing, support, or sound control.
Then you install the flooring itself (tile, vinyl, wood, etc.) using the method that matches the material: click-lock, glue-down, mortar, or nails. Finally, you complete the job with the “detail work” like transitions, trim, and sealing gaps so the floor looks clean and holds up in a busy kitchen.
Different Types of Kitchen Floor
Before you pick a kitchen floor, think about what you deal with every day: spills, steam, grease, and heavy foot traffic. The best options usually balance water resistance, durability, and easy cleaning, which is especially important in kitchens.
- Ceramic or porcelain tile: Tile handles water and stains extremely well, which is why it’s a classic kitchen choice. Ceramic tile is described as impervious to water and stains, and it also holds up well to heat in day-to-day use.
- Luxury Vinyl Plank (LVP) / Luxury Vinyl Tile (LVT): If you want a “wood look” without the stress, vinyl is a popular pick because it’s designed to deal with moisture and routine mess. Vinyl plank is often highlighted for water resistance and easy maintenance, making it practical for kitchens.
- Sheet vinyl (vinyl roll): Sheet vinyl can be a smart choice when you want fewer seams, which helps with spill control. It’s commonly recommended as a kitchen-suitable option because it manages moisture and cleans up easily.
- Engineered wood flooring: Engineered wood gives you real-wood style, but with a structure that tends to handle normal temperature changes better than some solid-wood installs. It’s often listed as a kitchen-appropriate option when you want warmth and a more natural look; just remember, you still need to stay on top of spills.
- Laminate flooring: Laminate can look great for the price, and many homeowners like it for quick visual upgrades. It’s also commonly listed among kitchen-suitable choices, but you’ll want to be extra careful with standing water and make sure edges are protected.
- Linoleum: Linoleum is one of those “quietly solid” options; comfortable underfoot and often chosen for everyday durability. It’s also mentioned among durable kitchen flooring choices, especially for people who want something resilient for busy routines.
- Natural stone (like slate, granite, or marble): Stone gives a premium look and can last a long time, but it usually needs sealing and regular care. It’s still a popular kitchen option for durability, especially when homeowners prioritize style and long-term wear.
Step-by-Step Kitchen Floor Installation
| Choosing the Right Kitchen Flooring Material |
| Measure Like a Pro (Avoid Thin “Sliver Cuts”) |
| Preparation the Space: Protect Cabinets, Appliances, and Neighbors |
| Removing Old Kitchen Flooring |
| Subfloor Inspection |
| Moisture Management (Especially Over Concrete) |
| Step-by-Step: Installing Click-Lock Vinyl Plank in a Kitchen |
| Step-by-Step: Installing Tile in a Kitchen |
| Finishing Touches |
Pro Tip
SR General Construction, NYC, is fully licensed and has over 15 years’ experience of Renovation and Remodeling work in Brooklyn. We’ve completed more than 750 projects for 500+ satisfied clients, and we offer 24/7 support to keep your home safe.
N.B. Do you need kitchen renovation service in Brooklyn? Call SR General Construction NYC for free estimate!
Choosing the Right Kitchen Flooring Material
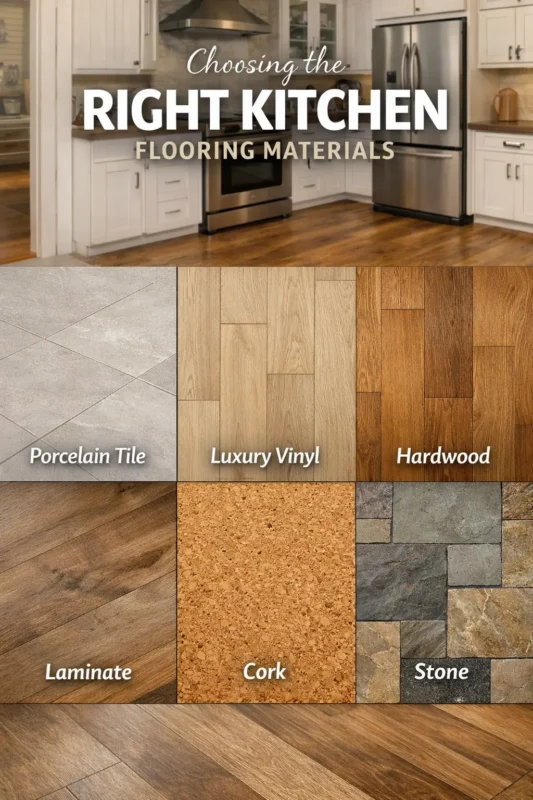
You don’t want to pick a kitchen floor just because it “looks nice”; you want a floor that matches how you cook, clean, and live. In Brooklyn kitchens, the smartest choice is usually the one that handles water, daily traffic, and easy cleanup without drama.
- Start with your “mess level” (spills, pets, kids, heavy cooking). Choose a material known for kitchen durability—vinyl, tile, stone, linoleum, and some hardwood options are commonly used because they handle wear better than delicate surfaces.
- Think about slip safety if your kitchen gets wet. For tile, many manufacturers reference wet slip testing, and a common benchmark for level interior areas walked on when wet is DCOF ≥ 0.42.
- Match the floor to your building and subfloor (not just your taste). Your installation method and prep depend on what you’re installing over (concrete, wood, or existing smooth vinyl), and that affects what products are a good fit.
- Account for sound if you live in an apartment. Underlayment and floor type can change how much impact noise travels, so it’s worth choosing a system that works with your building’s expectations.
- Read the “boring” manufacturer notes before you buy. Many vinyl products have specific acclimation/storage and installation rules, and following them protects your warranty and prevents movement later.
Measure Like a Pro (Avoid Thin “Sliver Cuts”)
If you measure quickly and guess the layout, you’ll usually pay for it later, with wasted boxes and tiny edge pieces that look awkward. A clean layout is about getting balanced cuts and avoiding those thin “slivers” along the walls.
- Break the room into simple shapes and measure each one. Measure length × width for each section (even small jogs) and add them together so your total square footage is real, not “close enough.”
- Add a cutting allowance before you order materials. Many pros add extra for cuts, waste, and future repairs; one common tip is adding about 5% for cutting allowance, and you may need more for patterns or tricky layouts.
- Dry-lay a few rows (tiles or planks) before anything gets glued or locked. This quick test shows you where your last row will land so you can avoid tiny cuts.
- Shift your layout line to “balance” the edges. A pro-looking layout stays centered and balanced, meaning you avoid small edge cuts by adjusting the starting point.
- Snap chalk lines so the floor stays straight from the first row. Chalk lines help you keep the pattern square and consistent, especially in kitchens where cabinets and doorways can trick your eyes.
Prepare the Space: Protect Cabinets, Appliances, and Neighbors
Kitchen flooring gets stressful when you rush the setup, because kitchens have appliances, tight corners, and busy buildings. A little prep protects your cabinets and also keeps your neighbours from hating the project.
- Clear the room and disconnect appliances safely. Start by removing furniture/appliances and shutting off utilities when needed (especially gas) before you move a range.
- Remove vents and any trim you plan to reinstall (and label it). Pulling vents and trim first keeps them from cracking and makes reinstalling faster later.
- Protect cabinets, counters, and walkways before the demo starts. Use floor protection and plastic sheeting so dust and tool bumps don’t turn into extra repairs.
- Plan your work hours the Brooklyn way (especially in co-ops/condos). NYC construction work is generally allowed 7am–6pm on weekdays, and many buildings set stricter rules in their alteration agreements.
- Control dust if you’re cutting tile or grinding mortar. Cutting/grinding materials like tile, mortar, and concrete can create respirable silica dust, so use safer methods and protection.
Removing Old Kitchen Flooring
Removing the old floor is usually the messiest part, but it’s also where you can prevent future problems. The goal is simple: get the old material out without damaging the subfloor or exposing yourself to hazards.
- Confirm what you’re removing and what’s underneath it. The tools and approach change depending on whether it’s sheet vinyl, tile, or another surface, and what subfloor sits below.
- Pause if the existing vinyl is old—some older vinyl can contain asbestos. One vinyl install guide warns that pre-1986 existing vinyl may contain asbestos, and NY health guidance explains where to get help and info.
- Cut the flooring into manageable strips before you lift it. A common approach is to find an edge, peel where possible, then cut and scrape as needed.
- Scrape glue as you go instead of letting it build up. Bob Vila recommends using a thin-edged scraper while pulling strips, and sometimes softening the glue helps release it.
- Keep dust under control during removal, especially with tile. If you’re chiseling or grinding tile materials, treat dust seriously because silica exposure can be dangerous.
Subfloor Inspection
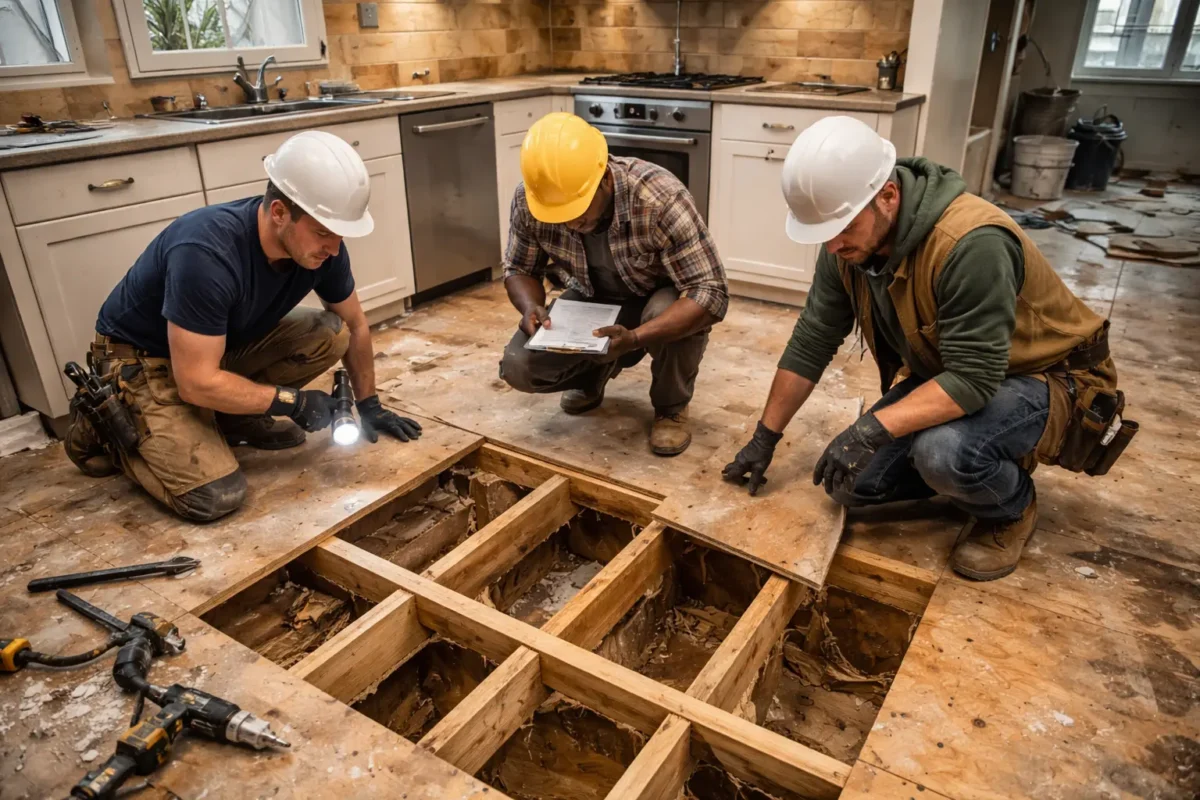
If your subfloor is weak, uneven, or damp, your new kitchen floor will almost always fail early, no matter how expensive the material is. Think of subfloor inspection as the step that makes everything else “stick, sit flat, and last.”
- Check for soft spots, rot, and movement before anything goes down. Moisture damage and weak areas can cause sagging, warping, or poor adhesion over time.
- Test for moisture, and don’t install over a known moisture problem. Wood-floor guidelines are very clear: never install over a known moisture condition, and moisture should be evaluated before installation.
- Verify flatness with a long straightedge (don’t “eyeball” it). Some vinyl guidance calls for flatness around ≤ 1/8 inch over 6 ft, and tile standards often reference tolerances like 1/4 inch over 10 ft (tighter for large-format tile), so always check your product rules.
- Fix squeaks and loose fasteners now, not after the floor is finished. Loose or missing fasteners can cause squeaks and make the top floor wear faster.
- Clean and dry the surface until it’s truly ready. Many installation guidelines require the subfloor to be firm, smooth, clean, and dry because debris and dust can ruin bonding and create bumps.
Moisture Management (Especially Over Concrete)
Concrete can look dry and still hold enough moisture to ruin a new floor later. If your Brooklyn kitchen sits over a slab (or you’re on a lower level), you’ll want to treat moisture checks like a non-negotiable step.
- Start by spotting moisture “risk zones” in the room. Test near exterior doors, plumbing walls, foundation walls, and the center of the room because those areas often show the real moisture picture.
- Run a real moisture test—not a guess. Common industry methods include ASTM F1869 (calcium chloride / MVER) and ASTM F2170 (in-situ relative humidity) for concrete slabs.
- Compare results to your flooring’s allowed limits. For example, one rigid vinyl plank guide allows concrete moisture up to 8 lbs/1000 ft²/24 hr (ASTM F1869) or <90% RH (ASTM F2170)—your product may be different, so follow your box guide.
- Use the right moisture barrier/underlayment for concrete. A DIY vinyl plank guide recommends covering on- or below-grade concrete with polyethylene underlayment before installation.
- Don’t rely on “waterproof flooring” to fix a moisture problem. Some manufacturers clearly warn that waterproof floating floors don’t stop subfloor moisture issues (and you still need to remove standing water fast).
Step-by-Step: Installing Click-Lock Vinyl Plank in a Kitchen
Click-lock vinyl plank is popular because it installs as a “floating floor,” so you don’t glue it down. The key is simple: prep the subfloor, leave expansion space, and lock every joint tight so it stays flat and gap-free.
- Read the carton instructions and do a jobsite check first. Manufacturers treat this as step one because subfloor type, moisture, and room conditions affect the whole install.
- Buy enough material (plus extra for cuts). One major manufacturer recommends adding ~10% for a standard install (more if diagonal) so you don’t run short mid-job.
- Make the subfloor clean, dry, solid, and flat. A vinyl plank DIY guide calls for flatness around ≤ 1/8″ over 6 ft, and a manufacturer’s guide also stresses flatness before locking planks together.
- Handle concrete correctly (moisture + barrier). Test the moisture and use a suitable underlayment/barrier on or below-grade concrete before you start clicking planks together.
- Install cabinets first; don’t trap a floating floor under heavy fixed items. One click-lock rigid plank manual says permanent cabinets/islands should go in first, then you install the floor around them with the proper expansion gap.
- Remove baseboards (or plan shoe molding) and undercut door jambs. A DIY vinyl plank guide notes you can remove baseboards or use shoe molding to cover the expansion gap, and it also recommends undercutting door jambs for a cleaner fit.
- Plan your layout and pick a starting wall. Many click systems start in a corner with the tongue toward the wall, so your first rows stay straight.
- Set spacers and keep an expansion gap the whole way around. A click-lock manufacturer example uses ¼” spacers to maintain the gap so the floor can expand and contract without buckling.
- Click planks together row by row and stagger end joints. Staggering spreads stress across the floor and helps the locking system stay strong over time.
- Cut around pipes, toe-kicks, and thresholds carefully (still leaving expansion space). One guide even calls out leaving expansion space around toilet flanges and sealing with waterproof silicone where needed.
- Finish with transitions and reinstall trim to cover gaps. Transitions protect plank edges at doorways, and trim/shoe molding gives you that clean “finished” look.
Step-by-Step: Installing Tile in a Kitchen
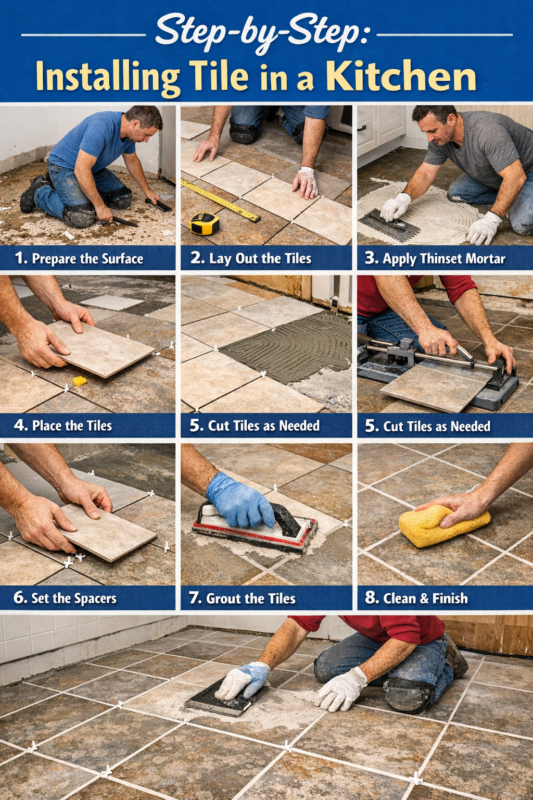
Tile lasts a long time in kitchens, but it only performs well when the base is flat and the mortar coverage is correct. So the real “pro move” is focusing on substrate prep, mortar technique, and movement joints, not just the tile pattern.
- Start with a flat, stable substrate. TCNA guidance emphasizes substrate tolerances (and notes larger tile needs a flatter surface), so don’t skip leveling before you set tile.
- Pick the right tile underlayment system. Tile assemblies often use membranes (crack isolation, waterproofing, sound) depending on the condition and goals of the floor.
- Plan your layout lines before mixing mortar. Layout first helps you avoid awkward slivers at walls and keeps grout lines straight.
- Mix thinset properly and spread only what you can cover before it skins over. ANSI guidance warns against applying tile onto skinned-over mortar because it weakens the bond.
- Key in mortar, then comb with the correct notched trowel. ANSI instructions describe “keying in” mortar with pressure and selecting a trowel that helps you hit coverage.
- Set the tile and press it into the collapsed ridges (don’t just drop it). ANSI notes embedding tile by pushing perpendicular to the ridges to collapse them and achieve proper contact.
- Check coverage by lifting a tile now and then. Industry standards call for at least 80% coverage in dry areas and 95% in wet areas, with support at edges and corners; so, verify it while you can still adjust.
- Use movement joints at perimeters and other required spots. Tile movement joints are described as “essential and required,” and perimeter joints are required at terminations and changes of plane.
- Let the tile cure, then grout and clean in stages. Proper curing time prevents shifting, and staged cleanup keeps haze from hardening on the surface.
- Seal or maintain grout based on the grout type you choose. Sealing needs vary by product, so follow the grout manufacturer’s directions for long-term stain resistance.
Finishing Touches
This is the part that makes your floor look “professional,” even if you installed it yourself. The goal is to protect edges, hide expansion gaps, and seal the spots where water loves to sneak in.
- Install transitions at doorways and where floors meet other materials. Transitions protect edges and reduce tripping where the kitchen connects to hallways or living areas.
- Reinstall baseboards or add shoe molding to cover the expansion gap. A DIY vinyl plank guide points out shoe molding as a simple way to hide that perimeter space neatly.
- Seal wet-risk edges with the right caulk where your manufacturer allows it. One rigid plank manual recommends filling expansion spaces around potential wet areas with premium waterproof silicone caulk.
- Respect tile movement joints instead of grouting everything tight. Perimeter expansion joints are required at terminations/changes of plane, and the sealant/joint design matters for preventing cracks.
- Do a final clean, then protect the floor during appliance moves. Use floor protection when sliding the fridge/stove back so your new surface doesn’t get scratched on day one.
What’s the best slip-resistant kitchen tile for wet areas (DCOF categories)
For a wet-prone kitchen, look for porcelain or ceramic floor tile rated for “level interior wet” use with a wet DCOF of 0.42 or higher, tested under ANSI A326.3. In simple terms, 0.42 is the common minimum benchmark for tiles marketed for spaces that are walked on when wet (like kitchens after mopping or spills). If you expect lots of splashes (kids, pets, heavy cooking), choosing a higher DCOF and a more textured/matte surface usually gives you better grip. And quick reality check: no tile is truly “slip-proof,” so good mats and fast wipe-ups still matter.
How Much Does Kitchen Floor Installation Per Square Foot Cost in Brooklyn?
In New York City, a midrange flooring installation commonly costs around $8–$15 per sq ft, and Brooklyn can run higher when stairs, tight hallways, or strict building rules slow the job down. For vinyl plank in Brooklyn, one local cost dataset places installed pricing around $4.69–$12.37 per sq ft, depending on subfloor condition, demo, and finish level.
For tile in NYC, installed pricing is often higher; one dataset estimates $9.83–$21.33 per sq ft based on tile type and prep work. Your final number usually jumps when you add old-floor removal, leveling, moisture work, sound underlayment, and transitions.
Where to Find the Best Brooklyn Contractors
Are you looking for an expert contractor in Brooklyn, NYC? SR General Construction has you covered! Our business is located at 8807 Avenue B, Brooklyn, NY 11236, United States, in the Canarsie area.
Additionally, we offer services at Rockaway Parkway and Ralph Avenue, providing fast access to Flatlands, East Flatbush, Bergen Beach, Brownsville, and the Spring Creek section of East New York.
FAQ
1. What’s the best kitchen flooring for Brooklyn apartments?
Most people do well with LVP or porcelain tile because they handle spills and daily traffic without needing delicate care.
2. Is vinyl plank flooring actually waterproof for kitchens?
Many LVP products resist water well, but you still need proper subfloor prep and quick cleanup; “waterproof” doesn’t mean water can sit forever.
3. Do I need underlayment under vinyl plank in a kitchen?
It depends on the plank and subfloor; some planks have an attached pad, while others need underlayment for comfort or sound control.
4. Should I install flooring before cabinets or after?
For floating floors (like many click systems), you generally don’t install under fixed kitchen units; you install around them with an expansion gap.
5. What DCOF rating should I look for in kitchen floor tile?
For areas walked on when wet, the common benchmark is wet DCOF ≥ 0.42 (ANSI A326.3 / ANSI A137.1).
Подробности смотрите здесь: [url=https://t.me/s/lifeinseo]продвижение сайтов[/url] в канале.