Do you have a room that stays dark at noon? Is there an upper floor that becomes stuffy after it rains? A roof window can fix that. It brings daylight from above and gives you fresh air where wall windows can’t.
A roof window is placed on the slope of the roof and allows light in straight from the sky. When a storm comes, it closes tightly and opens up to let in air. You can install insect screens and shutters to keep the sun out. Some types come with a remote and a rain sensor, so you don’t have to worry when it rains.
Here’s what we’ll cover in this guide. We look at the main types of roof windows for pitched roofs and flat roofs, and everything you need to know!
Quick View of Key Information
- Roof windows bring daylight and ventilation; options include blinds, insect screens, and rain-sensor controls.
- Materials: uPVC (moisture-proof), timber (insulating), and aluminum cladding (durable), with double/triple glazing.
- Main types: center-pivot, top-hung, side-hinged, electric/solar, and balcony designs.
- Categories: pitched roof (15°–90°) and flat roof (flat/domed/lantern with curbs).
- Size: 10–15% of floor area; up to 20% or multiple units for stuffy rooms.
- Benefits include more light, improved airflow, additional space, energy savings, enhanced privacy, and increased value.
- Risks include heat gain/loss, leaks, glare, and noise, which glazing, blinds, and professional installation can solve.
- Install steps: survey, cut opening, frame, seal, set frame, flash, insulate, test.
- Maintenance: inspect flashing, clean glass, lube hardware, check seals, and protect timber.
- Costs (Brooklyn 2025): $2,171–$2,940 typical; $1,490–$6,000+ range; repairs $225–$800.
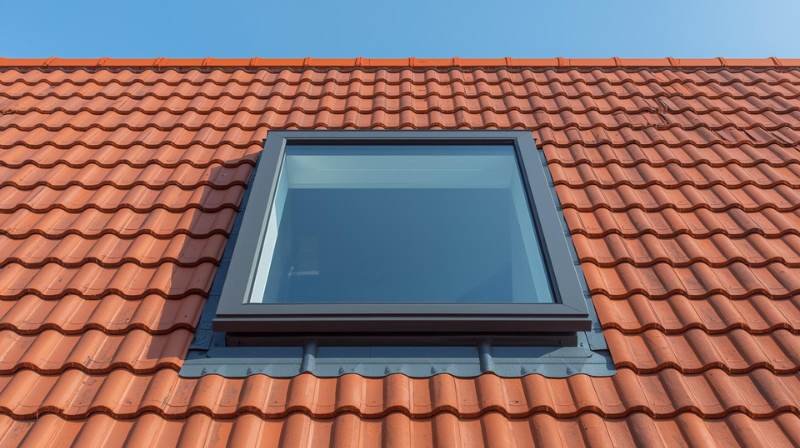
What is a window roof?
A roof window is a window set into a sloped roof that delivers daylight and real ventilation. It opens like a regular window, so you can control airflow and clean the glass from inside. It has simple functionality along with clear visibility due to its reachable position. A roof window works well for roof conversions and steep-pitch roofs, according to the Brooklyn Homes Skylight vs. Roof Window decision.
Materials and Components of the Window Roof
Before choosing a roof window, it’s helpful to know what it is made of. Good materials keep heat in during winter and keep glare down in summer. Smart components stop leaks and make the window easy to use.
- uPVC Frames: uPVC resists moisture and does not warp. It cleans up fast with mild soap. It suits bathrooms and kitchens that see steam and splashes.
- Timber Frames: Timber adds a warm, natural look. It insulates well and feels solid. It needs paint or a clear finish to block moisture.
- Aluminum Cladding: Aluminum sits on the outside of timber or uPVC and adds strength. It handles harsh weather and keeps its shape. It gives a slim, modern edge around the glass.
- Double or Triple Glazing: Two or three panes trap air or gas, reducing heat loss. Low-E coatings push heat back into the room in winter. Laminated inner panes add safety and block noise.
- Flashing, Seals, and Insulation Collars: Metal flashing guides water away from the frame. Seals and gaskets stop drafts and drips. Insulation collars fill gaps and raise energy performance.
Types of Roof Windows
You can choose from several styles. Each one solves a slightly different problem. Pick the one that fits your roof pitch, your reach, and your room.
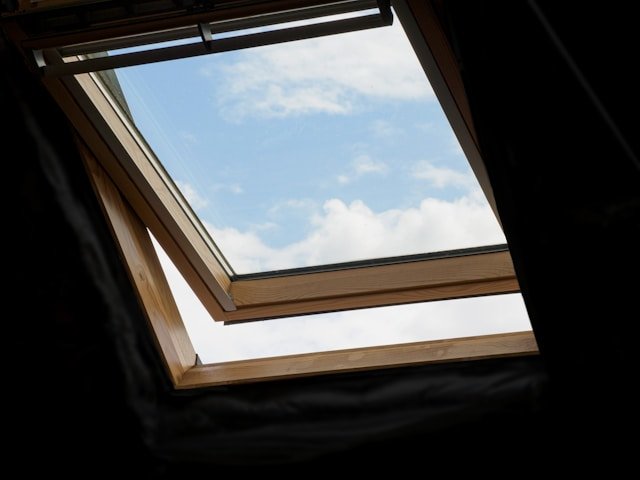
Center-Pivot Roof Window
Description: The sash turns on a center hinge. You can rotate it and clean the outer glass from inside the room. The handle sits at the top or bottom for easy reach.
Advantages:
- Easy cleaning from indoors
- Smooth airflow in small rooms
- Works well on many roof pitches
- Often, the best value for money
Features
- Central hinge with balanced action
- Ventilation flap for trickle air
- Child-safe latch on many models
- Wide range of blind options
Ideal for: Lofts and bedrooms where the window sits within arm’s reach.
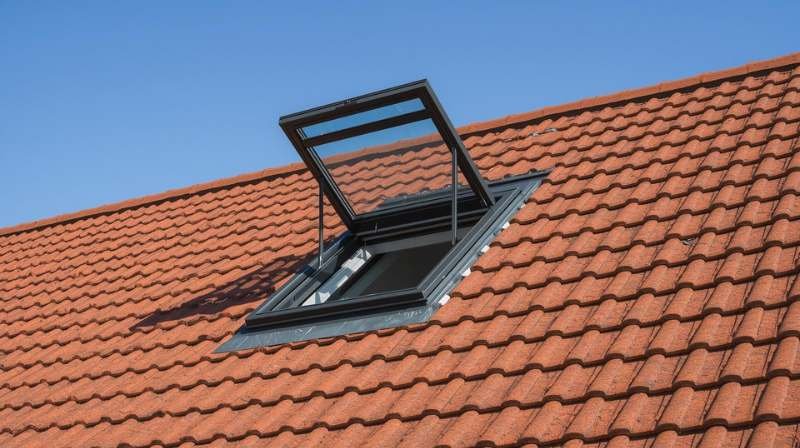
Top-Hung Roof Window
Description: The sash hinges at the top and opens outward. Your head can move close to the opening for a wide view. Rain stays off the glass better when the window is open at a slight angle.
Advantages:
- Clear, panoramic view
- More headroom near the window
- Good smoke and heat escape path
- Less chance of drips when partly open
Features
- Gas struts or stays for a steady hold
- Click-to-lock positions for venting
- Toughened outer pane for impact
- Compatible flashing for various tiles and slats
Ideal for: Attic living rooms and home offices that want a big sky view.
Side-Hinged (Egress) Roof Window
Description: The sash hinges on one side and swings like a door. It creates a wide, clear opening. Many building codes accept it as an escape route.
Advantages:
- Fast exit in an emergency
- Full frame opening for maximum air
- Simple, intuitive handle action
- Easy glass cleaning from the roof side
Features:
- Left or right hinge options
- Safety restrictor that releases fast
- Non-slip step flashing kits available
- Laminated inner glass for safety
Ideal for: Converted lofts that need an egress opening by code.
Electric or Solar-Powered Roof Window
Description: A motor opens and closes the sash. You use a wall switch, remote, or phone app. A rain sensor closes the window when showers start.
Advantages:
- Zero ladder use for high positions
- Auto close during rain
- Timer or climate control options
- Great for people with limited mobility
Features:
- Mains or solar power choices
- Integrated rain sensor
- Smart-home integration on many brands
- Battery backup on solar units
Ideal for stairwells, high ceilings, and rooms where you cannot reach the handle.
Balcony Roof Window
Description: The top sash lifts out. The lower section drops down and forms a small guard with side rails. The opening feels like a tiny balcony under the eaves.
Advantages:
- Big burst of daylight and fresh air
- Substantial visual impact for resale
- Clear standing view to the outside
- Adds charm to compact lofts
Features:
- Dual-section frame with safety rails
- Anti-slip lower panel surface
- High-strength laminated inner glass
- Certified fall-protection design
Ideal for: Loft bedrooms and studios that need a “wow” feature without a complete terrace.
Two Main Categories of Roof Windows
All roof windows fall into two big groups. The first group suits sloped roofs. The second group suits flat or very low-slope roofs. Your roof pitch points you to the right group first, and then you pick the style.
Pitched Roof Windows
Description: These windows sit on roofs with a clear slope. Typical pitch runs from about 15° to 90°. Flashing kits match tiles, slats, or metal sheets.
Advantages
- Broad style choice and sizes
- Strong water runoff around the frame
- Simple daylight aim into deep rooms
- Often lower cost than flat-roof systems
Features:
- Pre-made flashing for many roof materials
- Vent bars for trickle air without opening fully
- Wide glazing options for noise and heat
- Interior finishing trims for a neat look
Ideal for: Most homes with standard sloped roofs, lofts, and attic conversions.
Flat Roof Windows
Description: These units work on roofs that are almost flat. The glass could be flat, slightly domed, or in a lantern frame. Many models come with an electric drive.
Advantages:
- Works on extensions with near-flat decks
- Big daylight area in a single opening
- Clean modern look from inside
- Good weather performance with upstands
Features:
- Flat, dome, or lantern styles
- Curb or upstand to lift the frame above the deck
- Triple-seal designs for water control
- Electric vent options with rain sensors
Ideal for: Single-story extensions, kitchens under flat roofs, and hallways without wall windows.
What size roof window do I need?
For most rooms, a roof window with a glazed area of 10–15% of the floor area gives solid airflow once you open it. If the room feels stuffy, aim for a setting closer to 20% or consider adding a second unit to split the opening. Choose an operable sash that opens wide; a larger clear opening breathes better than a narrow vent. Tall ceilings or long rooms work best with two smaller windows at different heights for a strong stack effect.
Pros and Cons of Roof Windows
A roof window brings bright daylight and a steady breeze, and it can lift the feel of any loft or attic. It also lowers the amount of light used and makes things more comfortable. The negative aspects include allowing more heat in during the summer, which can lead to leaks if not installed correctly, and the higher cost compared to a regular wall window.
Advantages of roof windows
- More natural light: A roof window pulls light straight from the sky, so the room looks brighter throughout the day. Colors read truer, and tasks feel easier on the eyes. Many people report a better mood once the space gets real daylight.
- Better airflow and moisture control: An open roof window releases warm, stale air that gathers near the ceiling. Steam in kitchens and bathrooms clears faster. This helps reduce damp patches and musty smells.
- Space feels larger: Light from above softens shadows and opens corners. The room looks taller and less cramped. Furniture layouts feel more flexible once the space brightens.
- Energy savings potential: Daylight reduces the hours you need to switch on lights. Modern glazing holds heat in winter and limits heat gain in summer. Bills can come down when you pair the right glazing with blinds.
- Privacy without dark rooms: A roof window brings in brightness while street views stay limited. Bedrooms and bathrooms gain light without direct sightlines from neighbors. You maintain both comfort and privacy simultaneously.
- Convenient control options: You can choose manual, electric, or solar power for easy use. Remotes and apps are helpful when the window is high. Rain sensors add peace of mind if a shower starts.
- Curb appeal and home value: Good daylight and a clean finish lift a buyer’s first impression. Lofts transform into real living space rather than storage. Appraisals often reflect that upgrade.
Disadvantages of roof windows
- Heat gain or heat loss risk: Poor glazing can let in excessive sunlight during hot months. Weak insulation can drop indoor temperatures in winter. The fix is better glass and the right blind.
- Leak potential after poor installation: Water seeps into gaps around faulty flashing or rough cuts. Wind-driven rain can show faults fast. A trained installer and the right kit prevent that issue.
- Glare and UV exposure: Midday sun can wash out screens and bother your eyes. UV can fade fabrics over time. Tinted glass or a simple blackout blind solves most of this.
- Noise from rain or hail: Heavy showers can sound loud on certain roofs. Nearby flight paths and traffic may pass through thin glass more easily. Laminated panes and proper insulation cut that noise.
- Cleaning and access effort: Dust and pollen gather on the outer pane. Reaching the glass from the outside may feel awkward on steep roofs. A center-pivot design helps because the sash flips for safe indoor cleaning.
How to Install a Roof Window
A safe roof-window job starts with planning and careful setup. Most projects need structural checks and weatherproof details that match the roof type. A qualified installer is strongly recommended for new openings or for steep roofs.
- 1) Survey and approvals: Confirm the roof pitch, rafter size, and load path. Check for services near the opening, such as cables and vent pipes. Ask your local authority or building department about permits and code rules before work starts.
- 2) Position and size: Mark a location that clears rafters or allows simple trimming. Size the unit to the room and to the daylight goal, not only to a catalog page. Confirm ladder access and safe footing on the roof.
- 3) Cut the opening and frame it: Remove tiles or shingles in a neat area larger than the window. Cut the roof deck, then trim rafters only where the design allows. Add headers and trimmers to ensure loads transfer smoothly to sound framing.
- 4) Weather layer and underfelt collar: Lap the roof underlay into the opening and dress it to shed water away from the frame. Fit the manufacturer’s collar so the membrane seals to the frame. Tape joints that the manual calls out.
- 5) Set and fix the frame: Place the frame level and square. Check diagonals so the sash will not bind. Fix brackets to the structure at the points shown in the manual.
- 6) Flashing and roof covering: Install apron, step pieces, and head flashing in the order the kit shows. Interleave tiles or shingles with each flashing course. Brush off granules and debris so water runs cleanly.
- 7) Hang the sash, insulate, and test: Rehang the sash and check smooth travel and locks. Pack insulation around the frame from inside and fit the interior lining. Hose-test from low to high and watch for drips before you close up.
What is a roof lantern?
A roof lantern is a raised, multi-pane glazed structure that sits on a flat or low-slope roof. It forms a small glass “pavilion” on a curb or upstand rather than a flat panel. The design brings intense top light and a focal feature to kitchens, extensions, and halls. Vent panels may open for purge ventilation, yet many lanterns stay fixed for a clean profile.
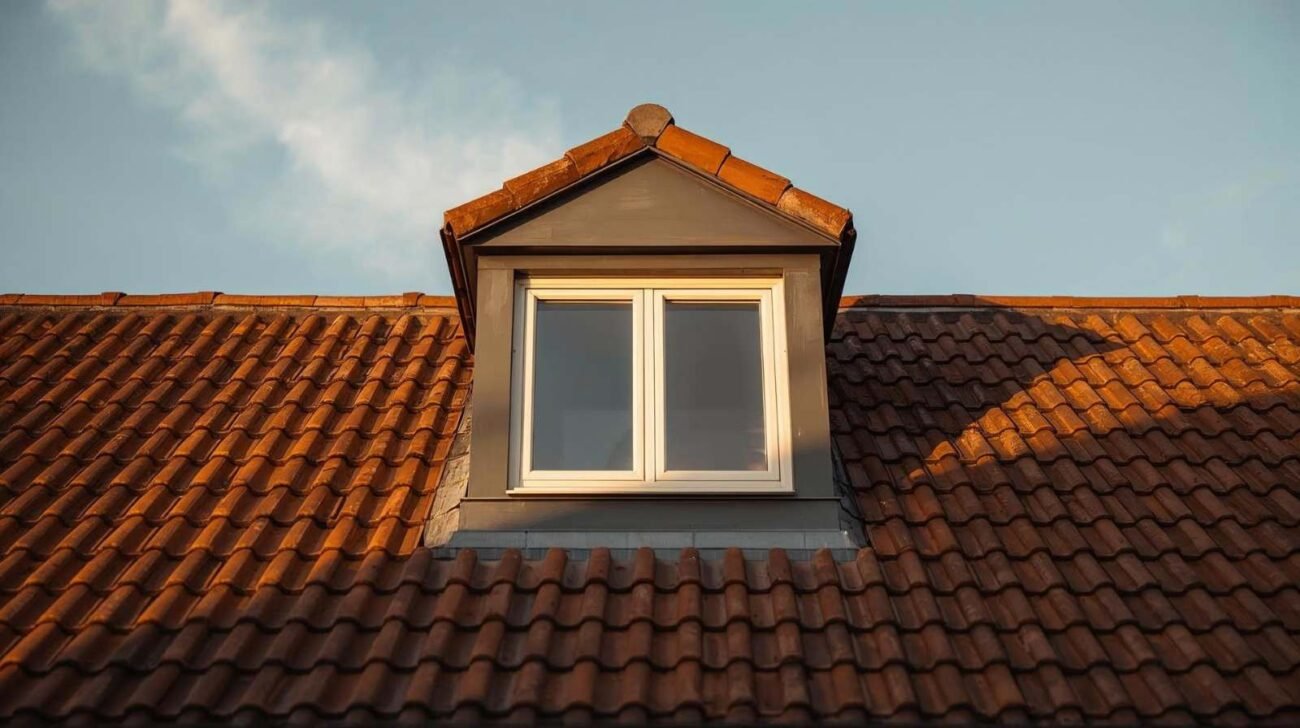
What’s the difference between roof windows and roof lanterns?
Both bring in daylight from above, yet they suit different roof forms and design goals. A roof window sits within the roof surface and can vent and provide a view. A roof lantern stands above the roof on a curb and acts as an architectural feature with large sky exposure.
| Factor | Roof Window | Roof Lantern |
| Roof type | Best for pitched roofs; also flat roofs with curb-mounted units | Designed for flat or very low-slope roofs |
| Form factor | Flush or low profile within the roof plane | Raised, framed structure above the roof |
| Ventilation | Widely available as opening units (manual, electric, solar) | Often fixed; selected models include vent sections |
| Daylight effect | Focused light path with view to sky and horizon | Strong sky exposure with even spread across the room |
| Install complexity | Single unit with integrated flashing kits | Built on a curb; more assembly and sealing steps |
| Typical cost band | Lower to mid compared with lanterns of similar size | Mid to high due to size, framing, and glazing area |
How much does a roof window cost (Brooklyn, NYC—2025)?
Brooklyn pricing sits above national averages because of labor and permitting overhead. Recent NYC guides show typical installed totals from $2,171 to $2,940 for many projects, with broader local ranges of $1,490–$3,160 for simpler jobs and $2,500–$6,000+ for premium or powered units.
| Roof Window Type | Material Cost | Labor Cost | Installation Cost | Repair Cost |
| Fixed (deck/curb-mount) | $150–$800 (typical unit) | $1,700–$2,700 (NYC projects) | $2,500–$3,500 (NYC typical) | $225–$800 for leak/flash fixes |
| Operable/Vented (manual or electric) | $300–$2,000 | $2,000–$3,500 | $3,500–$5,500 | $225–$800 leak work (motor swap $350–$700) |
| Solar-powered roof window | $1,200–$2,500 | $2,200–$3,500 | $4,000–$6,000+ | $350–$700 motor/controls (plus leak range above) |
| Sun Tunnel® / tubular | $150–$500 | $450–$1,200 | $650–$2,150 | $100–$400 minor fixes |
| Replacement in existing opening | $150–$800 | $1,200–$2,300 | $1,490–$3,160 (Brooklyn) | $225–$800 typical |
Factors to Consider When Choosing a Roof Window
Pick the unit that fits the room and the roof, not just the catalog photo. Use the list below as a quick filter before you buy.
- Roof pitch – Check the minimum and maximum pitch the model allows.
- Roof material—Tile, slate, metal, or shingle drives the flashing kit.
- Room use—Bedroom, bath, kitchen, or stairwell sets the vent and privacy needs.
- Size and daylight – Aim for 10–15% of floor area in glass; add a second unit for long rooms.
- Glazing—Consider factors such as U-factor, SHGC, low-E coatings, and laminated panes for enhanced safety and noise reduction.
- Operation – Manual, electric, or solar control; add a rain sensor for peace of mind.
- Access and cleaning – Center-pivot sashes help with safe indoor cleaning.
- Egress needs—Side-hinged units may satisfy escape rules in some lofts.
- Orientation—South adds more heat; north gives softer light; west can glare late in the day.
- Shades and screens—Blackout, light-filter, or heat-control blinds; insect screens where needed.
- Weather exposure—High wind or heavy rain may call for tougher glass and extra fixings.
- Noise—Laminated or acoustic glazing helps near busy streets or flight paths.
- Budget—Include unit, flashing, labor, drywall, paint, and any shaft work.
- Brand support – Check local parts availability and service response.
- Codes and permits—Confirm local rules before work starts.
Expert Tips for the Care and Maintenance of Roof Windows
Good care protects the frame, keeps seals tight, and stops minor issues from turning into leaks. Set a simple schedule and stick to it.
- Inspect flashing twice a year—look for gaps, dents, or lifted pieces after storms.
- Clear debris—Keep leaves and grit away from the head and side channels so water flows out.
- Clean the glass—use mild soap and soft water; wipe the frame dry after you finish.
- Service the hardware—Lubricate hinges and locks once a year with a light, non-staining oil.
- Check seals and gaskets—Replace cracked or flattened parts to stop drafts and drips.
- Manage condensation—Vent during showers and cooking; add a dehumidifier if moisture lingers.
- Use blinds for heat control—close during hot afternoons; open when you want solar gain in winter.
- Protect timber frames—Recoat paint or clear finish every 3–5 years or at the first sign of wear.
- Handle snow and ice with care—do not chip the glass; use a roof-safe rake and keep feet secure.
- Test auto features—Press the rain sensor test button and cycle the motor at least once per season.
- Book periodic pro checks—A roofer can hose-test and retighten fixings every 2–3 years.
- Keep records—Store the serial number, install date, and service notes to speed up parts orders.
Why should you choose a professional roofing contractor?
Are you looking for an expert roofing contractor in Brooklyn, NYC? SR General Construction has you covered! Our business is located at 8807 Avenue B, Brooklyn, NY 11236, United States, in the Canarsie area.
We proudly serve all areas of Brooklyn with high-quality, durable roofing solutions. From new installations to repairs and maintenance, we provide the best service at affordable prices. Contact us and experience why we’re Brooklyn’s roofing experts!
FAQ
1. How long does a roof window last?
A well-installed roof window with quality glazing and proper flashing can last 20–30 years. Regular maintenance, such as cleaning, sealing, and recoating timber, extends its lifespan.
2. Can I install a roof window myself?
It’s possible for skilled DIYers, but not recommended. Cutting into a roof requires structural checks, correct flashing, and waterproofing. To avoid leaks or code violations, hire a professional roofing contractor.
3. Do roof windows make a room hotter?
They can if you use basic glazing. Modern roof windows use low-E coatings, laminated panes, and blinds to control solar gain. North-facing units bring softer light, while south-facing ones may need heat-control glass.
4. Are roof windows noisy when it rains?
Standard glazing can sound loud during heavy showers. Choosing laminated or acoustic glass helps reduce noise. Blinds also soften the sound of rain.
5. Are roof windows safe for escape routes?
Side-hinged or top-hung models can meet fire-escape regulations if they offer at least 0.33 m² of clear open area, are at least 450 mm wide/high, and are located within the prescribed height from the floor.
6. How durable are different roof window frame materials?
uPVC resists moisture and cleans easily, timber provides warmth and insulation (but needs sealing), and aluminium cladding strengthens and protects frames while offering a slim look.