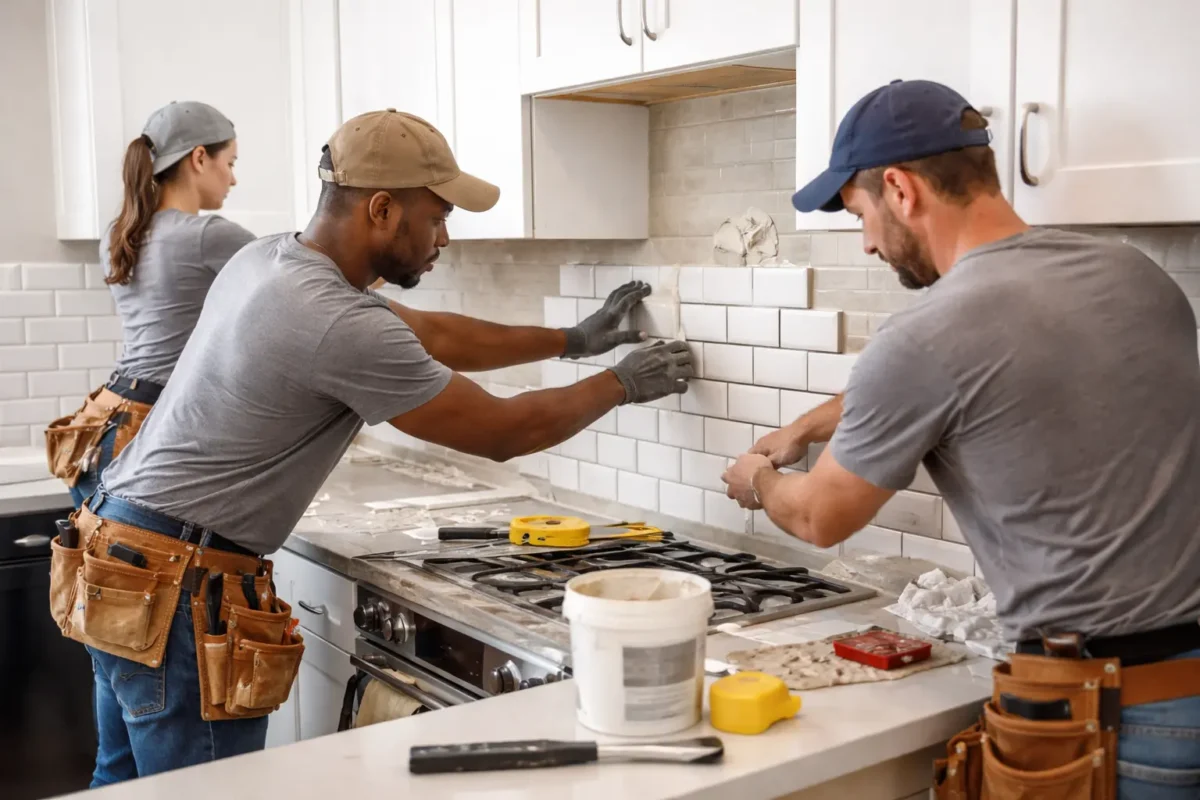
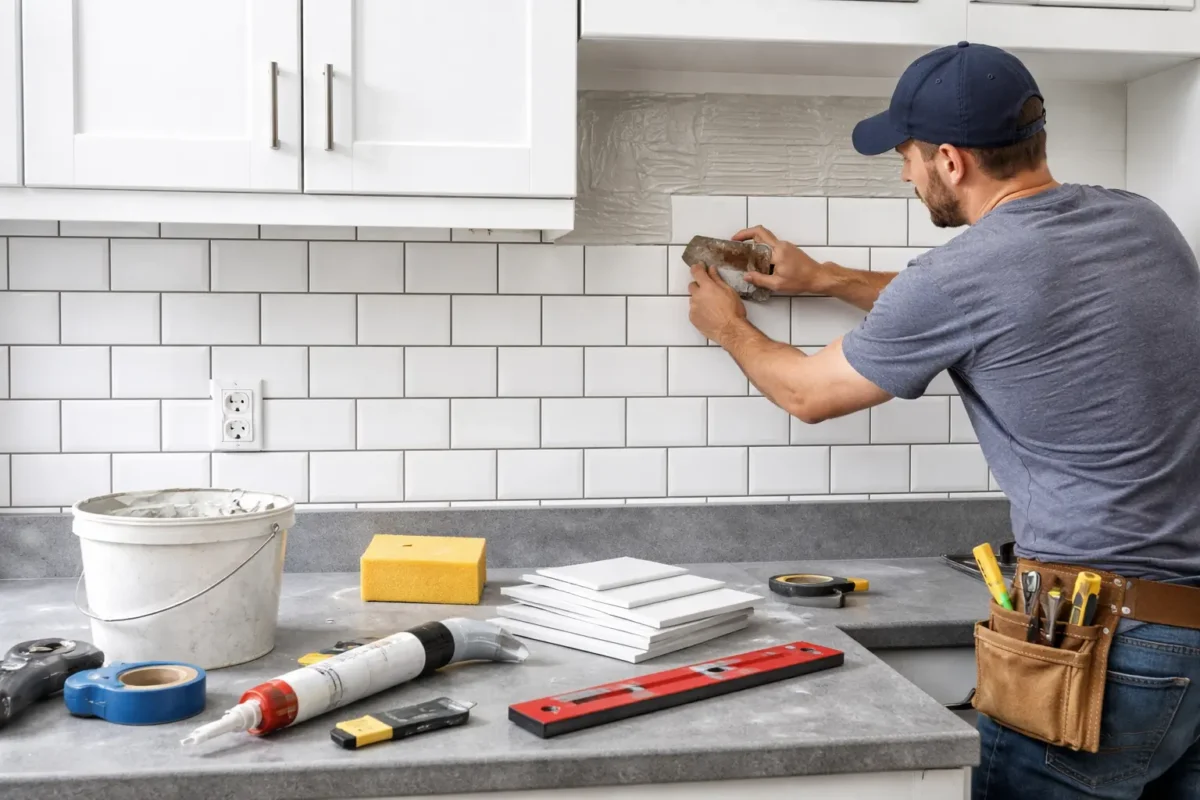
What is a kitchen tile backsplash, and why do so many Brooklyn, NYC homeowners choose to install one? A kitchen tile backsplash is the tiled wall area between your countertop and cabinets that protects your walls from spills and heat.
In this guide, we’ll walk you through how to install a kitchen tile backsplash step by step, using clear, practical advice for both DIY homeowners and professionals. You’ll learn about tile choices, tools, layout planning, installation tips, and finishing touches that matter.
Why Install a Kitchen Tile Backsplash?
Have you ever noticed how fast water, sauce, and grease can end up on the wall when you’re cooking in a Brooklyn kitchen? A tile backsplash gives you a tough, wipeable surface that protects your walls (and even nearby cabinets) from everyday splatters, especially around the sink and stove. It also upgrades your kitchen’s look in a big way without a complete remodel, which is a smart move in NYC, where small changes can make a space feel brand new.
And if you’d rather not deal with cutting tile and working around outlets, a local pro like SR General Construction (NYC) can handle the install cleanly and safely.
What are the Benefits of a Kitchen Tile Backsplash
A tile backsplash isn’t just “decor”; it’s one of those upgrades you’ll actually feel every day you cook. Here’s what you get out of it in a Brooklyn home or apartment.
- It protects your walls from daily mess. Tile acts like a shield against water, food, and greasy splatters, which is huge if you cook often or fry foods regularly.
- Instead of repainting or scrubbing the drywall, you’re protecting the surface where messes occur most often.
- It’s easier to clean than painted walls. When you’re dealing with sauce splashes or cooking oil, you can wipe down the tile quickly and keep the kitchen looking fresh. The Spruce even notes that different tile types are straightforward to clean with basic supplies, which makes upkeep simple for busy NYC schedules.
- It adds style and personality without changing the whole kitchen. With subway tile, mosaics, or bold patterns, you can make the backsplash a focal point or keep it clean and classic; your call. This is one reason designers and tile brands treat backsplashes as a “small refresh” that can totally change the room’s vibe.
- It can improve buyer appeal when you sell. Real estate and design pros often point out that kitchens matter, and a “beautiful backsplash” is one of those upgrades that makes the whole space feel more up to date. In a competitive market like NYC, that “updated look” can help your kitchen stand out in photos and showings.
- It lasts longer when finished properly. A properly installed backsplash includes a flexible “movement joint” (usually a quality sealant/caulk) where tile meets the countertop or changes planes, because tile and surfaces expand and shift slightly over time.
Step-by-Step Kitchen Tile Backsplash Installation Guide
- Choosing the Right Tile and Design.
- Measuring the Backsplash Area & Calculating Materials.
- Gathering Your Tools and Materials.
- Preparing the Workspace and Wall Surface.
- Planning the Layout (Dry-Fitting Tiles).
- Cutting Tiles to Fit (Tools & Techniques).
- Mixing the Mortar or Adhesive.
- Applying Tile Adhesive to the Wall.
- Installing the Tiles on the Wall.
- Letting the Adhesive Cure.
- Grouting the Tile Backsplash.
- Cleaning & Sealing the Grout (Finishing Touches).
Pro Tip
SR General Construction, NYC, is fully licensed and has over 15 years’ experience of Renovation and Remodeling work in Brooklyn. We’ve completed more than 750 projects for 500+ satisfied clients, and we offer 24/7 support to keep your home safe
Choosing the Right Tile and Design
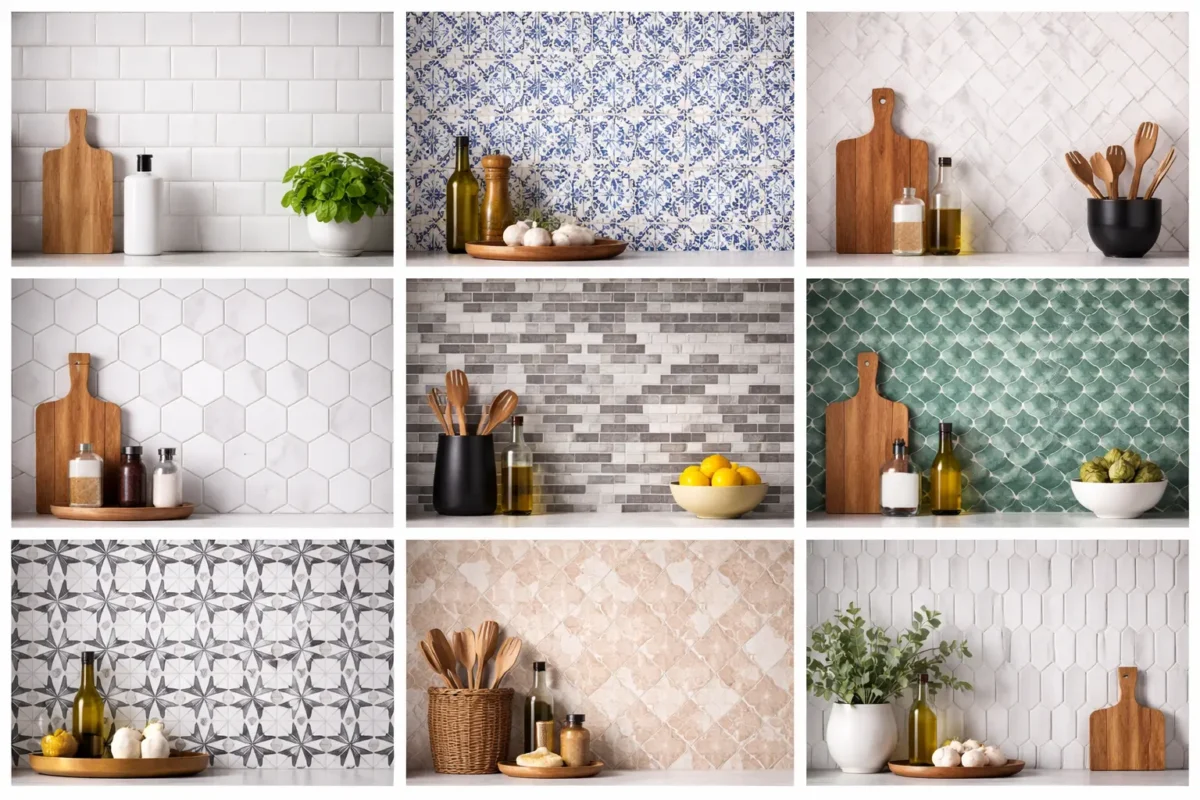
If you pick the correct tile upfront, the install goes smoother, and your backsplash looks “done” instead of “DIY-ish.” In Brooklyn kitchens, where light, space, and resale matter, you want a tile that’s easy to clean and fits your home’s style.
- Match your tile to your cabinets and counters. Choose a color and look that works with what you already have, so the backsplash feels intentional (not random).
- Choose a material that fits your lifestyle. Ceramic and porcelain are popular because they’re durable and easy to maintain, which is ideal for busy kitchens.
- Decide if you want “easy install” or “high detail.” Larger tiles are usually simpler to align, while smaller tiles or mosaics give you more design flexibility but more lines and cuts.
- Consider mesh-backed sheets for faster progress. Mosaics on a mesh backing can speed up placement, and many guides list them as a standard backsplash option.
- Pick a pattern you can actually execute. Classic subway/running bond is forgiving, while herringbone and complex layouts demand more measuring and cutting.
- Plan how you’ll finish the exposed edge. You can use a trim/profile (like Schluter-style edging) to protect tile edges and create a clean ending where tile stops.
Measuring the Backsplash Area & Calculating Materials
Measure the length of each backsplash run and the height from the countertop to the top of the backsplash. If the wall steps in/out, break it into smaller rectangles and measure each one. Measure obstacles like outlets or switches, and subtract their areas from your total for a tighter estimate. Multiply length × height to get square inches, then divide by 144 to convert to square feet (since tile is sold by the square foot). Add extra tile for cuts and mistakes; 10% is common for basic tile shapes, and 15–20% is smarter for mosaics or fussy patterns.
Gathering Your Tools and Materials
Before you start, get everything in one place—nothing slows a backsplash job like stopping mid-row to run to the store. These are the tools and materials you’ll see in the best step-by-step guides.
- Tape measure
- Circuit tester/voltage detector
- Level
- Drill/driver + bits
- Tile cutter/tile nippers
- Wet saw (or tile saw)
- Notched trowel
- Rubber grout float
- Sponge + bucket
- Eye protection + gloves
- Tile
- Thinset mortar (or backsplash mat option)
- Grout
- Tile caulk
- Tile spacers
- TSP (trisodium phosphate)
- Sandpaper
- Painter’s tape
- Drop cloth
- Electrical box extenders
- Grout sealer
- Optional: Schluter strip/edge trim
Preparing the Workspace and Wall Surface
This is the part people rush, and then wonder why the tiles won’t stick or the wall looks bumpy. Give yourself a clean, flat surface, and you’ll get a backsplash that looks sharp and lasts.
- Turn off the power and remove the outlet/switch covers. This keeps the workspace safer and makes it easier to tile cleanly around devices.
- Protect the countertop with a drop cloth and tape. You’ll catch thinset, grout, and tile chips before they get on your counter later.
- Remove loose paint or wallpaper first. Tile can go over drywall, but anything loose underneath can cause failures.
- Sand glossy paint and smooth out bumps. A lightly rough, even surface helps the adhesive grab and keeps tile rows from “waving.”
- Degrease the wall (especially behind the stove) with TSP. TSP is commonly recommended to cut kitchen grease so your adhesive bonds properly.
- Patch dips/dents and prime raw areas. Fill deep dents with joint compound and prime unfinished drywall/patches so the wall behaves consistently under thinset.
- Mark the boundaries of your backsplash with painter’s tape. This gives you a clean visual frame so you don’t “creep” outside your planned area.
Planning the Layout (Dry-Fitting Tiles)
Layout is where you “win” the backsplash before you touch mortar. When you dry-fit first, you avoid awkward skinny cuts, and you get clean lines around outlets and corners.
- Pick your focal wall and find the center. Many guides tell you to start with the most visible area so the pattern looks balanced where your eye lands first.
- Mark a vertical reference line. That center line keeps your tile pattern from drifting left or right as you work.
- Dry-lay tiles with spacers on the countertop. This shows you where cuts will land and helps you keep grout joints consistent.
- Make a “story pole” for repeatable spacing. Mark a board with tile + spacer spacing so you can transfer the layout up the wall accurately.
- Avoid tiny slivers and adjust the layout if needed. If your end pieces will be too narrow, shift the layout so both sides get wider, better-looking cuts.
- Tape tile sheets to the wall to preview the final look. BHG recommends taping sheets in place, checking cabinet gaps, and marking sheet locations before you set anything.
- Plan the edge finish now (trim or bullnose). If you’re using an edge strip, install it before tiling so the ending line looks crisp and protected.
Cutting Tiles to Fit (Tools & Techniques)
Cutting is where most backsplash projects slow down—mainly because outlets, corners, and cabinet edges don’t “land” on perfect tile sizes. The good news is you can get clean cuts if you use the right tool for the right tile and measure smartly.
- Measure the space (especially outlets) and transfer the marks to the tile. You’ll get the best fit when you measure the outlet location carefully and trace the opening on the tile before cutting.
- Use a wet saw for the cleanest, most precise cuts. A wet saw with a diamond blade is often the easiest way to get smooth cuts on many materials, especially when you want a crisp finish.
- For outlets in larger tiles, consider an angle grinder for middle cutouts. The Spruce outlines a practical method: mark the outlet box, cut the lines, then finish the cut so the opening meets cleanly.
- For mosaic sheets, cut the mesh first—then fine-tune with nippers. Mesh-backed mosaics can often be trimmed by cutting the mesh, and tile nippers help you “sneak up” on the final fit near the outlet.
- Keep tile edges close to the outlet box so the faceplate covers the cut. A tight, neat cut looks better and helps avoid gaps that the cover plate can’t hide.
Mixing the Mortar or Adhesive
This step determines whether your tile grips the wall like a pro job or slides around, frustrating you. If you’re using traditional thinset mortar, mix it exactly the way the bag says, because brands vary.
- Add water first, then powder, and mix slowly. Manufacturers commonly recommend mixing with a low-speed drill to avoid whipping in the air and weakening the mix.
- Aim for a smooth, paste-like consistency. VersaBond, for example, describes a mixing process that yields a smooth, paste-like texture that holds ridges without slumping.
- Let the mortar “slake,” then remix. Many thinsets require a rest time (often 5–10 minutes) so the chemicals hydrate properly, then you remix before spreading.
- Mix smaller batches so it doesn’t set up in the bucket. Thinset has a workable window, so mixing only what you can use helps you stay in control.
- If you want a cleaner, faster method, consider adhesive tile mats (with limits). This Old House notes mats can reduce mess and even allow immediate grouting, but they’re harder to adjust, and some pros question long-term durability.
Applying Tile Adhesive to the Wall
This is where you create the “bed” that locks the tile in place, so don’t rush it. You want even coverage, consistent ridges, and fresh mortar that’s still tacky when the tile goes on.
- Skim-coat the wall first with the flat side of the trowel. This pushes mortar into the surface and helps the next layer bond better.
- Comb ridges with the notched side at about a 45° angle. VersaBond specifically calls out holding the notched trowel at 45° and combing in one direction for consistent ridges.
- Work in small sections so the mortar stays “wet tacky.” Both VersaBond and LATICRETE advise spreading only as much as you can cover in about 15–20 minutes.
- If the mortar skins over (isn’t sticky), don’t tile on it. The fix is to re-comb or replace the mortar, because dry, skinned-over adhesive won’t bond as well.
- Check coverage as you go by lifting a tile now and then. That quick “peek” helps you confirm you’re getting solid contact behind the tile.
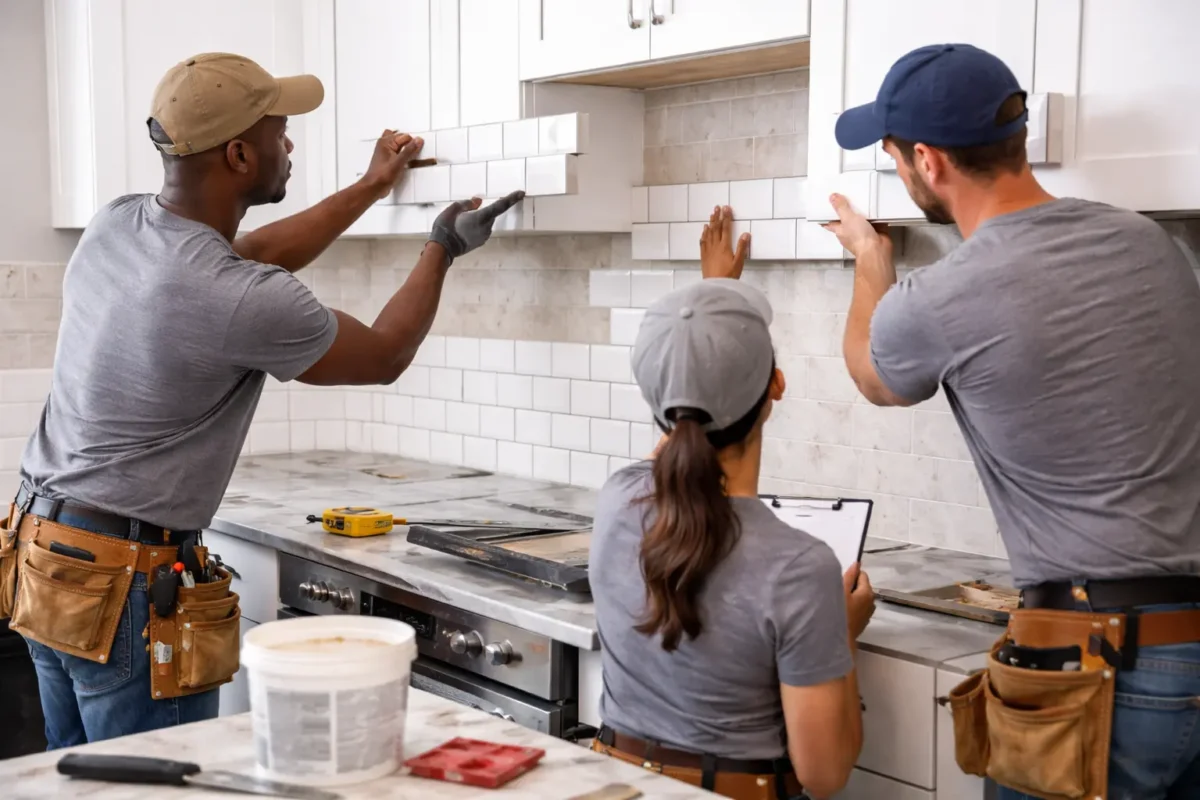
Installing the Tiles on the Wall
Once the tile starts going up, your job is to keep the lines straight and the spacing consistent, especially in Brooklyn kitchens where walls can be a little out of level. Set tiles with intention, check often, and you’ll get that clean, showroom look.
- Press each tile firmly and move it slightly across the ridges. VersaBond describes pressing in a perpendicular motion across ridges to flatten them and improve coverage.
- Use spacers to keep your grout lines from “wander.” Spacers help you keep the gaps even from the first tile to the last.
- Keep tile close to outlet edges and plan for box extenders. The Spruce explains that box extender rings help bring the electrical box flush with the new tile surface (a common backsplash “gotcha”).
- Back-butter when needed (especially for larger tiles). Manufacturers note that back-buttering can help with full bedding and support when tile size or backs require it.
- Stay organized: set a few rows, then re-check level and alignment. Minor corrections early prevent big headaches at the end of the wall.
Letting the Adhesive Cure
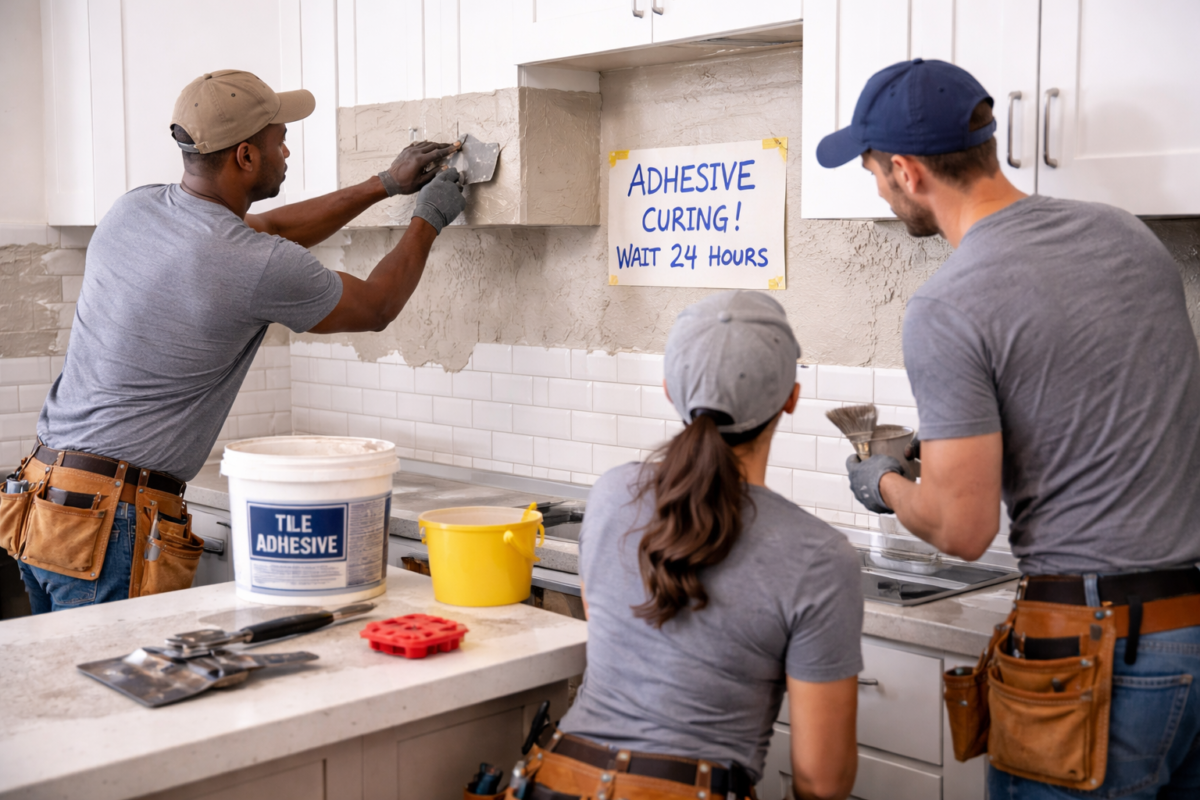
This is the patience part, and it matters more than people think; moving tiles too soon can ruin your alignment and weaken the bond. Your goal is simple: let the adhesive set fully before you grout or put the kitchen back into whole “splash zone” use.
- Wait at least 24 hours before grouting (unless your product says otherwise). VersaBond and LATICRETE both specify a minimum 24-hour cure before grouting under normal conditions.
- Expect longer cure times in cool, damp, or poorly ventilated spaces. Temperature and humidity affect cure, so a steamy NYC kitchen may need more time than an open, dry room.
- Keep the area untouched—no bumping, wiping, or “testing” tiles. Even small shifts can break alignment and create uneven grout lines later.
- If you used adhesive tile mats, the rules may differ. This Old House notes some mat systems allow immediate grouting, but they also have less adjustability and may raise durability concerns for some pros.
- Do a quick stability check before you grout. If tiles feel solid and you’ve met the cure time, you’re ready for the next step without risking movement.
Grouting the Tile Backsplash
Grouting is the step that locks your tile layout together and gives your backsplash that clean, finished look. If you take your time here, your Brooklyn kitchen will look “pro-installed” even if you did it yourself.
- Work in small sections (don’t grout the whole wall at once). Small sections are easier to clean before the grout starts setting and getting stubborn.
- Push grout into the joints with a rubber float held at around 45°. This angle helps you pack joints entirely instead of dragging grout back out.
- Scrape excess grout from the tile face with the float held at about 90°. This removes buildup early, so you don’t spend forever fighting haze later.
- Shape joints with a damp sponge using light pressure (don’t flood the wall). Too much water can weaken grout and leave low, uneven joints on a vertical backsplash.
- Wipe diagonally across the tile with a well-wrung sponge for final cleanup. Diagonal passes help keep grout in the joints while cleaning residue off the tile surface.
- Do NOT grout inside corners or where tile meets the countertop—use caulk there. Corners and transitions are movement points, and grout is more likely to crack there over time in real-world buildings.
Cleaning & Sealing the Grout (Finishing Touches)
Cleaning makes the tile shine, and sealing helps grout resist stains from cooking splatter and steam. In a Brooklyn kitchen where the stove works hard, these finishing touches matter more than people think.
- Do your first wipe with clean water and a damp sponge (not dripping). Water and a sponge remove most grout residue, but you still need to address the leftover haze.
- Buff the tile face after it dries a bit to catch light haze early. A simple microfiber buff can prevent that cloudy film from hardening on the tile.
- If haze remains, use a grout haze remover rather than “scrubbing harder.” Regular cleaners usually won’t remove haze well, but a haze remover is designed for that.
- Wait for the grout to cure before sealing (follow your grout/sealer directions). Manufacturers commonly recommend curing time before sealing—often in the 24–72 hour range, depending on the product.
- Apply sealer directly on grout lines, then wipe excess off the tile face. You want sealer in the grout, not a sticky film drying on the tile surface.
- Plan resealing as maintenance, not a one-time thing. Many experts recommend resealing backsplashes less often than wet areas, but still on a regular schedule to keep grout protected.
How to do backsplash repairs
Backsplash issues usually start small—hairline grout cracks, loose caulk, or a chipped tile near an outlet. If you fix them early, you avoid bigger repairs and keep the wall protected from moisture and grease.
- Repair cracked or missing grout (regrout the damaged lines). Remove loose grout, clean the joint, apply new grout, and seal after it cures.
- Re-caulk corners and the countertop joint when you see gaps or peeling. Caulk seals transitions between different surfaces where movement is common.
- Replace a chipped or broken tile instead of living with it. The standard approach is to remove grout around the tile, lift the tile carefully, reset a new one, then regrout.
- Fix a loose tile before it spreads. If a tile sounds hollow or shifts, reset it so moisture and debris don’t work behind the backsplash.
- When repairs keep repeating, check the root cause (movement or wall prep). Recurrent corner cracks often mean the joint needs flexible sealant, not more grout.
What type of tile is best for a kitchen backsplash?
For most kitchens, glazed ceramic or porcelain is the best balance of durability, easy cleaning, and cost. If you want a brighter look in smaller Brooklyn kitchens, glass tile can reflect more light, but it often needs more careful cutting and installation. Natural stone can look high-end, but it may need more maintenance and sealing depending on the stone. If you’re unsure, SR General Construction, NYC can help you choose a tile that fits your cooking habits and your wall conditions.
How much does it cost to install a kitchen backsplash in Brooklyn, NYC?
In many cases, backsplash installation runs about $480–$1,500 total, and many projects price out around $15–$40 per square foot, depending on tile type, layout, and the number of outlet or window cuts. Homewyse estimates roughly $28.16–$49.35 per square foot (Oct 2025 baseline) and lets you plug in a Brooklyn ZIP code for a location-adjusted estimate. In Brooklyn, costs often land toward the higher side when walls need prep, cuts are complex, or labor rates are higher—so a local site visit is the best way to get a tight quote.
Where to Find the Best Brooklyn Contractors
Are you looking for an expert contractor in Brooklyn, NYC? SR General Construction has you covered! Our business is located at 8807 Avenue B, Brooklyn, NY 11236, United States, in the Canarsie area.
Additionally, we offer services at Rockaway Parkway and Ralph Avenue, providing fast access to Flatlands, East Flatbush, Bergen Beach, Brownsville, and the Spring Creek section of East New York.
FAQ
1. What is a kitchen tile backsplash?
A kitchen tile backsplash is a tiled wall surface (usually between the countertop and cabinets) that protects your wall from grease, steam, and food splashes.
2. Can I install a tile backsplash over painted drywall?
Yes, tile can go on drywall in a typical kitchen as long as the wall is solid, clean, and properly prepped. Many thin-set mortars are rated for interior dry areas over gypsum wallboard, but you still need to remove grease and loose paint first.
3. Do I need cement backer board for a kitchen backsplash?
Most standard kitchen backsplashes don’t require a cement board if the drywall is in good shape and the area isn’t constantly soaked.
4. Should I use thinset or mastic for a backsplash?
Thinset is cement-based and is generally the safer “all-around” choice for strength and heat/moisture tolerance, while mastic is convenient but has more limitations.
5. How much extra tile should I buy?
Plan for at least 10% extra to cover cuts, breakage, outlet notches, and future repairs. If you’re doing a complex pattern (herringbone, mosaic sheets, handmade-look tile), bump the waste factor higher.
Онлайн-слоты — являются самые известные игры в гемблинг-индустрии.
https://tltrock.ru/material/2026-07-10-mobilnyy-opyt-v-randx-casino-kak-igrat-so-smartfona.html
Концепция разумного риска — это подход, предназначенный на укрепление дисциплины в отношении игровым процессом и предотвращение негативных последствий.
https://tltrock.ru/material/2026-06-01-sergey-lazarev-ispolnil-zavetnuyu-mechtu-pensionerki-blogera.html
На представленном веб-сайте легко почерпнуть немало полезной знаний.
https://malemoda.ru/him/2258.html