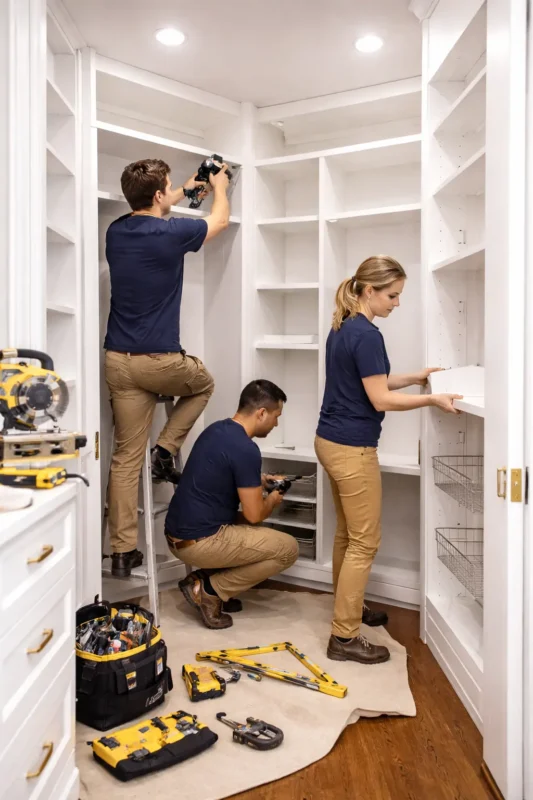
If you want to know how to install a kitchen pantry, then you are in the right place.
Installing a kitchen pantry may sound complicated, but with the right steps, it becomes a clear and manageable project. In this guide, you’ll learn how to plan your pantry installation, choose the right setup for your kitchen, and install shelves or cabinets correctly.
Why Install a Kitchen Pantry in Brooklyn?
In Brooklyn, kitchens often run small, so a pantry gives you extra storage without stealing counter space. A well-installed pantry also makes it easier to keep food visible, which helps you stop buying duplicates and losing items in the back. Many NYC apartments also have closets or awkward nooks that can become a reach-in pantry with simple shelving. And if you ever plan to renovate again, a pantry is one of those upgrades that makes daily life feel noticeably easier.
Kitchen Pantry Installation Types
Before you pick up a drill, it helps to choose the right pantry “build style” for your layout. In Brooklyn kitchens, the best option is usually the one that maximizes vertical space and stays easy to access.
- Fixed shelves with wood cleats (closet pantry conversion). This is one of the most common DIY methods because it’s sturdy and simple: you attach cleats to the wall and set shelves on top. Guides like Bob Vila and Today’s Homeowner emphasize installing cleats into studs and using level lines to prevent shelves from tilting or sagging.
- Adjustable track systems (Shelf-track / standards + brackets). This system uses a top “hang track” with vertical standards and brackets so you can move shelves up or down later. Closet-maid’s installation tips highlight mounting the track for strength (ideally into framing) and spacing standards to keep the system stable.
- Floating pantry shelves (built-in look). Floating shelves look clean and custom, but the installation needs careful measuring and solid anchoring. This Old House shows floating pantry shelves as a practical way to add storage while keeping the pantry looking finished and intentional.
- Pull-out shelves / roll-out trays inside cabinets. If your “pantry” is really deep base cabinets, pull-outs are a game-changer because they bring items forward instead of requiring you to dig. This Old House often recommends installing roll-outs to improve access and visibility in deep storage.
- Tall pantry cabinet (pantry tower). A tall cabinet is perfect when you don’t have a pantry closet; one footprint can hold a lot if you use adjustable shelves or pull-outs inside. In NYC, this can be a smart “one-wall” upgrade, and DOB guidance notes that installing new kitchen cabinets typically doesn’t require a permit (though contractor licensing rules still apply).
- Hybrid pantry (cabinets + a small counter zone). Some pantry installs include a short counter for coffee gear, decanting, or small appliances, with shelves above. DIY pantry builds often include shimming and leveling cabinets, then screwing them into studs for a tight install.
Planning & Measuring Your Brooklyn Pantry Space

A pantry install goes smoothly when you plan for your real items, not an ideal Pinterest pantry. When you measure well and mark everything clearly, you avoid crooked shelves and last-minute patchwork.
- Empty the area and list what you’ll store so you know if you need tall spacing (cereal, appliances) or tighter spacing (cans, jars).
- Measure height, width, and depth (and measure twice) so your shelves fit without forcing or gaps.
- Decide shelf depth based on access, because overly deep shelves make items disappear in the back.
- Mark shelf heights on the wall with light pencil lines so you can “see” the pantry before drilling.
- Locate studs early and mark them clearly; this step decides how strong your installation will be.
- Plan around door swings and tight walkways (very Brooklyn-real), so your pantry stays easy to open and use.
Tools & Hardware: Stud Finders, Levels, Rails & Fasteners
Most pantry installs don’t require fancy tools, but they do require the right basics. If you have a stud finder and a level, you’re already ahead of most pantry problems.
- Stud finder: Use it to find framing so your cleats, tracks, or cabinets anchor securely.
- Level or laser level: Use it for straight cleat lines and shelf alignment so everything looks professional.
- Drill/driver + bits: Pre-drill where needed and drive screws cleanly into studs or anchors.
- Measuring tape + pencil: Mark shelf heights and bracket spacing so you don’t “freehand” a pantry install.
- Shelf supports (wood cleats or brackets): Cleats are a classic support method, while brackets/standards give adjustability.
- Fasteners (cabinet screws, wood screws, wall anchors): Closet-maid recommends using the correct hardware for your wall type and stud fastening whenever possible.
Fixed Shelving with Wood Cleats: Step-By-Step Method
If you want a sturdy pantry fast, the cleat method is one of the simplest installs you can do. The big idea is easy: cleats hold the shelf, and studs hold the cleats.
- Step 1: Mark your shelf heights and draw level lines where each cleat will sit.
- Step 2: Find and mark studs along those lines so you know where to fasten for strength.
- Step 3: Cut your cleats (support strips) to length so they fit the back and sides cleanly.
- Step 4: Attach cleats to studs with the top of the cleat flush to your level line.
- Step 5: Cut shelf boards to size and set them onto the cleats so they sit flat and tight.
- Step 6: Secure the shelves and add support if needed (a centre bracket underneath or a 1×2 strip on the front edge helps prevent sagging on wider shelves).
Adjustable Track Systems
If you want a pantry that can adapt to your shopping habits, an adjustable track system is one of the easiest long-term installs. It’s also a smart choice for Brooklyn kitchens because you can re-space shelves later without having to rebuild everything.
- Pick the right anchors for your wall type before you start. Track systems only feel “solid” when the hardware matches the wall (drywall, studs, concrete), so don’t treat fasteners like an afterthought. Closet-maid’s guide specifically calls out choosing hardware by wall type and using stud fastening whenever possible for the strongest install.
- Mount the hang track as your “straight line” reference. For maximum adjust-ability and strength, install the hang track flush to the ceiling and screw it into the wood header behind the wallboard when possible. If you can hit studs, do it; stud installation is recommended for the strongest result.
- Space the vertical standards correctly so shelves don’t flex. Closet-maid notes that the closer the standards are, the stronger the system feels, and they should be spaced no more than 24 inches apart. They also recommend placing standards no more than 4 inches from the ends of shelves to reduce sag.
- Secure each standard properly before adding brackets. Each standard should be secured to the wall with a screw at the hole closest to the centre, so the rail doesn’t wobble under load. If you’re using toggle bolts, the guide explains attaching the toggle to the bolt before setting the standard on the track.
- Match bracket size to shelf depth (this is where many installs go wrong). A bracket that’s too short can make a shelf feel bouncy and unsafe, especially with heavier pantry items. Closet-maid’s tips say to match bracket size to shelving depth, with special notes for certain shelf-and-rod setups.
Floating Shelves: Creating a Built-In Look
Floating shelves are perfect when you want your pantry to look custom, not “added later.” The key is to plan shelf spacing around real items and anchor everything into studs so the shelves stay strong.
- Mock the shelf layout before you build anything. This Old House suggests using painter’s tape to mark shelf locations and spacing shelves roughly 10–16 inches apart, then adjusting based on what you store. When you can visualize the final layout first, you avoid rebuilding because cereal boxes or appliances don’t fit.
- Find studs and transfer those stud lines to every shelf position. This Old House recommends locating at least two studs along the back wall and one on each side wall, then using a level to draw vertical guide lines to each shelf height. That step keeps your hidden supports aligned, so each shelf actually carries weight rather than relying on drywall.
- Install the hidden support system (bracket or frame) perfectly level. Better Homes & Gardens shows a common approach: mark straight lines with a level, drill pilot holes aligned with studs, and screw the bracket into studs before sliding the shelf on. If your bracket is even slightly out of level, the shelf will “announce it” every time you look at it.
- Slide the shelf on and lock it so it can’t drift. BHG recommends securing floating shelves from the underside after you slide them onto the bracket to help prevent shifting over time. That small detail matters in a pantry because repeated loading and unloading can gradually loosen a shelf that isn’t locked in place.
Pull-Out Shelves and Roll-Out Trays
Pull-outs are the best fix for deep cabinets because they bring everything to you, rather than forcing you to crawl into the back. A good pull-out shelf is basically a shallow drawer on full-extension slides, and it makes everyday pantry use feel faster and cleaner.
- Measure the cabinet interior and choose full-extension slides. This Old House describes pull-out shelves as shallow drawers mounted on full-extension slides, which gives you full access to items in the back. You can size the design to your cabinet, as the basic concept adapts to many cabinet sizes.
- Build a sturdy tray box, not a flimsy “platform.” In the This Old House example, the shelf uses a pine frame with a plywood bottom to create a durable surface that won’t warp under weight. When you build it like a drawer, the slides stay aligned longer, and the tray doesn’t twist.
- Install slides carefully and test the motion before loading anything heavy. Your goal is smooth travel with no rubbing or binding, so test the pull-out right after mounting the hardware and adjust if it feels tight. Once it glides well empty, it will stay far more stable when you add cans, jars, and small appliances.
- Add “useful” sides to prevent items from tipping during motion. Pull-outs work best when the tray has low sides (or rails) that keep bottles and jars from sliding off as you open it. This Old House frames the pull-out like a shallow drawer, which naturally helps with control and organization.
Tall Pantry Cabinets & Floor-to-Ceiling Towers
A tall pantry cabinet is how many Brooklyn kitchens get “pantry storage” without having a pantry room. The win comes from getting vertical space, but you only get a clean look when the cabinet is level, plumb, and firmly secured.
- Start by finding the highest point of the floor and leveling from there. IKEA’s SEKTION guide bases rail height on the floor’s highest point and stresses using a spirit level to check rails. This matters because older NYC floors often slope, and you want the cabinet run to finish straight, even if the floor isn’t.
- If you’re using a rail system, mount rails at the correct height and keep them level. IKEA provides specific rail-height guidance and emphasizes leveling the rail before hanging cabinets, which helps your tall units sit correctly. A level rail now saves you hours of door and drawer adjustments later.
- Install in a smart order, so you have room to work. IKEA notes that, in most kitchens, it’s best to install wall cabinets first so base cabinets don’t get in the way. In a single-line kitchen with a high cabinet at one end, the guide calls out that the high cabinet may go first.
- Join, shim, clamp, and then secure to studs for a “built-in” finish. This Old House recommends using shims to level and align cabinets, clamping cabinets together, and then securing them to wall studs with appropriate screws. When you take that order seriously, your pantry tower won’t wobble, and your reveals (gaps/lines) look intentional.
Corner Pantry Solutions

Corners can be frustrating, but they’re also “hidden storage gold” when you pick the right hardware. The goal is simple: you want corner storage that you can reach without doing a deep bend-and-dig every time you cook.
- Use a Lazy Susan (especially for upper corner cabinets). Better Homes & Gardens recommends a large lazy Susan for deep upper corner cabinets to prevent items from getting lost in the back, and suggests storing round items like cans, jars, and spices for easy access. When you spin instead of rummaging, you keep the cabinet tidy with less effort.
- Install a swing-out or blind-corner organizer for base corners. BHG calls swing-out organizers a strong alternative to a two-tier lazy Susan because you pull the unit toward you and reach items that normally sit in the “dead zone.” These systems are great when your corner cabinet is deep, and your everyday items keep disappearing into it.
- Choose a blind-corner pull-out for maximum access with a cleaner feel. Rev-A-Shelf’s “Girasolo” blind corner optimizer uses pullout trays that glide out on pivot hardware, helping you access hard-to-reach areas without fighting for cabinet space. It’s especially helpful when you want a smooth motion and better use of the full corner volume.
- Use a corner carousel for “see everything at once” storage. IKEA’s corner base cabinet carousel is designed to make what’s inside easier to see and reach, with swivel shelves and adjustability. This type of solution works well for pots, pie dishes, and dry goods when you want visibility more than deep stacking.
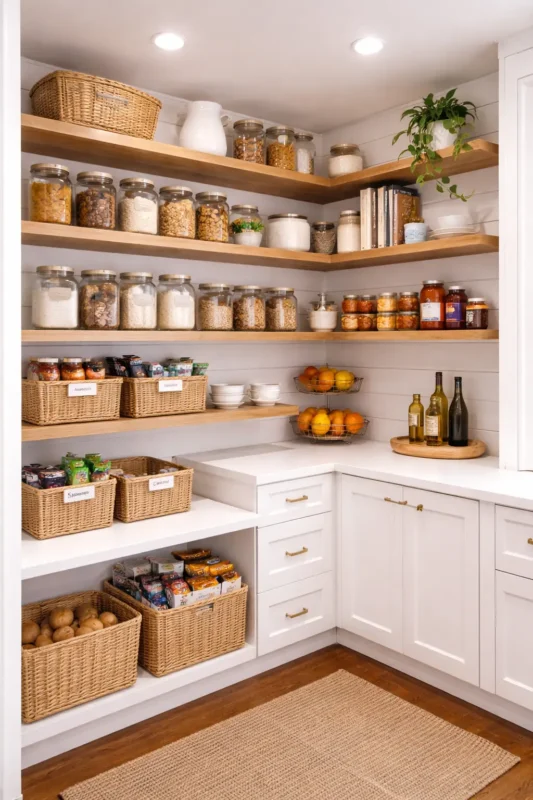
Selecting Materials: Plywood, MDF, Solid Wood & Laminates
Choosing the right shelf material decides whether your pantry feels “solid” for years or starts sagging and chipping in a few months. I always tell homeowners to pick materials based on weight, moisture risk, and how often you’ll slide bins across shelves.
- Plywood: Use plywood for a strong shelf that resists sagging better than MDF, especially for heavier pantry loads.
- MDF/Particleboard: MDF can work for light-duty storage, but it tends to sag more under weight, so it’s not the best choice for canned goods.
- Solid wood: Solid wood looks great and holds up well, but it costs more and still needs proper support spacing.
- Melamine/laminate (prefinished boards): Melamine/laminate shelves are easy to wipe clean and don’t require staining or sealing, saving time on finishing.
- Thickness matters: For pantry shelving, going thicker (often around 3/4″) helps reduce sag, especially on longer spans.
- Edge protection: If you use plywood, consider edge banding or a front strip to make the shelf edge look smoother and easier to clean.
Handling Different Wall Types in Brooklyn (Drywall, Plaster & Brick)
Brooklyn homes are a mix; new drywall in one unit, old plaster in another, and brick hiding behind finishes everywhere. Your install becomes easier (and safer) when you match your anchors and drilling method to the actual wall you have.
- Drywall over studs (most common): Aim to fasten pantry cleats, tracks, and heavy brackets into studs because drywall alone isn’t meant to carry serious weight. If you can’t hit studs in a few spots, use the right heavy-duty drywall anchors rather than “random screws and hope.”
- Plaster & lath (common in pre-war Brooklyn): Plaster can crack if you drill aggressively, and stud finders may give weird readings because of the lath strips behind the plaster. Use careful stud-finding methods (magnets, outlets/switches as clues, small test holes) and drill slowly so you don’t blow out the wall surface.
- Brick/concrete/masonry walls: For masonry, regular wood screws won’t work; you typically drill a pilot hole and use masonry screws or anchors designed for brick/concrete. Clean the hole of any dust before driving the fastener, as leftover dust can reduce holding strength.
- “Mystery walls” (tile, plaster patchwork, uneven surfaces): If your wall has tile or patchwork repairs, keep your layout flexible, as a bracket location may need a small shift to land on solid support. When in doubt, add more support points (brackets/standards) rather than trying to span long distances.
Finishing Touches: Painting, Lighting & Hardware
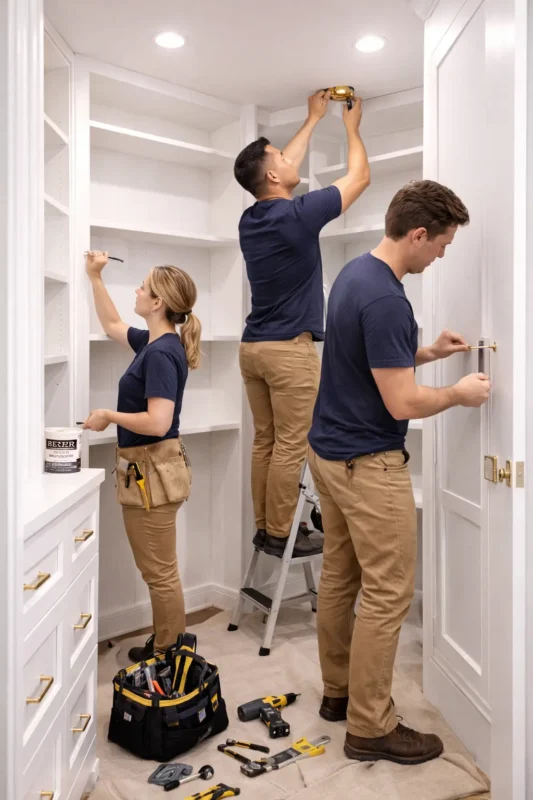
The install isn’t really “done” until it feels clean, bright, and easy to use every day. These finishing steps are what turn basic shelves into a pantry you’ll actually enjoy opening.
- Paint or seal wood shelves to resist moisture and make them easier to wipe clean.
- Caulk small gaps where cleats meet walls for a cleaner, built-in look.
- Add pantry lighting (an LED strip or a closet-rated fixture) so you can see labels and expiration dates clearly.
- Follow closet-light clearance rules if your pantry is closet-style; enclosed LED fixtures often need specific clearance from storage areas.
- Upgrade hardware (soft-close hinges, pull handles, drawer slides) so doors and pull-outs feel smooth and quiet.
- Label and zone your shelves so you stop “re-organizing” every week and start maintaining.
Choose 12-inch laminate shelves to save time on finishing.
If you want the fastest pantry upgrade, 12-inch laminate (or melamine) shelves are a smart move because they come pre-finished and clean up easily. Some DIY shelf guides choose laminate specifically because you don’t need to stain or seal it, and it wipes clean when bins slide across it. A 12-inch depth is also a common “sweet spot” for pantry storage because it keeps items visible rather than having them get lost behind other boxes. To keep laminate shelves strong, support them well (stud-fastened cleats or properly spaced standards) so the board doesn’t flex under heavier goods.
Where to Find the Best Brooklyn Roofing Contractors
Are you looking for an expert roofing contractor in Brooklyn, NYC? SR General Construction has you covered! Our business is located at 8807 Avenue B, Brooklyn, NY 11236, United States, in the Canarsie area.
We proudly serve all areas of Brooklyn with high-quality, durable roofing solutions. From new installations to repairs and maintenance, we provide the best service at affordable prices. Contact us and experience why we’re Brooklyn’s roofing experts!
FAQ
1. Do I need a permit to install a kitchen pantry in Brooklyn?
Usually not for cabinet installs, but NYC DOB notes contractors doing this work must have a DCWP Home Improvement Contractor license.
2. What’s the best pantry shelf depth for small kitchens?
Around 12 inches is a common standard because it keeps items reachable and visible.
3. How close should Shelf-track standards be placed?
Closet-maid notes that closer standards increase strength and provide spacing guidance (commonly around 24 inches or less).
4. Is plywood better than MDF for pantry shelves?
Often, yes, for load-bearing shelves; many material guides warn that MDF can sag sooner under weight.
5. What lighting is best for a closet-style pantry?
Closet-rated LED fixtures and LED strips work well, and codes specify clearances to keep lighting safely away from stored items.