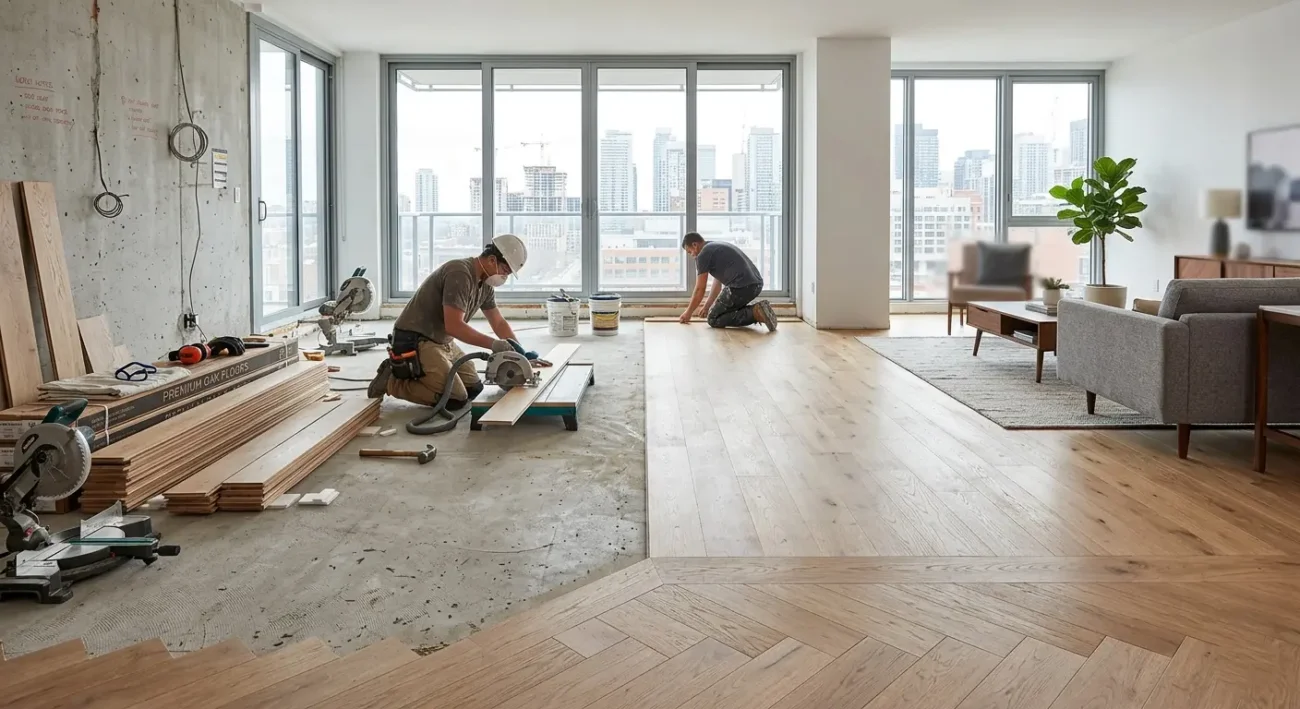
What makes the right floor renovation design so important for your Brooklyn home? It’s not just a surface you walk on; it’s a foundation of your home’s style, comfort, and value. The right floor renovation design can alter how light flows through a room, the warmth of your living space, and even how potential buyers perceive your property.
Let’s begin by exploring the key steps in selecting the best floor renovation design for your Brooklyn home. This guide will show you how to match flooring styles with your neighborhood’s architecture, distinguish between materials such as hardwood, vinyl, and concrete, and utilize design patterns such as herringbone, chevron, or wide planks to elevate any room.
By the end of this guide, you will have clear insight into designing a floor that is both beautiful and practical for Brooklyn living. Now, let’s clarify some essential flooring concepts you’ll encounter.
What Is the Difference between Floor Installation and Renovation for Your Apartment?
Floor installation refers to the process of installing a brand-new floor where none existed before, or where the old one is first removed. You start with the subfloor, then add underlayment and your chosen material in steps. Floor renovation means improving the existing floor through repairs, refinishing, or partial replacement, rather than starting from scratch.
Renovation focuses on fixing damage, updating the style, and extending the life of the existing floor. In short, installation creates a new floor, while renovation brings your current floor back to life.
Overview of How to Choose the Right Floor Renovation Designs
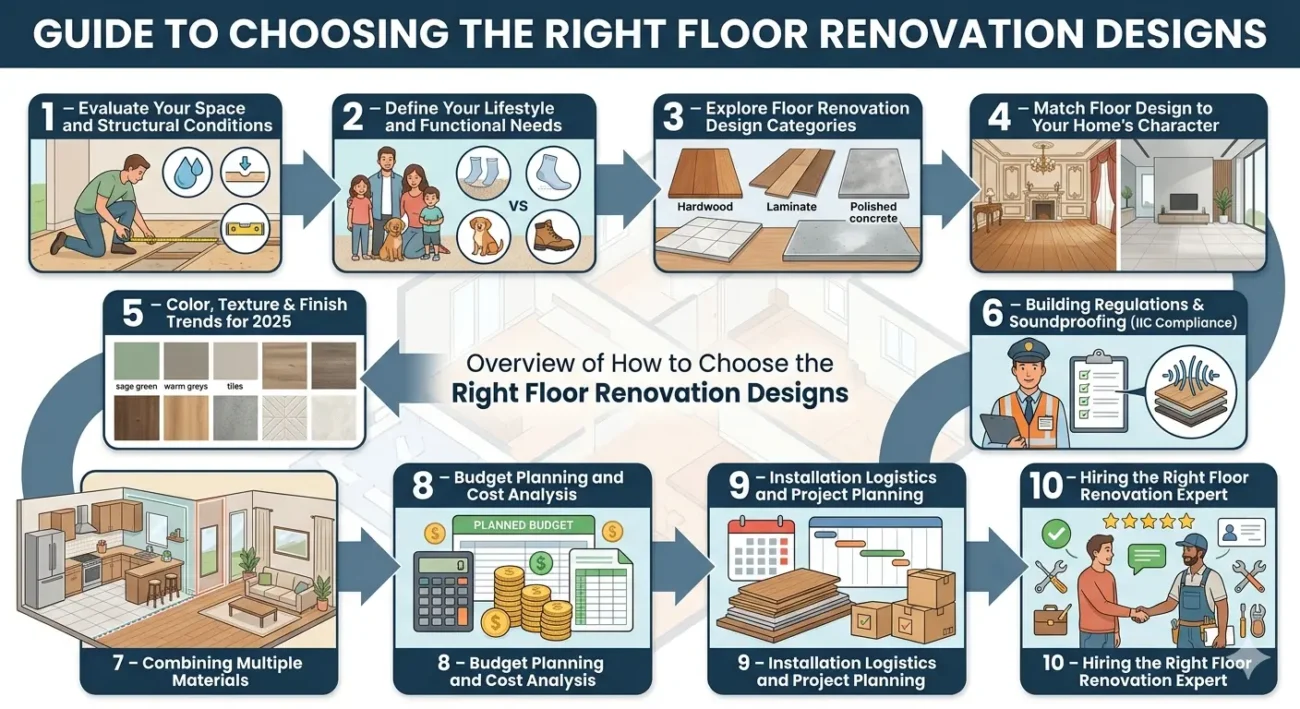
- Step 1 – Evaluate Your Space and Structural Conditions
- Step 2 – Define Your Lifestyle and Functional Needs
- Step 3 – Explore Floor Renovation Design Categories
- Step 4 – Match Floor Design to Your Home’s Character
- Step 5 – Color, Texture & Finish Trends for 2025
- Step 6 – Building Regulations & Soundproofing (IIC Compliance)
- Step 7 – Combining Multiple Materials
- Step 8 – Budget Planning and Cost Analysis
- Step 9 – Installation Logistics and Project Planning
- Step 10 – Hiring the Right Floor Renovation Expert
Step 1 – Evaluate Your Space and Structural Conditions
Before considering patterns or colors, you need to understand what is under your feet right now. When you know the real condition of your space, you avoid surprise costs and bad results later.
Here is how you can check your space and structure in a simple way:
- Look at your current floor. Check for dips, soft spots, cracks, loose boards, or tiles that feel hollow when tapped.
- Check the subfloor if you can. In a Brooklyn brownstone, you may have old plank subfloors; in a condo, you may have a concrete slab. Try to notice rot, gaps, or movement.
- Test for moisture in key areas. Focus on basements, ground floors, and rooms over unheated spaces. Excessive moisture can damage wood floors and some types of glue.
- Notice the noise between levels. If you hear every footstep from above or below, you may need soundproof underlayment when you design your new floor.
- Think about ceiling height. Some floors add thickness. In Brooklyn apartments with low ceilings, you do not want doors that drag or thresholds that feel too high.
Step 2 – Define Your Lifestyle and Functional Needs
Your floor renovation design must fit your daily life in Brooklyn. If it only looks good in photos but doesn’t hold up in real use, you will feel regret very quickly.
Let’s walk through a quick demo lifestyle for a Brooklyn home so you see how this works:
You live in a Park Slope walk-up with two kids and a dog. The hallway and living room have heavy traffic, so you need a tough surface that does not scratch easily and that cleans fast after park days. Your bedrooms feel cold in winter, so you want a warmer, softer feel underfoot. You also live in a pre-war building, so your downstairs neighbor has already complained about the noise.
For you, the ideal floor renovation design might incorporate durable LVP in the living areas, cozy cork or carpet tiles in bedrooms, and a good acoustic underlayment everywhere to maintain peace with the neighbors.
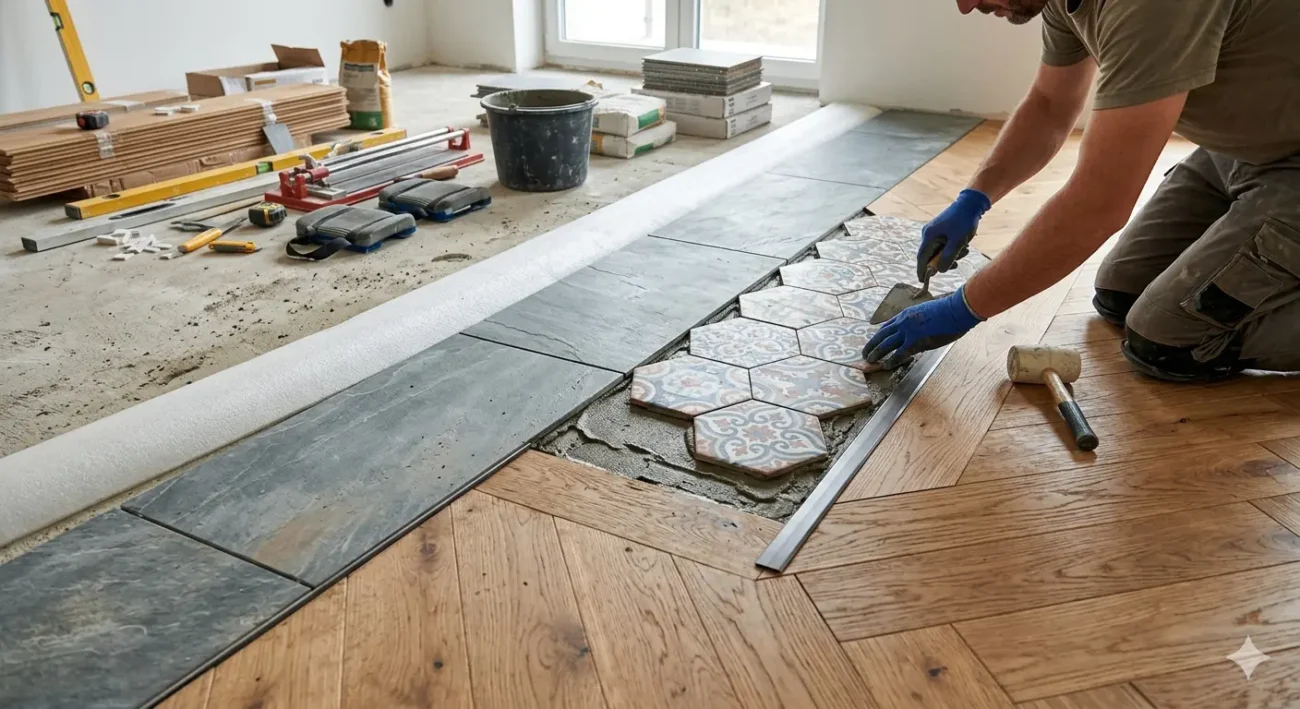
Step 3 – Explore Floor Renovation Design Categories
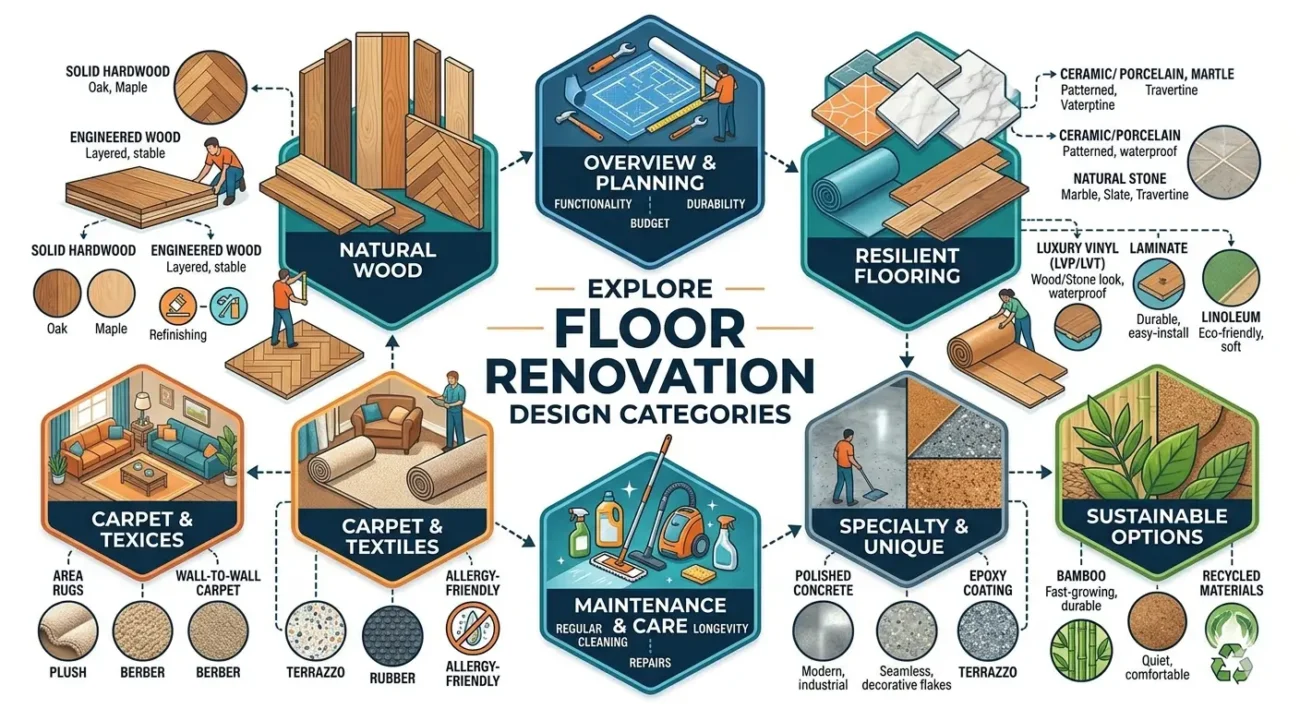
Once you understand your structure and lifestyle, you can explore design categories with a clear mind. Consider this your menu of floor renovation design options for Brooklyn homes.
Here are six popular types you can consider:
- Hardwood Floor Renovation Design
Perfect for those who want classic Brooklyn charm. You can use solid or engineered wood, choose patterns like herringbone or chevron, and pick stains that match brownstone trim or modern white walls. - Luxury Vinyl Plank (LVP) and Hybrid Design
Great for busy families, renters, and pet owners. LVP gives you a wood or stone look with strong resistance to water and scratches, making it ideal for use in kitchens, entries, and kids’ rooms. - Tile and Stone Floor Renovation Design
Ideal for bathrooms, kitchens, and entry halls. You can opt for porcelain, ceramic, marble, or slate, and add checkerboard patterns to create a high-end feel that withstands water and spills. - Concrete and Epoxy Industrial Design
This fits lofts, studios, and modern basements. Polished concrete or epoxy coatings give a clean, urban look and handle heavy use in creative spaces or home gyms. - Eco-Friendly Floor Renovation Design
If you care about health and the environment, consider choosing cork, bamboo, reclaimed wood, and low-VOC finishes. These options suit Brooklyn owners who want a green home without losing style. - Laminate and Budget-Smart Design
This option is ideal when you want a fresh look and need to control costs. Quality laminate can resemble wood, and some products are well-suited for apartments and rental units due to their resistance to moisture.
Step 4 – Match Floor Design to Your Home’s Character
Imagine you bought a narrow brownstone in Bed-Stuy with original crown molding and big front windows. The previous owner covered the old floors with dull laminate that clashes with the house’s history. You decide to remove the laminate and install wide-plank white oak in a warm, natural tone. In the parlor level, you choose a herringbone pattern that lines up with the long hallway and points toward the fireplace, so the floor feels like it belongs to that era.
Upstairs, you use straight, wide planks that cost less but still match the color of the main level. The floor renovation design respects the home’s age, supports its layout, and still feels fresh enough to accommodate modern furniture and art.
Step 5 – Color, Texture & Finish Trends for 2026
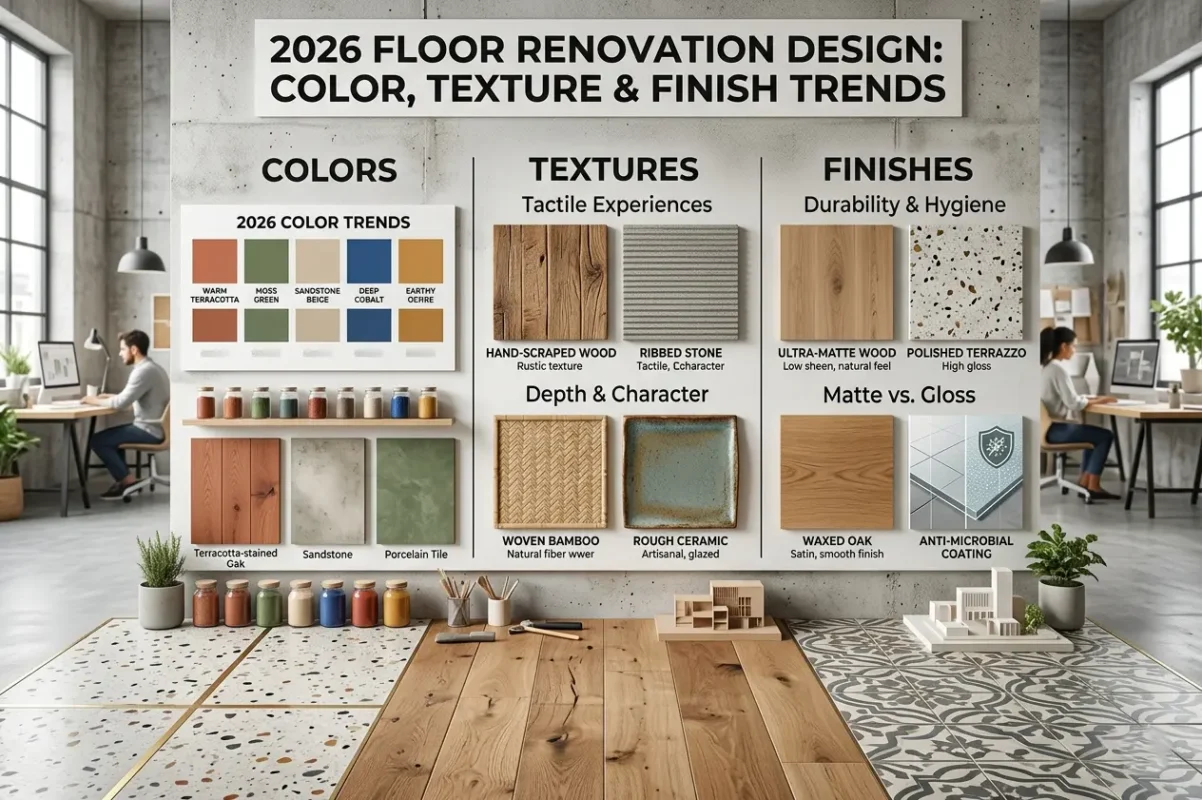
Color, texture, and finish shape how your floor renovation design feels day-to-day. In 2026, warm natural tones will stay popular in Brooklyn, so think soft oaks and mid-tones instead of very dark or very grey floors. Matte and low-sheen finishes help conceal small scratches, ensuring your floor remains visually appealing even after years of use.
Light wire-brushed textures add interest and grip underfoot, while smooth finishes give a more formal vibe. When planning your design, match the color to your wall paint and furniture, texture to your lifestyle, and finish level to the amount of maintenance you prefer. In the end, the right mix will make your rooms feel larger, brighter, and more “you” without constant effort.
Step 6 – Building Regulations & Soundproofing (IIC Compliance)
Brooklyn buildings are rarely quiet, so it’s essential to follow regulations and protect your comfort. Keep these soundproofing and code points in mind:
- Most condos and co-ops in NYC ask for a minimum IIC rating. Boards often look for systems that reach at least IIC 60 so impact noise from footsteps stays under control.
- Your floor renovation design should include the right underlayment. Cork, rubber, or acoustic mats under wood, vinyl, or laminate help you reach those IIC targets and avoid complaints.
- NYC guidance suggests better impact insulation in bedrooms. You treat bedrooms as quiet zones, so you choose thicker underlayment and softer surfaces where possible.
- Some buildings want proof from lab tests or product data sheets. Before purchasing materials, ask your installer for documents that show the IIC and STC ratings, which must match the local building codes.
- A well-designed soundproofing system protects both your peace of mind and your property’s resale value. When buyers know the floor meets or exceeds building standards, they feel safer and more ready to pay your price.
Step 7 – Combining Multiple Materials
In Brooklyn, one material often doesn’t solve every problem. You may want warmth in one room, easy cleaning in another, and drama at the entry—so mix materials purposely.
Here are a few smart ways you can combine floor materials:
- Wood and tile at the kitchen transition: Use hardwood in your living area, then switch to porcelain or ceramic tile in the kitchen. A thin metal or wood strip between them keeps the joint clean and helps the design feel planned.
- LVP in high-traffic zones with cozy carpet in bedrooms: Install luxury vinyl plank in hallways and living rooms where you expect heavy foot traffic. Save soft carpet tiles or rugs for bedrooms to enjoy comfort and noise control while you sleep.
- Concrete or epoxy in studios with wood in living areas: Keep polished concrete or epoxy in a home office, studio, or workshop where you move chairs and equipment. Then move to warm wood or LVP in the lounge so you still feel relaxed and at home.
- Stone or tile entry with wood beyond: Use stone or porcelain at the front door to handle wet shoes and Brooklyn snow. After a small threshold, switch to wood or LVP once you step deeper into the home so the main space feels warmer.
- Pattern and direction changes as “room dividers”: In open-plan spaces, you can use the same material but change plank direction or pattern. For example, you keep straight planks in the living area and use herringbone in the dining corner so the floor guides the eye without walls.
Step 8 – Budget Planning and Cost Analysis
You want a beautiful floor, but you also want to sleep at night without worrying about your bank account. A simple plan helps you select a floor renovation design that suits your budget and aligns with your goals.
Here is how you can plan your budget and read your costs:
- Set a clear total budget first: Decide on a number you’re comfortable with for the entire project, not just the materials. This number should include labor, delivery, preparation, and a small contingency amount for unexpected expenses.
- Compare material costs by square foot: Create a simple table that includes wood, LVP, tile, concrete, and eco-friendly options. Consider the cost per square foot, plus additional components such as underlayment, trims, and glue, to see the actual price.
- Separate “must-have” areas from “nice-to-have” areas: Spend more on the rooms that show first, such as the living room and hallway. Use more cost-effective options in closets or less visible spaces to keep your overall budget under control.
- Request itemized quotes from contractors: Ask for quotes that break down labor, materials, demolition, disposal, and any other additional expenses. When you see the list, you can adjust thickness, pattern, or finish instead of cutting quality where it matters.
- Plan for long-term value, not just the upfront cost: A cheaper floor that fails early will cost more over ten years than a mid-range option that lasts. Consider durability, repair options, and resale value when selecting your final design.
Step 9 – Installation Logistics and Project Planning
Once you’ve chosen a floor renovation design, you need a straightforward plan to ensure the project runs smoothly. New floors touch your whole routine, so you and your installer must stay on the same page.
Key points you should think about:
- Access and building rules: Check your building’s work hours, elevator rules, and loading zone rules. Please inform your contractor so they can schedule deliveries and work crews accordingly.
- Furniture and room clearing: Decide where you will put furniture while crews work on each room. Some people rent short-term storage; others simply move items from room to room in a straightforward sequence.
- Noise, dust, and protection: Ask how the team will control dust and protect other surfaces. Good planning includes plastic walls, floor covers on common hallways, and a clear cleanup plan at the end of each day.
- Cure times and “no-walk” periods: Different finishes and adhesives need different rest times. Discuss when you can walk with socks, when you can move furniture back, and when rugs can be put down.
- Project timeline and milestones: Break the project into stages: demo, prep, install, finishing, and final walk-through. A short calendar on your fridge helps everyone in your home know what to expect each day.
Step 10 – Hiring the Right Floor Renovation Expert
Even the best floor renovation design fails if the installer does not respect the details. In Brooklyn, you deal with old buildings, strict boards, and tight hallways, so you want a team that already knows how to handle all that.
Here is how you can choose the right expert for your project:
- Check license, insurance, and local experience: You want a contractor who holds proper NYC licenses and carries insurance that protects you and your home. Local experience in Brooklyn is particularly valuable because older buildings and narrow streets present unique challenges.
- Look at real before-and-after projects: Ask to see photos and addresses of recent projects, not just stock images. When you see similar homes and floors, you feel more sure that they can handle your space.
- Ask clear questions about the process and communication: Discuss how they handle dust, noise, schedule changes, and surprises that may occur behind walls. A good professional explains each step in plain language and provides you with a single main point of contact.
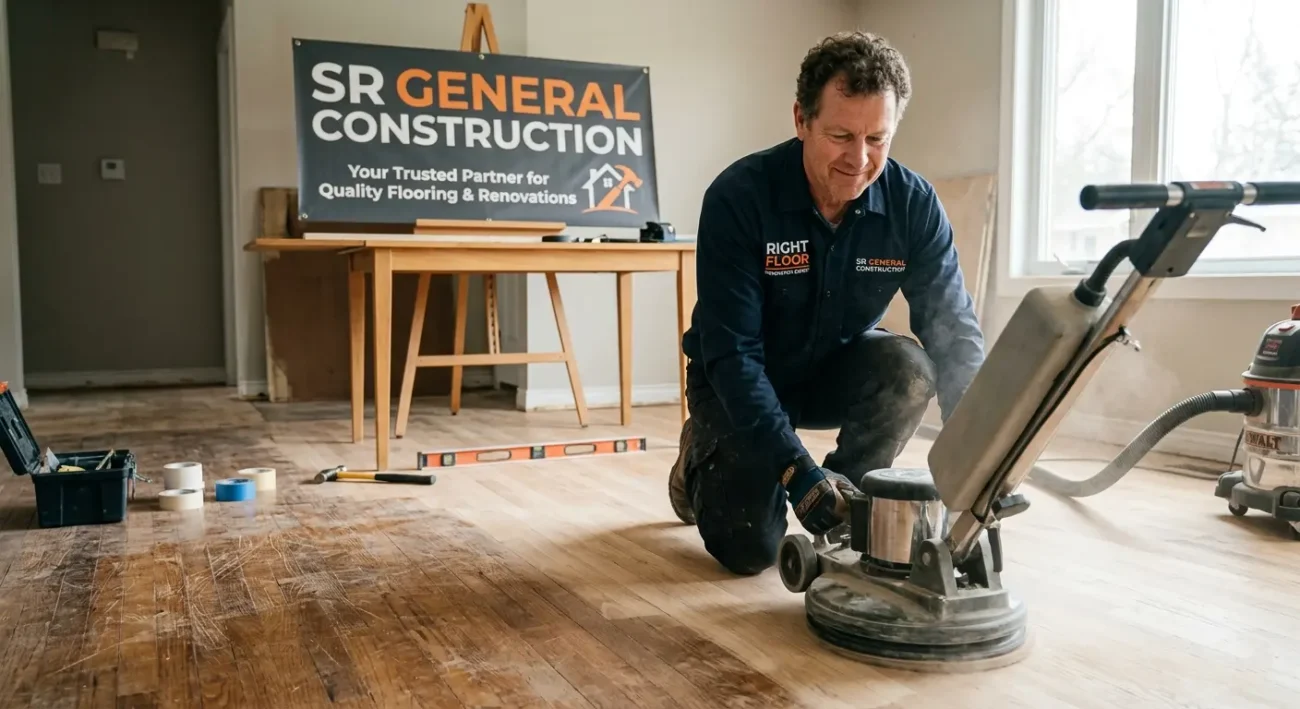
- Choose a contractor with a proven track record: SR General Construction NYC is a fully licensed Brooklyn team with over 15 years of experience in the city, having completed more than 750 projects and serving 500+ satisfied clients—plus they offer 24/7 support. This proven track record means you are working with experts who know how to handle surprises and deliver exceptional results.
- Compare detailed written estimates, not just prices: Ask for written scopes that list materials, brands, patterns, and finished products. The cheapest option does not always provide the best value, so read every line carefully before making a decision.
Common Mistakes to Avoid
When planning a floor renovation design, you not only choose what to do, but also what to avoid. A few common mistakes cause stress, extra costs, and floors that do not last.
Here are some pitfalls you should steer clear of:
- Skipping proper subfloor prep: If you rush into installation without fixing dips, loose boards, or cracks, your new floor can flex and squeak. Over time, planks may move out of place and tiles may crack, so you pay twice for the same room.
- Choosing style without considering lifestyle: A glossy, dark floor looks amazing on Instagram, but it reveals every scratch and dust speck in a home with kids and pets. When your daily life fights your design, you feel annoyed every time you clean.
- Ignoring building and sound rules: Some owners pick floors that do not meet IIC sound ratings or condo bylaws. Boards can impose extra work or fine you, so the cheap shortcut can turn into an expensive problem.
- Underestimating total project cost: Many people only count the price of planks or tiles, forgetting to factor in labor, underlayment, disposal, and trim. When the actual bill arrives, they often end up cutting corners on quality or halting the project midway.
- Hiring based only on the lowest quote: The lowest price often means weaker prep, cheaper materials, or rushed work. If the floor fails early, you face disruption and new costs that erase any savings you thought you gained.
Understanding the Brooklyn Context
- You live in a multi-family city, so floors must meet sound rules.
In NYC apartments and condos, building codes and industry standards require floor/ceiling systems to achieve an IIC of at least 50 and an STC of 50 to control noise between units. When selecting a floor renovation design, consider the entire “sandwich” (subfloor, underlayment, and finished floor) to ensure the final assembly meets those targets. - NYC gives clear guidance about noise from floors.
The NYC Department of Environmental Protection explains that impact noise through floors is measured using the Impact Insulation Class (IIC), and it recommends floor construction with an IIC rating of 50 or higher in living areas and 60 or higher in bedrooms. That advice encourages you to prioritize quality underlayments under hard floors, especially in Brooklyn walk-ups and co-ops. - Condo and co-op boards often set even higher standards.
Many Brooklyn boards require specific IIC ratings or even specific brands of acoustic underlayment under wood, tile, or vinyl, so neighbors do not hear every footstep. Before locking in a design, read your alteration agreement and ensure your contractor matches the underlayment and flooring system to the written rules.
Where to Find the Best Brooklyn Contractors
Are you looking for an expert contractor in Brooklyn, NYC? SR General Construction has you covered! Our business is located at 8807 Avenue B, Brooklyn, NY 11236, United States, in the Canarsie area.
Additionally, we offer services at Rockaway Parkway and Ralph Avenue, providing fast access to Flatlands, East Flatbush, Bergen Beach, Brownsville, and the Spring Creek section of East New York.
FAQ
1. What is the best type of floor for a Brooklyn apartment?
The best floor depends on your building and lifestyle. In NYC apartments, contractors often recommend engineered hardwood for resale value, LVP for durability and noise control, and tile for wet areas like kitchens and baths.
2. How much does it cost to refinish hardwood floors in NYC or Brooklyn?
Recent NYC pricing guides indicate that full refinishing jobs typically range from approximately $1,500 to $8,000 for an apartment, or roughly $3–$15 per square foot, depending on size, condition, stain, and finish type. Stairs, repairs, and special patterns increase the total.
3. What kind of flooring is best for pets in a Brooklyn apartment?
For dogs and cats, most experts suggest vinyl or LVP because it resists scratches and water better than most wood and cleans quickly after accidents. Some owners also use tougher engineered wood or bamboo, but these still need nail trimming and rugs in high-impact zones.
4. What flooring works best in Brooklyn kitchens and bathrooms?
Designers usually prefer porcelain or ceramic tile for NYC kitchens and baths because it resists water, stains, and heavy traffic. In some renovations, people use waterproof LVP in kitchens to achieve a warmer feel, while retaining tile in showers and other wet areas.
5. What is an acceptable IIC rating for floors in NYC apartments?
Acoustics resources explain that IIC 50 is often considered the bare minimum, while IIC 60–65 provides noticeably better impact noise control between floors. Many condo and co-op rules in cities like New York use the 60+ range as a practical target for wood or tile floors with underlayment.