Do you know the benefits of Countertop Installation in Brooklyn homes?
A well-installed countertop doesn’t just change how your kitchen or bathroom looks; it improves daily usability, boosts property value, and helps your space meet modern NYC living standards.
In this complete guide, we’ll explain how countertop installation works step by step, what you should prepare before starting, which materials are best for Brooklyn homes, and when DIY is realistic versus when hiring a professional makes sense.
What is Countertop Installation
Countertop installation is the process of fitting and securing a new surface, like granite, quartz, laminate, or solid surface, onto your kitchen or bathroom cabinets to create a functional work area. It includes measuring, cutting to size, making cutouts for sinks and appliances, and securing the surface to keep it level and durable. A successful installation ensures your countertops look great and work well for everyday tasks like cooking and cleaning. This step is one of the most important parts of any kitchen or bathroom renovation.
Step-by-Step Countertop Installation Guide
| Choose the Right Countertop Material |
| Countertop Measurement & Layout |
| Removing the Old Countertop Without Damaging Cabinets or Walls |
| Cabinet Prep: Leveling, Shimming, and Build-Up Strips |
| Dry-Fit the Countertop |
| Cutting & Cutouts (Straight Cuts, Sink Holes, Cooktops) |
| Joining Sections & Seams (L-Shapes, Miters, and Long Runs) |
| Setting & Securing the Countertop |
| Backsplash, Caulk Lines, and Final Finish |
Pro Tip
SR General Construction, NYC, is fully licensed and has over 15 years’ experience of Renovation and Remodeling work in Brooklyn. We’ve completed more than 750 projects for 500+ satisfied clients, and we offer 24/7 support to keep your home safe.
N.B. Do you need kitchen renovation service in Brooklyn? Call SR General Construction NYC for free estimate!
Choose the Right Countertop Material
Picking the right material makes the whole installation easier and helps your countertop last longer. I want you to choose based on how you cook, clean, and use the space every day.
- If you want the most DIY-friendly option, laminate is lighter and easier to cut than stone, so it’s often the simplest first-time install.
- If you love butcher block, pick a wood type (like maple, walnut, oak, teak, or mahogany) that fits your budget and the amount of wear you expect.
- Match the thickness to your needs, because butcher block is typically 1 1/2–2 1/2 inches thick, and thicker tops feel sturdier and handle sanding/refinishing better.
- If you’re considering quartz/engineered stone, plan for proper support, as manufacturers require specific overhang limits and support near cutouts.
- Think about sink areas early, because water protection and proper sealing around the cutout matter as much as the surface itself.
Countertop Measurement & Layout
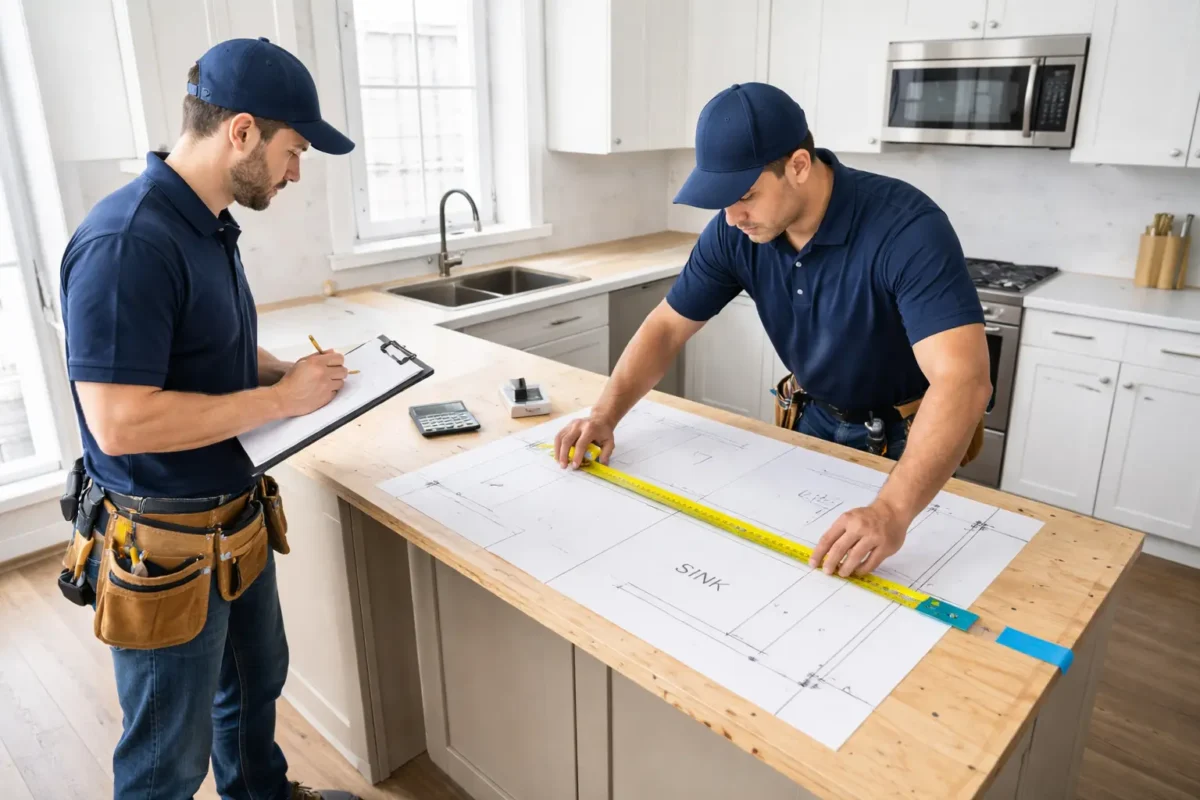
This stage decides whether your countertop fits cleanly or becomes a “trim it three times” headache. You’re aiming for measurements that work with real-life walls, cabinets, and appliances; not perfect drawings.
- Measure along the back wall for your most accurate length, because that’s the reference line install guides rely on.
- Add an overhang where the counter ends, free (not against a wall or appliance), and many laminate guides recommend allowing an extra 3/4 inch per overhang.
- Mark lines clearly and use tape to reduce chipping when cutting, especially on the laminate’s decorative face.
- Plan sink placement with clearance on all sides, then follow the sink maker’s cut line guidance instead of guessing.
- Leave breathing room for appliances, because some stone/quartz guidelines call for extra clearance (like 1/8 inch) at appliance openings to prevent binding or stress.
Removing the Old Countertop Without Damaging Cabinets or Walls
Old countertops usually come off easily when you disconnect utilities and remove fasteners in the right order. If you rush, you can crack cabinet frames, tear drywall, or damage plumbing connections.
- Shut off water and power first, especially if you’re removing a disposal or cooktop, to avoid leaks or shock hazards.
- Disconnect the sink drain at the trap and loosen supply unions so the sink can lift out without pulling pipes.
- Remove clips or screws holding appliances (like a dishwasher) so nothing is trapped under the old top.
- Cut through old caulk or sealant where the countertop meets the wall/backsplash, because that bond can rip paint and drywall if you pry too soon.
- Lift carefully and evenly after removing the fasteners, as twisting can crack the top or splinter the cabinet rails.
Cabinet Prep: Leveling, Shimming, and Build-Up Strips
Your countertop can only sit as flat as the cabinets below it. If the cabinet runs dips or twists, seams look worse, and some materials can even crack over time.
- Set the countertop in place and check the level and stability, because installation guides treat this as a required checkpoint before securing anything.
- Use shims to correct low spots so the countertop doesn’t rock, then re-check the level across the whole run.
- Add a build-up kit/strips when needed, since some cabinetry requires it to give drawers enough clearance to open freely.
- Plan extra support near sink and cooktop openings, because some quartz standards require support within 3 inches of any cutout.
- Avoid driving screws through stone/quartz, because at least some manufacturers’ guidance warns against mechanical fasteners directly through the material.
Dry-Fit the Countertop
Dry-fitting is your “test drive” before anything becomes permanent. It helps you catch wall gaps, cabinet issues, and cutout alignment while fixes are still easy.
- Place the countertop on the cabinets and check the fit before you glue or screw anything down.
- Scribe to the wall if needed by marking the top edge and sanding or filing to the line so the backsplash edge sits tight.
- Confirm the level and stability during the dry fit, because this is when you should adjust the shims rather than forcing the top flat later.
- Verify your sink cutout layout by tracing and drilling corner holes first, then cutting with a jigsaw along the planned cut line.
- If you’re installing quartz/stone, keep cutout corners rounded and field seams fully supported, as some guidelines require radial corners and fully supported field seams.
Cutting & Cutouts (Straight Cuts, Sink Holes, Cooktops)
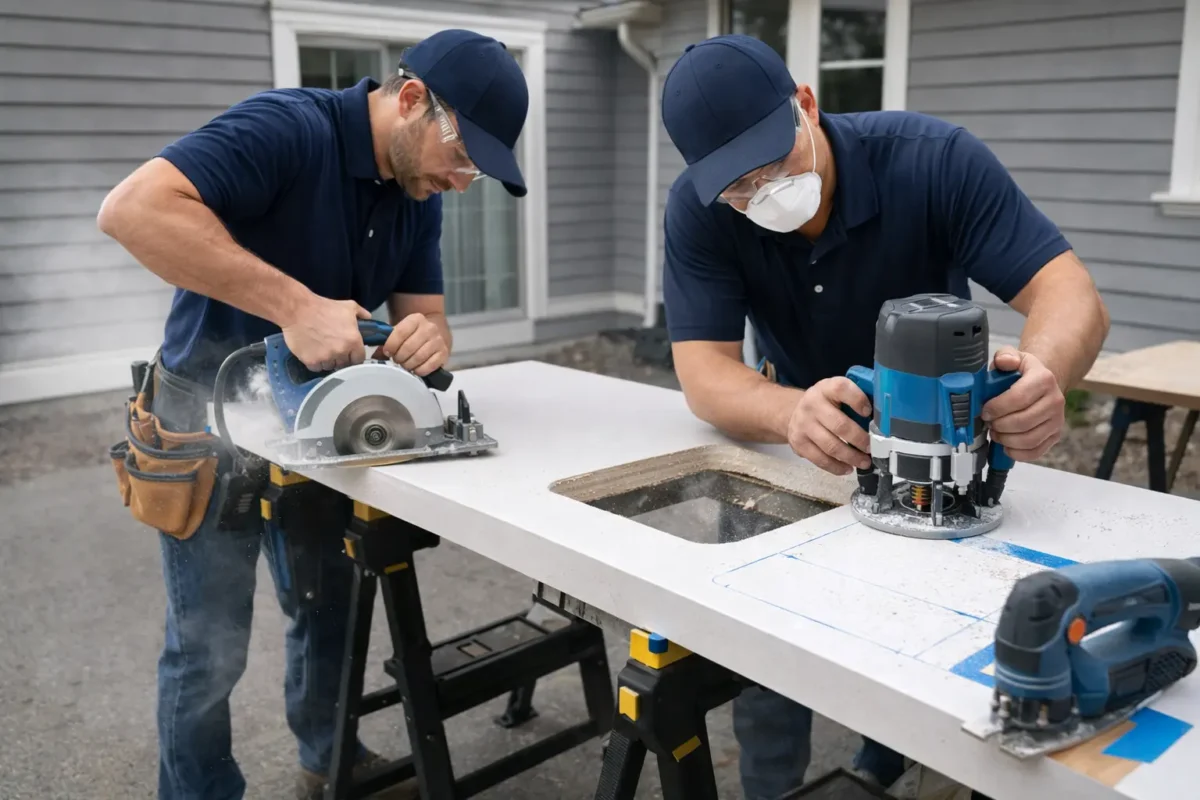
This is the step where small mistakes become big headaches, so I want you to slow down and cut with a plan. When you protect the surface, follow the templates, and keep corners clean, your countertop looks “pro” even in a DIY install.
- Mark your cut line clearly and apply masking/transparent tape over it to help prevent chipping while you work.
- Cut from the bottom side when possible, because guides explain that it helps protect the decorative surface from chipping.
- For sink cutouts, trace the sink rim and cut the opening slightly smaller than the line so the sink flange still covers the edge cleanly.
- Drill pilot holes at the rounded corners, then use a jigsaw/keyhole saw to cut the inside corners, and finish them by filing or sanding them smooth.
- Keep inside cutout corners rounded (a small radius strengthens the corner), and for cooktops/rangetops, add heat-conductive aluminum tape around the cutout if the instructions call for it.
Joining Sections & Seams (L-Shapes, Miters, and Long Runs)
Seams are where countertops usually look “DIY,” so this is the part you want to do carefully. Your goal is a tight, aligned joint that’s sealed and supported so it doesn’t shift over time.
- Join the mitered sections before installing the countertop on the cabinets, as recommended in standard laminate installation guides.
- Use a miter bolt kit/fasteners to pull the joint tight from underneath so the seam closes evenly.
- Run a bead of sealant on each mitered edge before tightening, because it helps seal the joint and reduce moisture entry.
- Align the front edges first, then tighten the fasteners gradually while tapping them into alignment with wood blocks to avoid damaging the surface.
- For quartz/stone-style seams, use design-matched seaming adhesive and keep seams fully supported and tight (Cambria specifies seam width limits and full support).
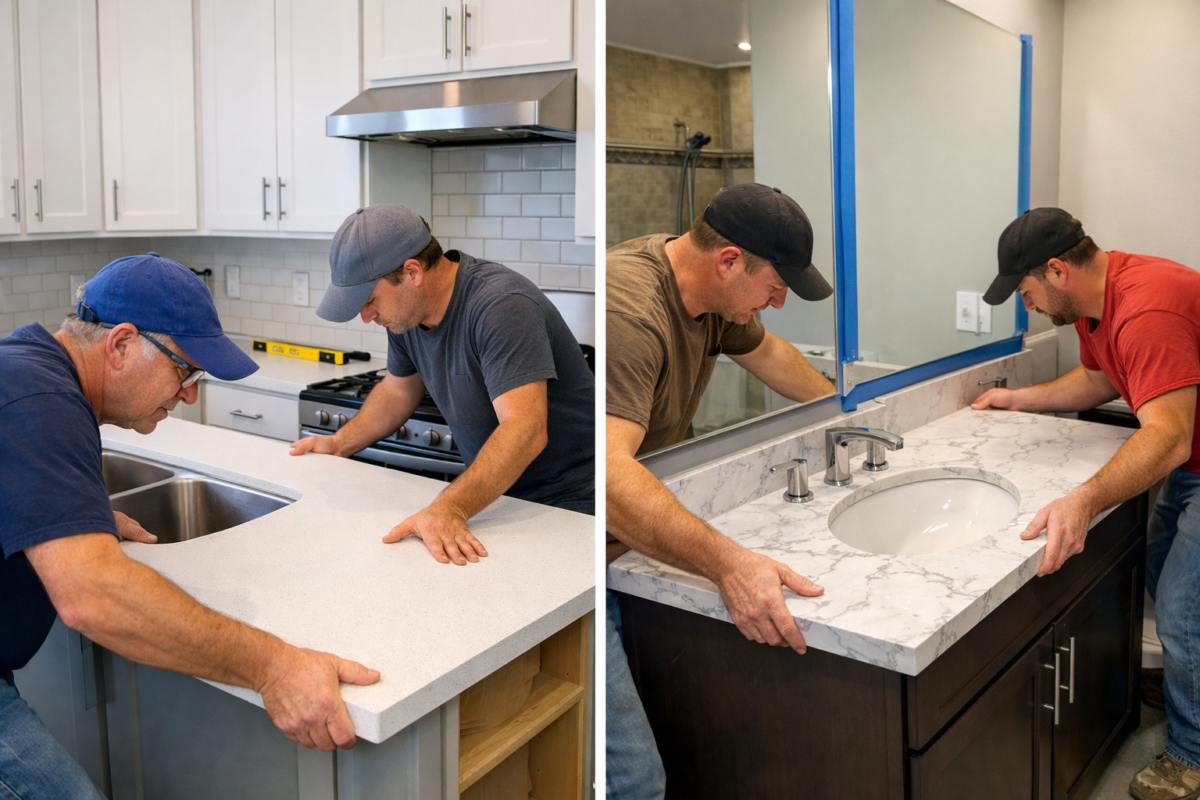
Setting & Securing the Countertop
Once the countertop is on the cabinets, you’re basically locking in your final fit. If you level-check, support spans, and fasten correctly, you avoid rocking, gaps, and long-term cracking.
- Place the countertop, check its level and stability, and fix any problems now (this is exactly what the installation guides tell you to verify before securing).
- Secure the countertop to the cabinets using wood screws or panel adhesive, but always choose the method that fits your countertop type and instructions.
- If you use screws, check the screw length first so nothing pokes through the top surface.
- Add real support for large spans and appliance openings (Cambria calls for additional underside support in certain sizes and vertical support around openings like dishwashers).
- Don’t ignore overhang support; heavy tops may need corbels or extra structure, and Cambria gives specific overhang limits and spacing guidance.
Backsplash, Caulk Lines, and Final Finish
This is where you stop water from sneaking behind your cabinets and ruining the substrate. A clean caulk line and sealed joints make the install look finished—and they protect the kitchen in the long term.
- Use an end splash where the countertop meets a wall (or keep the wall joint clean if you’re doing tile later), because this is a common finishing step in preformed countertop installs.
- Seal the countertop-to-wall joint with caulking compound and wipe off excess right away for a clean line.
- Caulk seams/joints where sections meet, since manufacturers list sealant as a standard material for tightening and protecting joints.
- Seal the sink area carefully, because the sink must be sealed to avoid water damage to the base material.
- Do a final cleanup pass; remove excess sealant around the sink and end splash, so everything cures neatly and looks sharp.
Do I need a permit to replace a countertop in Brooklyn, NYC?
In many cases, a straight “swap” (remove old countertop, install a new one in the same spot) is treated like a minor home improvement and may not need a DOB work permit—NYC DOB even lists “installing new cabinets” and “plumbing fixture replacement” as examples of work that doesn’t need a permit. What changes things is scope: if your countertop project also involves moving or altering plumbing/gas/electrical, you may trigger rules that require licensed trades (and sometimes permitting/filings, depending on the work).
NYC DOB also notes that even “no-permit” work still must comply with codes, and contractors doing these home improvements must be licensed through NYC DCWP (Home Improvement Contractor). If you’re in a co-op/condo, your building may require approvals and insurance even when the City doesn’t require a permit.
How do I measure countertops correctly in older Brooklyn homes?
Start by measuring the back wall (not the front edge), because that’s the reference line install guides use for accurate readings. Measure section by section, and when an end doesn’t butt up to a wall or appliance, add an extra 3/4 inch per overhang so the countertop finishes properly. Because older Brooklyn walls are often wavy or out of square, plan to scribe the countertop to match the wall instead of forcing a tight fit. Do a quick test placement first so you can mark what needs trimming before anything gets secured.
What’s the best way to cut a sink opening without chipping laminate?
Chipping usually happens when the blade grabs the laminate face or when the cutout drops at the end. If you tape, drill clean corners, and use the right blade direction, you’ll get a neat sink opening that the rim fully covers.
- Trace the sink template (or the sink rim) on masking/painter’s tape so your cut line is easy to see and the surface stays protected.
- Make your cutout slightly smaller than the traced line; guides often recommend about 3/8” to 1/2” inside the line for self-rimming sinks so the flange hides the edge.
- Tape directly over the final cut line, because the install guides specifically call out tape as a simple way to reduce chipping while sawing.
- Drill corner holes first (inside the line) so your jigsaw has a clean starting point and you don’t crack the corner.
- Use a laminate-cutting or reverse-cut jigsaw blade (cuts on the downstroke) and go slow with steady pressure to prevent blowout on the top face.
- Support the cutout piece as you finish the last side (a temporary cleat/board works) so it doesn’t fall and chip the edge at the worst moment.
Where to Find the Best Brooklyn Contractors
Are you looking for an expert contractor in Brooklyn, NYC? SR General Construction has you covered! Our business is located at 8807 Avenue B, Brooklyn, NY 11236, United States, in the Canarsie area.
Additionally, we offer services at Rockaway Parkway and Ralph Avenue, providing fast access to Flatlands, East Flatbush, Bergen Beach, Brownsville, and the Spring Creek section of East New York.
FAQ
1. When does a countertop replacement turn into a job that needs permits or filings?
If you’re moving a sink, changing plumbing lines, adding/moving gas for a cooktop, or doing meaningful electrical changes, the project often stops being “cosmetic.” NYC renovation guidance consistently flags plumbing/gas/electrical/structural or ventilation changes as the usual permit triggers.
2. Do I need a licensed contractor to install countertops in NYC?
If the work exceeds $200, NYC requires a DCWP Home Improvement Contractor license for the contractor performing the work. You can verify license status through NYC311 or DCWP’s official “Check License” tools.
3. What hours can countertop installation work happen in NYC apartments?
NYC311 notes that residential construction is generally allowed from 7:00 a.m. to 6:00 p.m. on weekdays, and anything outside that window may require special authorization. NYC DEP also requires a Construction Noise Mitigation Plan for construction/renovation work, so installers should be prepared to follow and document noise controls.
4. How long does countertop installation usually take?
The on-site install is typically 1–2 days, depending on the layout complexity and plumbing reconnection. Stone/solid-surface jobs may add lead time for templating and fabrication before installation day.
5. What’s a typical countertop depth and overhang when measuring?
Many kitchens follow common sizing assumptions (Lowe’s measurement guide uses 26 inches as a standard depth, including overhang), but you should measure your actual cabinets and room constraints. If you’re changing the overhang for seating, that’s where support planning becomes critical.