What makes a bathroom renovation in Brooklyn both challenging and rewarding?
Perhaps it’s the character of historic brownstones, the limited space in city apartments, or the maze of permits and building codes that every New Yorker knows too well. Or maybe it’s the simple desire to turn an ordinary, overused room into a space that feels fresh, modern, and truly yours.
If you live in Brooklyn, you already understand that renovating a bathroom involves more than replacing tiles or fixtures. It’s about creating a design that blends function with style while navigating city regulations and building expectations.
In this guide, I’ll share some of the most practical and reliable bathroom renovation tips for Brooklyn homeowners. You’ll learn how to plan your budget strategically, manage NYC permits, and coordinate with co-op or condo boards smoothly. We’ll also explore clever small-space solutions, durable material options, and lighting choices that can completely transform the look and feel of your bathroom.
The Top 13 Best Bathroom Renovation Tips
Renovating your bathroom is an exciting project, but it can also feel overwhelming—especially in a place like New York City. To help you out, we’ve compiled some of the best tips for a successful bathroom renovation. These tips cover everything from navigating NYC permits and co-op board approvals to budgeting smartly and hiring the right contractor. By keeping these pointers in mind, you can save money, avoid headaches, and enjoy a smoother renovation journey.
Plan for NYC Permits and Building Regulations
First off, plan for NYC permits and building regulations from the very beginning. New York City has some of the strictest building codes in the country, which means if your renovation is more than a simple cosmetic update, you’ll likely need to obtain permits. In fact, most bathroom remodeling projects in NYC require a Department of Buildings work permit. For any substantial changes (like moving plumbing lines or adding new electrical outlets), you’ll need to have a licensed Professional Engineer (P.E.) or Registered Architect (R.A.) file an Alteration Type II permit application with the city.
It’s crucial to factor the permit process into your timeline—approvals can take anywhere from a few days to several weeks, so build that waiting period into your plan. And whatever you do, don’t be tempted to skip the permits. Doing construction work without the proper NYC permits is illegal and can lead to hefty fines or even having to undo the work you’ve done. It’s far better to do it right the first time: follow the regulations, get the necessary approvals, and you’ll avoid costly surprises down the road.
Secure Co-op or Condo Board Approval and Follow Building Rules
If you live in a co-op or condo, securing board approval is a critical early step. Each building has its own rules, so you’ll need to follow your building’s guidelines to the letter. Here are some key things to do to get board approval and stay in good standing with your building:
- Review your alteration agreement or renovation policy: Before you start anything, ask management for your building’s alteration agreement (or renovation guidelines). This document lays out all the do’s and don’ts for renovations—including permitted work hours, what kind of work is allowed, any permits or paperwork required, and insurance or contractor qualifications.
- Submit a detailed proposal to the board: Boards want to see that you’ve thought everything through. Prepare a thorough renovation proposal package that includes a detailed scope of work, any necessary architectural drawings (especially if you’re changing the layout), plans for plumbing and electrical work, a list of materials/fixtures you plan to use, a projected timeline, and proof of your contractor’s license and insurance.
- Obtain the required permits and documents: Your co-op or condo board will likely require evidence that you’ve secured all needed city permits and approvals. If your project involves moving plumbing fixtures, altering electrical lines, or removing walls, you (or your contractor) should file for the proper NYC DOB permits before work begins.
- Respect building rules during construction: Once you have approval, it’s important to be a good neighbor. Follow all the construction rules set by your building. Typically, work can only be done during certain hours (often weekdays, 9 AM to 5 PM), and you may need to reserve the elevator for moving materials. Protect common areas (like hallways and floors) with proper floor coverings, and control dust and noise as much as possible.
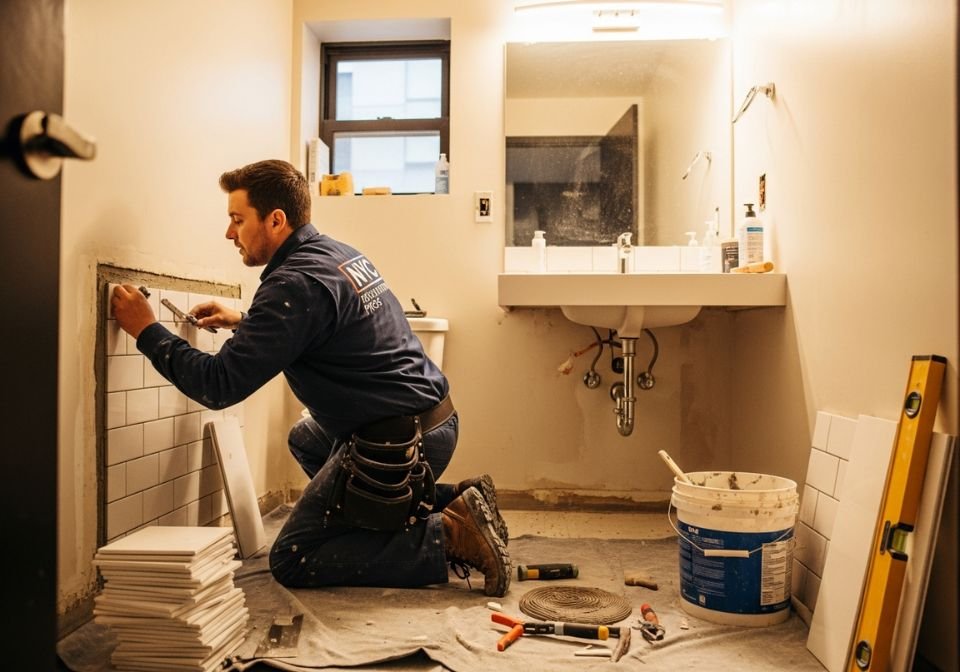
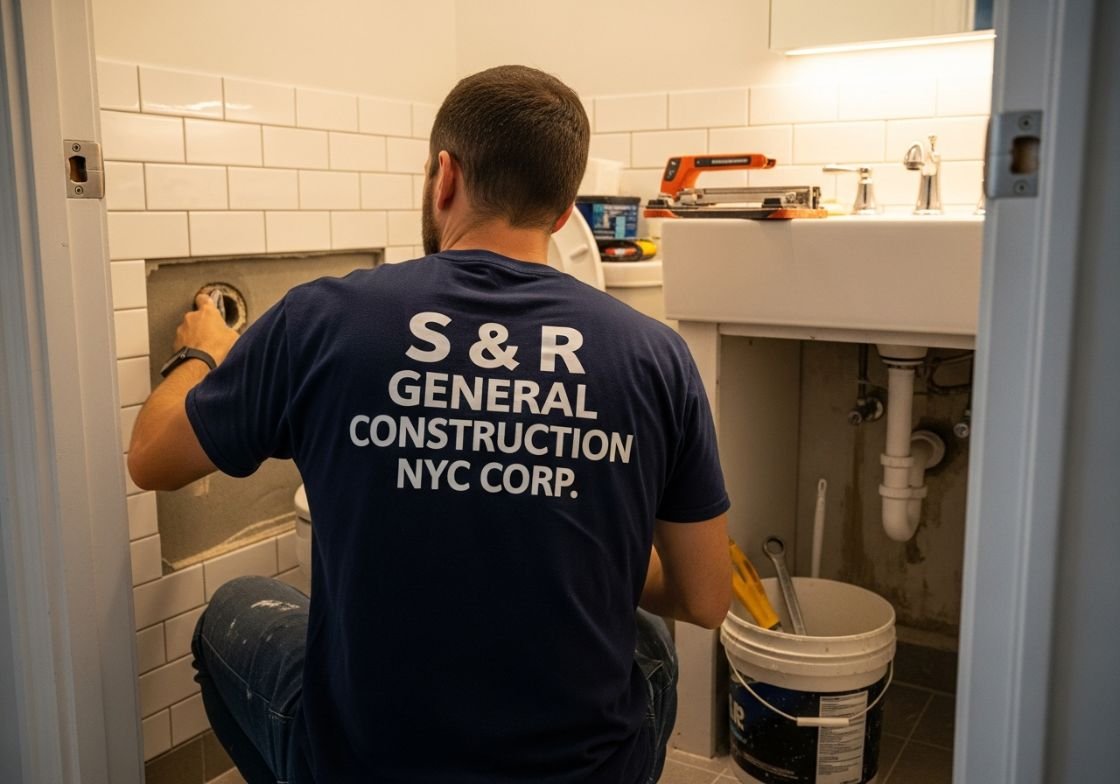
Hire Licensed Brooklyn Contractors with Experience
One of the most important decisions you’ll make is choosing the right contractor. You want someone who is not only skilled at bathroom remodels, but also familiar with the ins and outs of working in Brooklyn/NYC. Here are some tips for hiring a licensed contractor with solid experience:
- Check for proper licensing and insurance: Only hire contractors who are fully licensed and insured to work in NYC. A legitimate NYC Home Improvement Contractor license is required for any home remodeling work, so ask for their license number and verify it through the NYC Department of Consumer and Worker Protection’s online lookup tool.
- Seek out local experience and expertise: Brooklyn has many older buildings with quirks (think ancient plumbing, uneven floors, tight stairwells)—so look for a contractor who has plenty of NYC or Brooklyn-specific experience. An experienced local pro will know how to handle building regulations, permits, and any surprise issues that might pop up in a 100-year-old brownstone.
- Review their past work and references: A reputable contractor should have a portfolio of past bathroom renovations and a list of client references or reviews. Take a look at photos of their completed projects to make sure their quality meets your standards.
- Compare detailed quotes from multiple contractors: Don’t settle for the first quote you get. It’s wise to meet with a few contractors, discuss your plans, and get written estimates from each. Make sure each quote details the scope of work, materials, timeline, and payment schedule so you can compare them fairly.
- Choose a proven, responsive team: Our team at SR General Construction NYC is fully licensed and has over 15 years of experience in the industry. We’ve completed more than 750 projects for 500+ satisfied clients, so we bring a wealth of know-how to every renovation. We also offer 24/7 support, which means we’re available around the clock to answer your questions and address any issues during the project.
Allow extra time for the renovation timeline.
When planning your renovation, always allow extra time in your schedule. A bathroom remodel often takes longer than people initially expect, especially in NYC. On average, a full bathroom renovation can take about 2 to 4 months from start to finish. The construction phase alone is usually around 4 to 8 weeks of that timeline, but there’s a lot more that happens before and after the actual construction. Obtaining permits and co-op/condo board approvals can add a few weeks right at the start.
If you think a project will be done in 6 weeks, it’s safer to budget for 8 or 9 weeks, just in case. Remember, keeping the project simple will speed it up.
Retain the Existing Layout to Save Money
A smart way to save money on your bathroom remodel is to retain the existing layout whenever possible. In simple terms, this means you keep your sink, toilet, and shower/bathtub in the same locations as they are now, instead of moving them around.
In contrast, if you decide to change the layout of your bathroom, your project turns into a more complex (and costly) gut renovation. Moving a toilet or shower to a new spot means running new drain lines, vent lines, and water supply lines through the walls and floors. It often means opening up additional walls or even moving structural elements, which then requires hiring an architect and obtaining additional permits to meet NYC building codes.
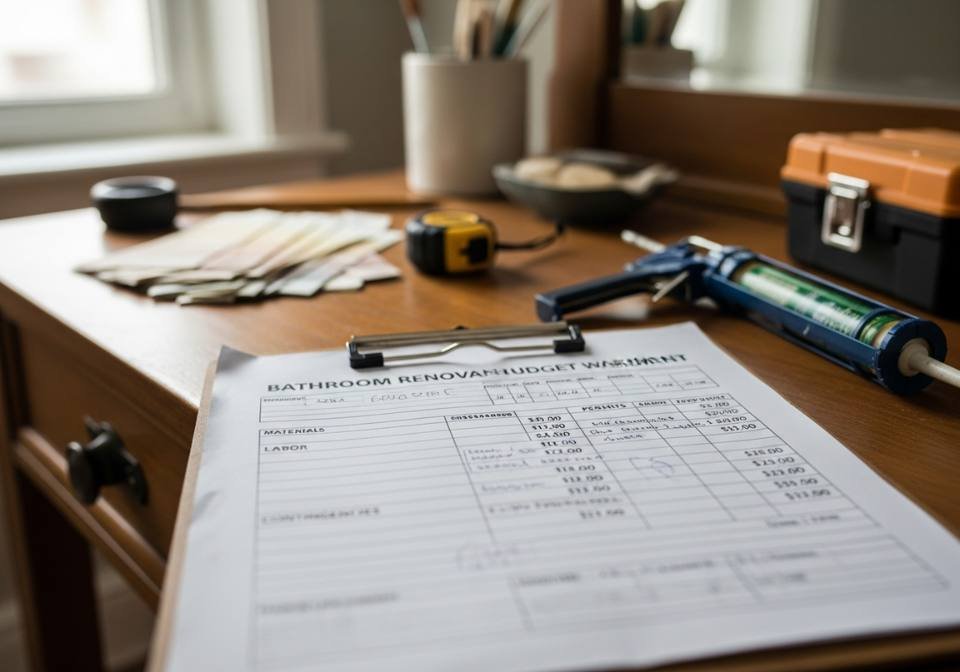
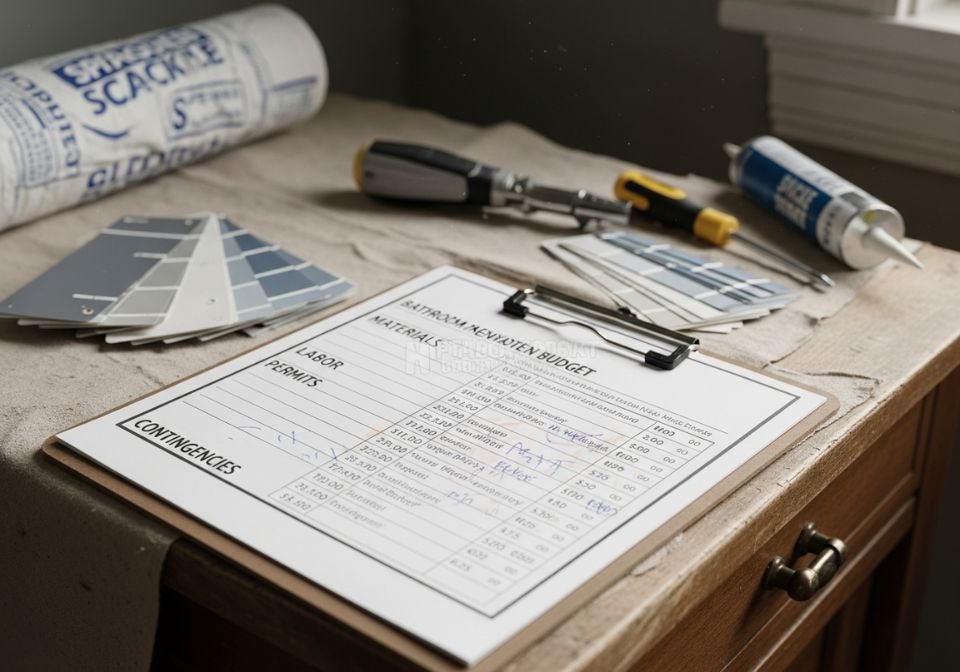
Set Budget for Brooklyn Bathroom Renovation Costs
When it comes to budgeting for a Brooklyn bathroom renovation, do your homework and set a realistic budget that fits local prices. Renovating in NYC isn’t cheap, so you’ll want to know the ballpark costs up front. In Brooklyn, a small bathroom remodel (think a simple 5′ x 7′ bathroom) might cost around $10,000 to $15,000 on the low end. For a mid-sized bathroom with mid-range finishes, you could be looking at roughly $20,000 to $30,000. And if you have a large bathroom or you’re going high-end, the budget can climb to $30,000–$50,000 or more.
How to Create a Budget for Brooklyn Bathroom Renovation Costs
- To design your budget wisely, make a list of all expected costs: materials, labor, permits, and even building fees if your co-op/condo requires any.
- It’s a good idea to get estimates from a few contractors to see how they price the project and ensure your budget is on target.
- And importantly, build in a buffer for unexpected costs.
- Old buildings can hide surprises (like water damage or outdated wiring behind the walls), so experts recommend setting aside about 10–20% of your budget as a contingency fund for those “just in case” scenarios
Update Outdated Plumbing and Electrical Systems
You might not see them every day, but your home’s pipes and wires are its unseen workhorses—and if they’re old, they can spell trouble. Aging pipes often corrode or burst and cause leaks or water damage, and obsolete wiring can overload and pose fire risks if left unaddressed. Upgrading to modern plumbing materials (like PVC or copper) and a new electrical panel eliminates many of these issues and boosts efficiency.
It means fewer sudden leaks, no more flickering lights, and a system that can handle your family’s needs. In fact, older houses with original systems tend to have far more problems (and insurance claims) than ones that have been updated. Bringing your plumbing and electrical up to date gives you peace of mind and keeps your home safe, dry, and ready for the future.
Test for Risky Materials (Asbestos and Lead)
When remodeling an older home, you owe it to yourself to check for hidden dangers in the walls. Two big ones to watch out for are
- Asbestos: If your house was built before the 1980s, there’s a good chance asbestos is lurking in things like insulation, old floor tiles, or popcorn ceilings. When asbestos-containing materials are disturbed, they can release microscopic fibers that cause serious lung diseases, including cancer, years down the line. You should always test for asbestos before any demolition so you don’t accidentally expose your family—it’s the only way to know if professional removal is needed to keep everyone safe.
- Lead: Homes from before 1978 often have lead-based paint on walls, trim, or old windows, and some even have lead pipes or solder in the plumbing. Lead is highly toxic—dust from chipping lead paint or water from lead pipes can lead to poisoning, especially in kids. That’s why you want to test for lead and identify any lead paint or plumbing. Knowing it’s there lets you take proper precautions or hire certified pros to remove or seal it, keeping your home healthy and lead-safe.
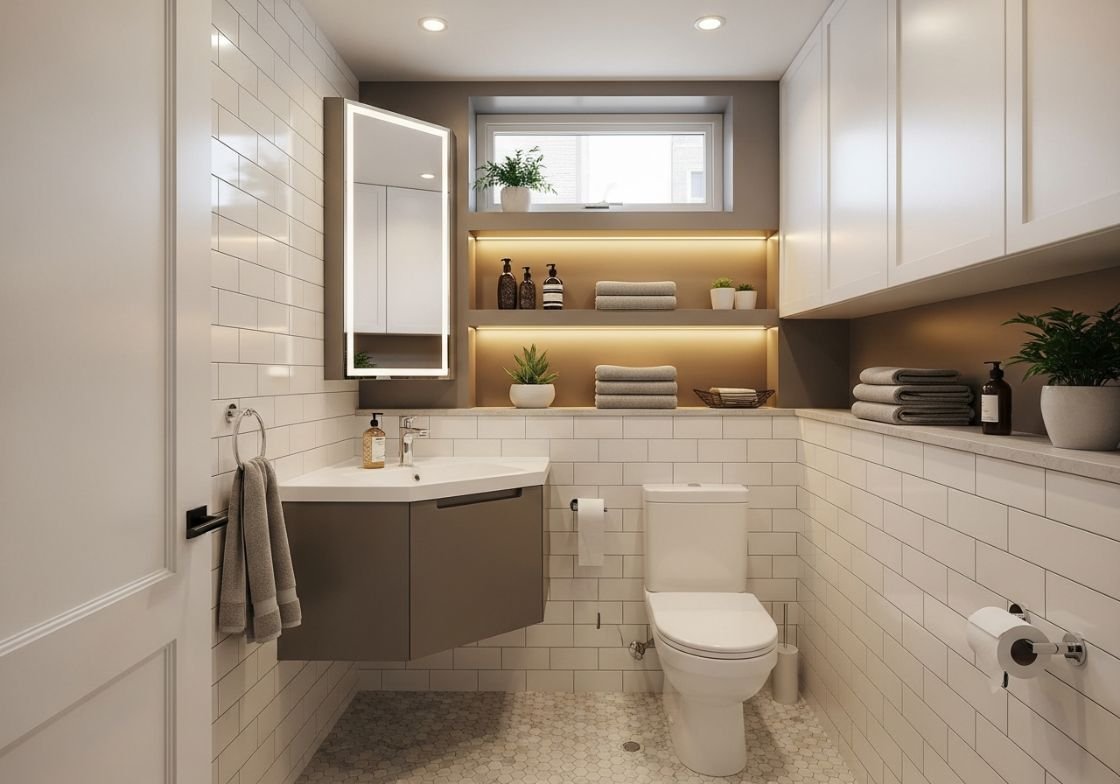
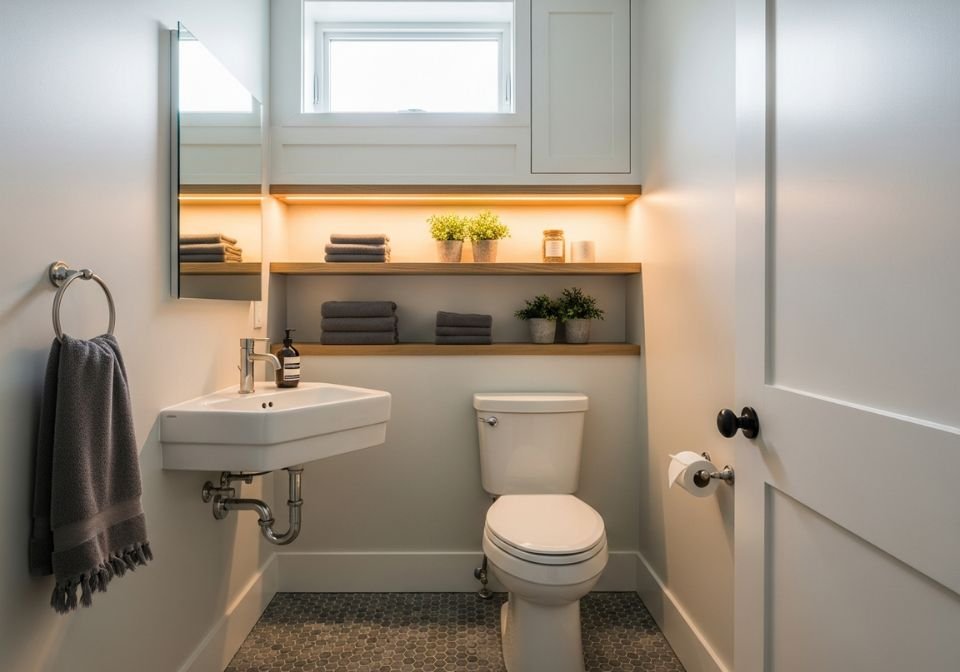
Design for Small Spaces: Maximize Every Inch
Got a tiny bathroom or powder room? Don’t worry—with a smart design, you can make that small space feel just as comfortable and efficient as a larger one. The key is to plan carefully and use every nook and cranny. Think vertical: you can add shelving or cabinets up high to use wall space instead of crowding the floor.
Opt for space-saving fixtures too, like a corner sink or a floating vanity that keeps the floor clear underneath. Every inch counts, so maybe tuck a built-in shelf between studs or slide a narrow storage caddy into an unused gap. By embracing multi-functional ideas (and a bit of creativity), you’ll turn your compact area into a stylish, practical space that feels surprisingly open and uncluttered.
Increase Storage with Creative Solutions
Not enough storage? Let’s fix that by sneaking in smart storage wherever we can. Here are some creative solutions to boost your bathroom’s stash space:
- Put Up Floating Shelves: Empty wall space is wasted space, so consider installing floating shelves for extra towels, toiletries, or decor. They keep your items tidy without adding bulk, since they don’t protrude as much as cabinets. You can stagger a couple of shelves above the toilet or beside the mirror—it uses vertical space and makes use of areas that would otherwise stay bare.
- Use an Over-the-Toilet Organizer: The area above your toilet is prime real estate for storage. You can add a freestanding shelving unit or wall cabinet over the toilet tank to hold toilet paper, candles, or baskets of supplies. It’s a clever way to utilize an awkward spot, and it keeps everyday essentials within arm’s reach while freeing up your countertop.
- Add a Slim Rolling Cart: A narrow, rolling storage cart can be a game-changer in a small bathroom. You can park it against a wall or tuck it beside the vanity—its slim design fits almost anywhere and can hold a surprising amount of stuff. Store things like extra shampoo, cleaning products, or towels on the cart. The best part? You can roll it out of the way whenever you need, making it a flexible storage solution for tight spaces.
- Swap in a Mirrored Medicine Cabinet: Instead of a plain mirror, choose a medicine cabinet with a mirrored door. It provides hidden storage for all your toiletries (from toothpaste to prescriptions) while still functioning as your bathroom mirror. This two-in-one upgrade means your countertop stays clear and clutter-free. Plus, having everyday items tucked away behind the mirror makes your bathroom look cleaner and more open.
- Hang Hooks and Baskets: Don’t forget the back of the door and open wall sections – they’re perfect for added hooks or hanging organizers. For example, mount a row of hooks on the door to hang towels, robes, or a caddy of hair tools. You can even hang small baskets on the hooks to hold toiletries, effectively creating new “shelves” that use zero floor space.
Choose light colors and large mirrors to visually expand the space.
Making a small bathroom look bigger can be as simple as a paint job and a good mirror. Let’s talk about why embracing bright colors and reflective surfaces can help your cozy bath feel more open.
- Bright, Airy Colors Open Things Up: Light colors reflect more light than dark ones, instantly making a cramped room feel brighter and more spacious. Painting your walls and ceiling a soft white or pastel shade means less shadow and more bounce to any light in the room. The result? Your bathroom feels less like a cave and more like a welcoming, open space.
- Unified Colors Create Continuity: Sticking to one light color scheme throughout the bathroom tricks the eye into seeing a larger, continuous area. When the walls, ceiling, and even vanity are in a similar pale tone, there are fewer visual breaks, so the room appears more seamless and roomy.
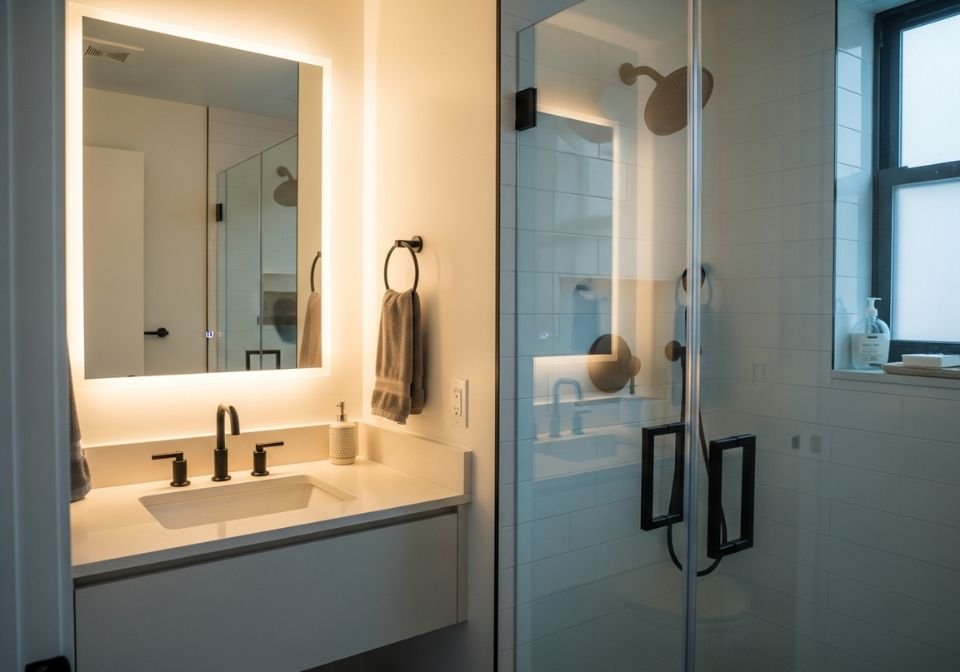
- Big Mirrors Double the Sense of Space: Ever notice how a large mirror can make a tiny room feel much larger? Mirrors essentially “stretch” space by reproducing it in reflection—for example, mirroring an entire wall can make a narrow bathroom seem wider. By installing a big mirror (or even a mirrored cabinet), you create the illusion of depth, as if the room continues further.
- Mirrors Amplify Light (Banish Gloomy Corners): In addition to adding depth, mirrors bounce light around the room. A well-placed mirror across from a window or light fixture will reflect that light into every corner, helping to erase shadows and brighten up the whole bathroom. This amplification of light makes the space feel open and cheerful—no more one dim end of the room.
Upgrade the Lighting for Function and Ambiance
Lighting sets the tone in your bathroom—and it helps you see what you’re doing. By upgrading from that one dim overhead light to a well-planned lighting scheme, you’ll make your bathroom safer, more useful, and a lot more mood-friendly.
- Clear Visibility for Daily Tasks: Good lighting makes all the difference when you’re getting ready. By installing brighter, focused lights around your mirror and elsewhere, you’ll be able to shave, do makeup, or insert contacts without squinting. No more mysterious shadows—upgraded lighting ensures you can see what you’re doing clearly, which also means a safer bathroom with less chance of slips or mistakes.
- Set a Relaxing or Energizing Mood: The right lighting lets you change the bathroom’s atmosphere to suit your needs. For instance, you might use a dimmer switch or warm LED bulbs to create a soft, spa-like glow for a relaxing evening soak. In the morning, you can switch to bright, white light that helps wake you up and start the day energized.
- Highlight Your Bathroom’s Best Features: Beyond function, lighting is a design tool. New fixtures like wall sconces or under-cabinet LED strips not only add brightness but also draw attention to the beautiful parts of your bathroom—that lovely tile backsplash or a stylish vanity. Accent lighting adds a layer of elegance and shows off these details, making the whole room feel more luxurious and inviting.
- Boost Efficiency and Convenience: Upgrading your lights can save you money and hassle in the long run. Modern LED lights use a fraction of the energy of old incandescent bulbs, so your electricity bills will thank you. They also last for years, meaning less time spent changing bulbs. You can even incorporate smart lighting features – imagine motion sensors that turn on a gentle night-light when you enter, or voice-controlled lights for convenience.
Select Durable, Water-Resistant Materials
Bathrooms take a beating from water and humidity, so let’s choose finishes that can handle it. Picking sturdy, water-safe materials means your remodel will look great and last longer with less worry.
- Porcelain or Ceramic Tile (Waterproof Workhorse): There’s a reason you see so much tile in bathrooms—quality porcelain or ceramic tiles are highly water-resistant, durable, and easy to clean. They won’t warp or peel when wet, and they stand up to heavy foot traffic and scrubbing.
- Quartz Countertops (Non-Porous & Tough): Engineered quartz is a stellar choice for vanity tops or other surfaces that get wet. It’s non-porous, so it won’t soak up water or stains—no ugly watermarks or mildew seeping in. Quartz is also very hard and scratch-resistant, meaning it can handle dropped bottles or hot hair tools without showing wear.
- Luxury Vinyl Flooring (Waterproof and Cozy): Vinyl has come a long way and is excellent for bathrooms. Modern luxury vinyl planks or tiles are 100% waterproof and resist mold, making them ideal for a wet environment. They’re also softer and warmer underfoot than ceramic tile. You can get vinyl that mimics wood or stone for a high-end look, but unlike wood, it won’t swell or rot. It’s budget-friendly, durable, and great for families (kids splashing out of the tub are no problem for this floor).
- Fiberglass or Acrylic Shower/Tub Surrounds: Prefabricated fiberglass or acrylic units are a smart material choice for your bathtub or shower enclosure. They’re built to be seamless and watertight, so you don’t have to worry about grout lines or leaks. These materials are non-porous and naturally resist mildew and staining. An acrylic tub surround, for example, will not chip like old porcelain enamel might, and it’s much easier to clean.
Ensure Proper Ventilation to Prevent Moisture Problems
Ever walk into a bathroom and feel like you’re in a swamp sauna with foggy mirrors and a musty smell? Proper ventilation fixes that. It’s not the most glamorous aspect of a remodel, but you’ll be glad you prioritized it.
- Stop Mold and Mildew in Their Tracks: A well-ventilated bathroom actively removes the excess moisture that mold and mildew love. By running an exhaust fan or opening a window to clear out steam after showers, you’ll dry out the surfaces and deprive mold of the damp environment it needs to grow. This not only protects your walls and grout from ugly mildew stains but also helps keep your indoor air healthier (no mold spores here!).
- Protect Your Walls and Fixtures: Constant humidity can quietly wreck your bathroom over time—paint starts peeling, wood cabinets swell or rot, and drywall can even crumble. Ventilation is your best defense against these headaches. It whisks away moisture before it can condense on surfaces, preventing water damage like warped trim or bubbling paint. Think of it as adding years of life to your finishes; you’ll spend less on repairs and keep your bathroom looking new longer by simply getting rid of the excess humidity.
- Improve Air Quality (Bye-bye, Musty Odors): Nobody likes a stale-smelling bathroom. Proper ventilation means fresher air by eliminating musty smells and even chemical odors from cleaners. An exhaust fan will pull out the stuffy, damp air and replace it with clean air, so you’re not left gagging on aerosol spray residue or that post-shower funk. This is especially important if anyone in your home has allergies or sensitivities.
- Make Your Bathroom More Comfortable: Ever step out of a hot shower and feel like you can’t breathe in the humid air? Good ventilation fixes that. It helps vent out the steam, so your bathroom doesn’t feel like a tropical rainforest. With a fan (or a cracked window), the room will cool down and dry out faster, which means no more fogged-up mirrors and less clammy, sticky feeling in the air.
Average Cost of Bathroom Renovation in Brooklyn, NYC
If you live in Brooklyn, expect higher-than-national costs. For a small “rip-and-replace” job, typical budgets fall around $10k–$15k. Standard full baths usually start around $18k and commonly land at $25k–$35k when you stay with stock fixtures and no layout moves. High-end work with custom tile, stone, and upgrades often runs $40k–$75k+. These ranges reflect 2025 NYC market guides and Brooklyn-specific write-ups.
Some pros are also quoted by square foot. In NYC, you’ll often hear $700–$1,200 per sq ft for bathrooms, due to labor, code compliance, and building constraints.
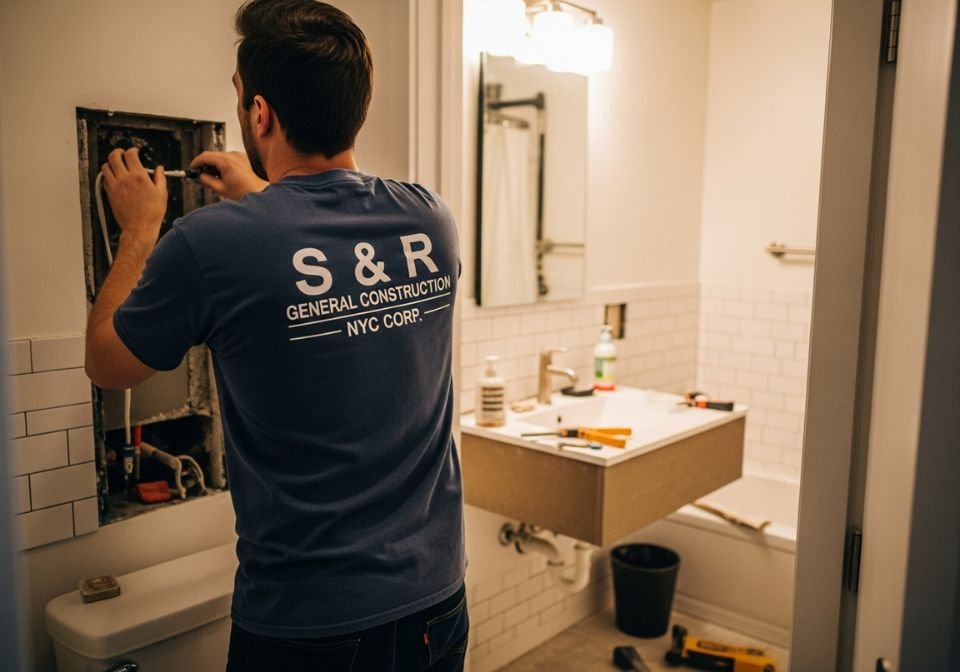
Don’t DIY Major Work – Trust the Professionals
In NYC, plumbing and electrical are licensed trades. Most electrical work must be done by an NYC-licensed master electrician with a permit and inspection. Plumbing beyond minor maintenance requires a licensed master plumber, and NYC Administrative Code §28-408.1 makes unlicensed plumbing unlawful.
The city also requires DCWP-licensed home improvement contractors for residential jobs over $200, and you can verify licenses online. Working without proper licensing or permits risks stop-work orders and fines. It can also derail future sales.
Why this matters to you:
- Safe, code-compliant work that passes inspections.
- Proper permits, filings, and board docs handled.
- Warranty, insurance, and NYC experience on your side.
A smart local choice: SR General Construction NYC—a fully licensed Brooklyn team with 15+ years in the city, 750+ projects, and 500+ satisfied clients, plus 24/7 support. If you want a compliant, predictable build, bring in a crew that lives this process daily.
Where to Find the Best Brooklyn Contractors
Are you looking for an expert contractor in Brooklyn, NYC? SR General Construction has you covered! Our business is located at 8807 Avenue B, Brooklyn, NY 11236, United States, in the Canarsie area.
Additionally, we (SR General Construction) offer services at Rockaway Parkway and Ralph Avenue, providing fast access to Flatlands, East Flatbush, Bergen Beach, Brownsville, and the Spring Creek section of East New York.
FAQ
1) How much does a standard bathroom renovation cost in Brooklyn?
For a full rip-and-replace, plan $18k–$35k depending on finishes and scope; high-end can exceed $40k–$75k+. Small baths sometimes cost $10k–$15k.
2) What drives up the most in NYC?
Labor rates, permits/approvals, and layout changes drive prices. Older buildings also add hidden plumbing/electrical fixes.
3) Do I need a permit to renovate a bathroom in Brooklyn?
Most construction needs DOB approval and permits. Some fixture swaps may be permit-exempt, but many still require a Licensed Master Plumber to perform the work.
4) Can I replace a vanity or toilet without a permit?
DOB lists “plumbing fixture replacement” among work that may not require a permit, but the work still must meet code and may require a Licensed Master Plumber. Always confirm scope before starting.
5) How long does a bathroom renovation take in NYC?
Construction often runs 4–10 weeks once work begins. Add time for design, filings, product lead times, and board approvals.
6) Do I need an asbestos check before the demo?
For most pre-1987 buildings, the DOB requires an asbestos assessment before permits; DEP forms (ACP-5/ACP-7) may apply.
7) Do I need to test for lead paint?
If your building is pre-1978, EPA’s RRP Rule applies when disturbing paint; NYC and NYS have added local requirements. Use lead-safe certified pros.