Have you ever wondered how a bathtub is actually installed, and whether you can do it yourself without making costly mistakes? Bathtub installation may look simple, but it’s a step-by-step process that depends on proper preparation, accurate measurements, and careful plumbing connections.
In this detailed guide, we’ll explain the complete bathtub installation process, from removing the old tub and preparing the space to setting the new bathtub, connecting the drain, and sealing everything properly.
What tools and materials do I need for a DIY bathtub installation?
Before you start, it helps to lay everything out so you’re not running to the store mid-project. The tools below cover removal, installation, drain/overflow, and sealing for both alcove and freestanding tubs.
- Safety & protection: work gloves, safety glasses, dust mask/respirator, knee pads, hearing protection, drop cloths/plastic sheeting
- Measuring & layout: tape measure, pencil/marker, carpenter’s level (2–4 ft), square
- Demo & removal: utility knife (for caulk), pry bar, hammer, reciprocating saw (optional but helpful), buckets/towels, shop-vac
- Fastening & framing: drill/driver, bits, screws, stud finder, 2×4 (ledger/stringer support for many alcove tubs), shims
- Plumbing hand tools: adjustable wrench, channel-lock pliers, screwdriver set, tub drain wrench/removal tool
- Drain/overflow parts: tub drain & overflow kit (waste-and-overflow), new trap/adapter if needed
- Sealing & waterproofing: 100% silicone bathroom caulk, caulk gun, plumber’s putty (if the drain kit calls for it), PTFE (Teflon) tape
- Finishing (if you’re rebuilding the surround): cement backer board for wet areas, backer-board screws, waterproofing membrane/tape (as needed)
What are common mistakes to avoid when installing or replacing a bathtub?
Bathtub installs usually go wrong in the same few places: fit, level, support, sealing, and testing. If you avoid these mistakes, you’ll save yourself from leaks and frustrating redo work.
- Skipping rough-in checks and measurements: If you don’t confirm the space and rough-in plumbing alignment, the tub might not sit correctly, or the drain won’t line up. Measure the alcove (or freestanding footprint) and confirm drain location before you buy or set the tub.
- Not turning off the water completely: It sounds obvious, but it’s a real cause of surprise water damage. Shut off the correct valve(s) and test that water is fully off before disconnecting anything.
- Installing the tub on an unlevel subfloor: An unlevel tub can cause water to pool and stress the unit over time. Use a level before fastening, then shim (or correct the floor) until the tub is balanced.
- Poor support under the tub base: If the tub flexes or moves, the seals can fail, leading to squeaks, cracks, or slow leaks. Follow the manufacturer’s support method (some require a stringer/ledger, others require a base material) and make sure the tub feels solid.
- Rushing the drain and overflow connection: Most leak problems start right here: misaligned parts, messy putty/gaskets, or loose connections. Assemble carefully, tighten evenly (not aggressively), and keep everything clean so the seal seats properly.
- Skipping leak testing before closing the walls: Don’t assume it’s fine to test it. Run water, fill the tub partway, drain it, and check every connection before you put back tile or panels.
- Using the wrong wallboard behind tile/surround: Regular drywall in a wet zone can lead to swelling and mold problems. Use an approved wet-area wallboard/backer for shower/tub surrounds if you’re rebuilding that section.
- Forgetting to seal the tub-to-wall joint properly: Water finds tiny gaps, especially where the tub meets the wall. A clean silicone seal helps stop moisture from sneaking behind the surround and damaging framing.
Pre-Planning and Preparation for Bathtub
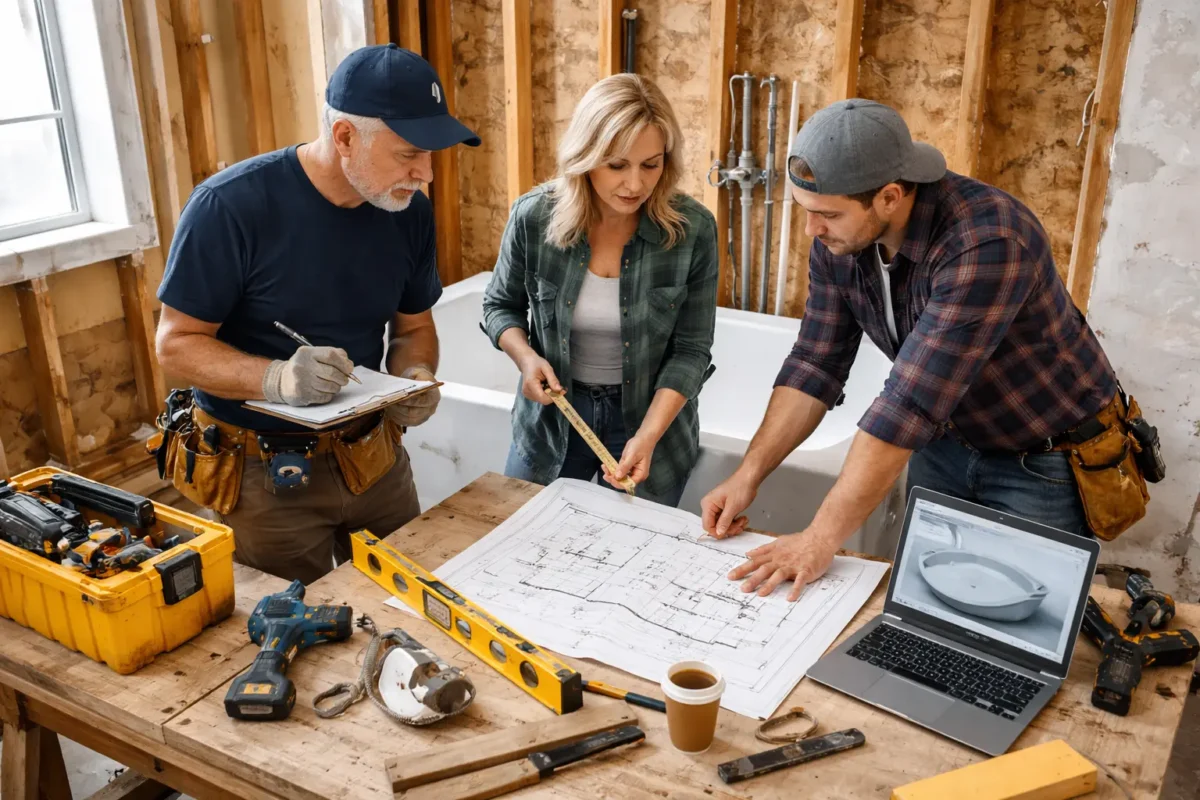
A smooth install starts before you touch a wrench. When you plan the tub type, plumbing alignment, and downtime upfront, your DIY work feels way less stressful.
- Measure your space and confirm the tub type (alcove or freestanding). For alcove tubs, measure the wall-to-wall length and depth to avoid a bad fit. For freestanding tubs, plan the footprint and the clear space around it so you can clean and move comfortably.
- Check plumbing rough-in and drain alignment early: Your drain and overflow have to meet the home’s plumbing in the right spot, or you’ll fight the install. If anything looks off, fix the rough-in plan before the new tub arrives.
- Plan a safe shutoff and protect the bathroom: Turn off the water supply and set up drop cloths and surface protection to prevent damage to floors or finishes. This is also a good time to look for signs of old leaks before you cover things up again.
- Inspect the subfloor and wall framing (and be honest about repairs): If the old tub leaked, you may find soft subfloor or damaged studs that must be repaired first. A solid, level base keeps the new tub stable and drains correctly.
- Decide your surround plan (tile, panels, or kit): Your tub install, and your wall system work together especially at the flange and waterproofing. If you’re tiling, choose an approved wet-area backer system and plan your waterproofing steps.
- Know when NYC rules push you to a licensed pro: If you’re changing plumbing lines (not just swapping a tub), NYC DOB requires plumbing work to be filed for permits by a licensed plumber (or PE/RA as applicable) before work begins. When in doubt, confirm the scope before you open walls.
- Set expectations for time and access: Tub replacement can take longer than you think, so plan for a backup shower option. Also, clear a path for getting the new tub into the bathroom without dinging walls or railings.
Step-by-Step Process of Bathtub Installation
Bathtub installation is basically: remove the old tub, prep the space, set and level the new tub, connect the drain/overflow, then seal and test everything. For alcove tubs, you’ll usually add wall support (like a ledger/stringer) and fasten the flange to studs. For freestanding tubs, you’ll focus more on floor stability, precise drain alignment, and keeping the tub perfectly level. The job isn’t “done” until you’ve tested for leaks and sealed the wet edges.
Choosing the Right Bathtub (Measurements, Alcove vs. Freestanding)
- Measure the alcove opening (length, depth, height clearance) so the tub fits end-to-end without forcing it.
- Confirm the drain side (left-hand vs right-hand) for alcove tubs so your plumbing lines up.
- Decide between an alcove (3-wall) vs. a freestanding based on your space. Freestanding tubs usually need extra room around them.
- Check the tub material and weight (cast iron vs. acrylic/fiberglass), as they affect handling and floor support.
- Review the manufacturer’s rough-in/installation requirements before buying, especially for drain/overflow style and support methods.
- For freestanding tubs, plan your plumbing visibility and whether you need a floor-mounted tub filler and matching supply setup.
Removing and Disposing of the Old Bathtub
- Shut off the water, then remove the tub trim (spout/handle/overflow cover) and cut the caulk line around the tub edges.
- Open the wall area enough to access the fasteners and the tub flange (tile/panels may need to be removed).
- Disconnect the drain and overflow (a drain wrench/removal tool helps), then free the tub from screws/nails holding the flange.
- With help, lift the tub out carefully (cast iron is extremely heavy; plan manpower and safe handling).
- For Brooklyn/NYC homeowners, a bathtub can qualify as a large/bulk item. DSNY offers free curbside large-item removal, and you can set out up to 6 items per collection day (metal items are handled under recycling rules).
- If you’re unsure what your building allows (especially in multi-unit buildings), check house rules and disposal instructions before demo day.
Repairing and Preparing the Bathtub Installation Area
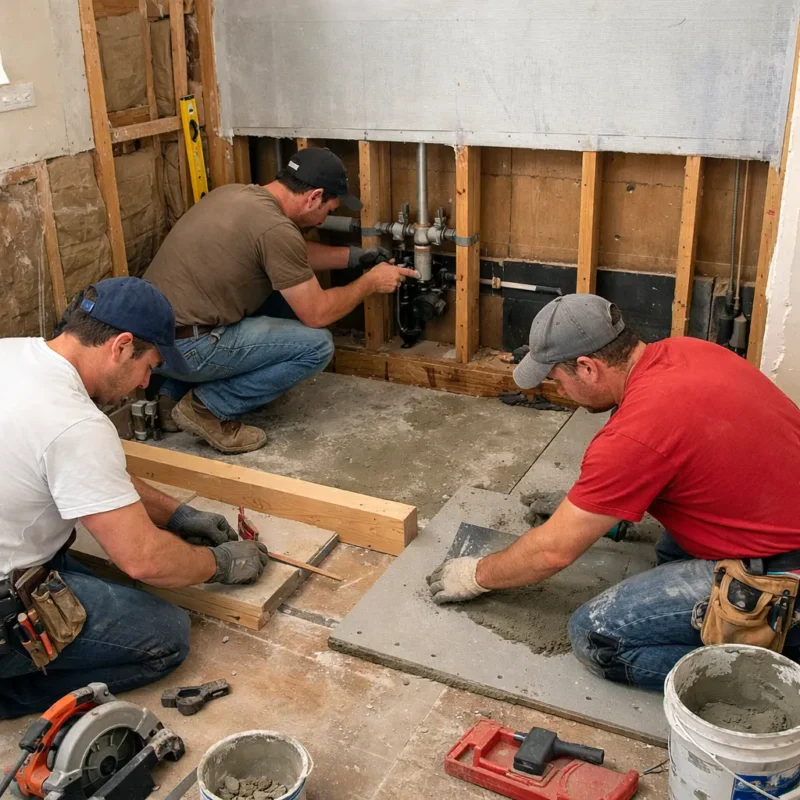
Before you set a new tub, you want the space under it to be solid, flat, and ready to hold weight. A little prep here saves you from a wobbly tub, bad drainage, and leaks later.
- Clear the area down to framing so you can see the subfloor, studs, and plumbing.
- Inspect the subfloor for soft spots, rot, or water damage, and replace any weak sections before you move on.
- Check that the floor is level where the tub will sit; correct high/low spots so the tub won’t rock and water will drain the right way.
- Confirm the wall framing is plumb, square, and properly dimensioned for the tub you’re installing (this matters a lot for alcove tubs).
- Verify the drain location matches the tub’s outlet (don’t assume the new tub lines up with the old one).
- Plan access: make sure you can reach the drain/overflow connections before you close any walls.
- If the tub manufacturer requires base support (feet, bedding, etc.), follow that rule; many manuals warn against supporting a tub by its rim.
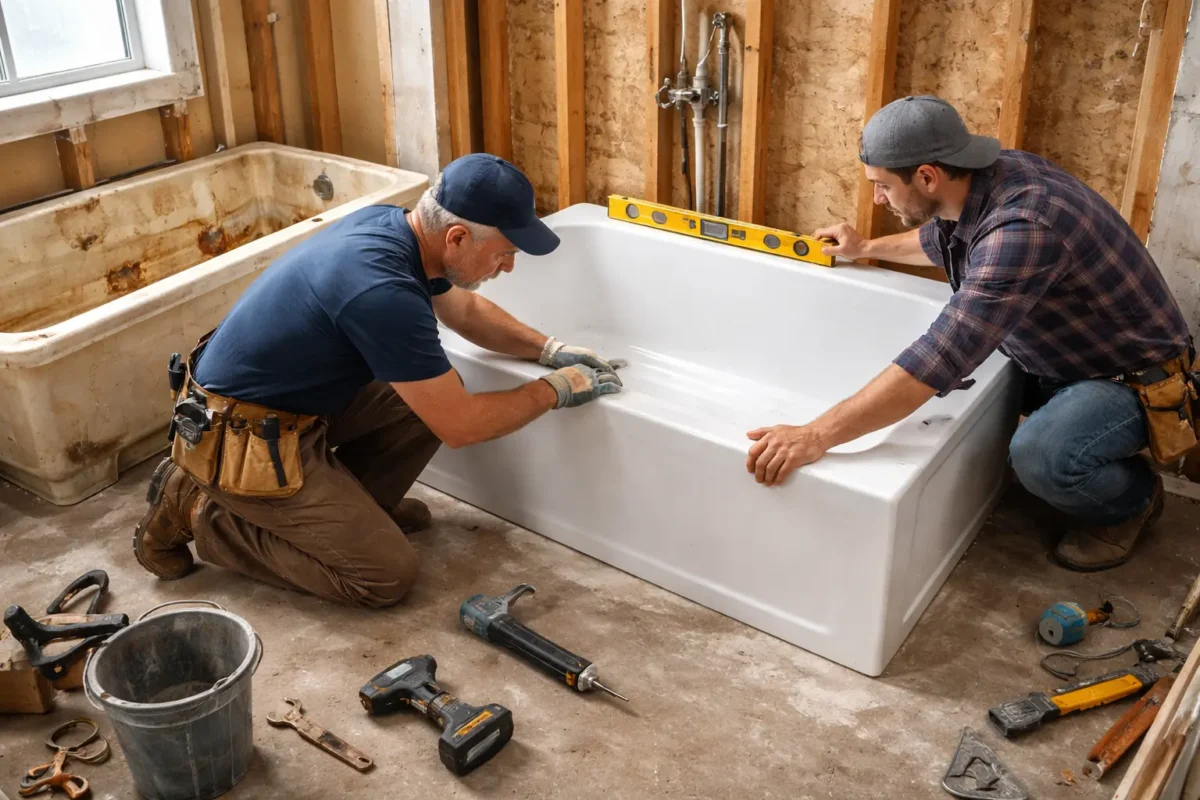
Installing an Alcove Bathtub (Built-In Tub Installation)
An alcove tub needs a snug fit, a level base, and solid wall support to prevent shifting over time. Take it slow and dry-fit as you go; you’ll feel the difference when you step in later.
- Confirm the alcove framing is plumb, square, and sized correctly for your tub.
- Dry-fit the tub to confirm the drain side and rough-in alignment before fastening anything.
- Install the required ledger/stringer board (if your tub calls for one) and keep it perfectly level.
- Carefully move the tub into place—don’t support or lift it by the rim; support it as the manufacturer specifies.
- Check level front-to-back and side-to-side; use shims under the tub if needed until it sits level and stable.
- Fasten the tiling flange to studs using the method in your instructions (many guides recommend screws with washers and pre-drilling to avoid cracking).
- Double-check the tub is supported by the floor/feet/base, not just the flange or ledger.
- Only after the tub is set and secured, move on to the drain/overflow connection and leak testing.
Installing a Freestanding Bathtub (Floor-Mounted Tub Installation)
A freestanding tub looks simple, but it demands precision because it isn’t anchored to three walls like an alcove tub. Your big goals are a level finished floor, correct drain alignment, and stable placement.
- Make sure the tub can actually fit through doorways. Many freestanding tubs are heavy and awkward, so plan the path in advance.
- Install the tub on an adequately supported, level finished floor (this is non-negotiable for freestanding installs).
- Confirm the drain location corresponds to the tub outlet before you set the tub down.
- If the tub has adjustable feet, set the tub roughly in place, then adjust until it’s level in both directions.
- Leave (or create) access to the plumbing connections so future repairs don’t require tearing up the floor.
- Follow the manufacturer’s rules for fillers: many freestanding tubs require a floor- or ceiling-mounted bath filler.
- Once level and aligned, connect the drain/overflow, test for leaks, then finish any final positioning and sealing required by your tub’s instructions.
Connecting the Drain and Overflow Assembly
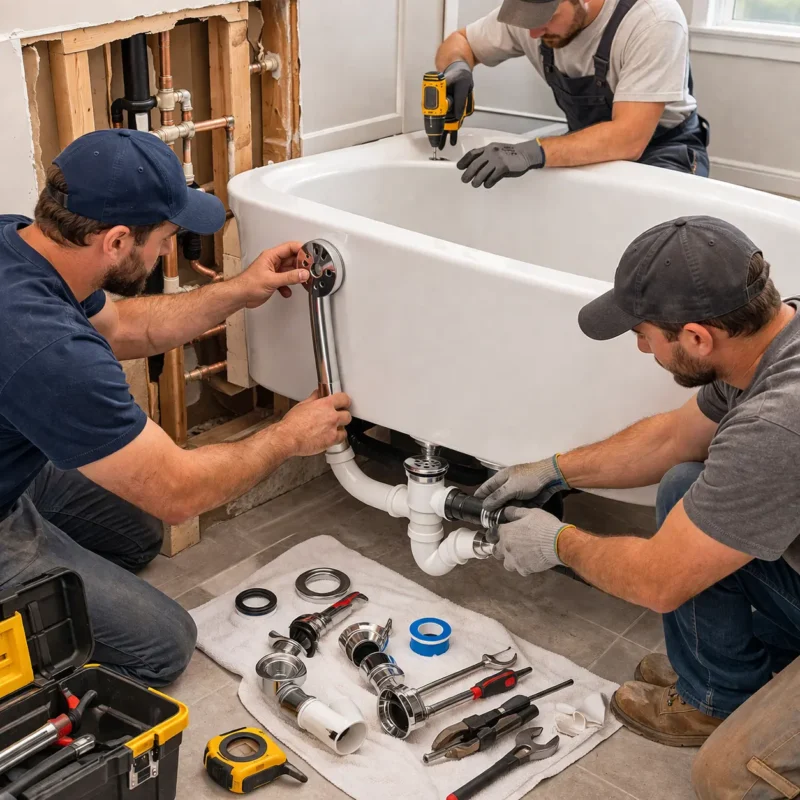
This is the “don’t rush it” part; most tub leaks start at the drain or overflow. Follow the instructions that came with your specific kit, because putty vs. silicone and gasket order can vary.
- Lay out the full waste-and-overflow kit and confirm you have all parts before assembly.
- Apply the correct sealant to the underside of the drain flange (many kits allow silicone or putty, but some warn against using plumber’s putty on ABS parts—follow the kit instructions).
- Press the drain flange into the tub’s drain opening, then hand-tighten the drain elbow/shoe from underneath (align the outlet as directed in the instructions).
- Fit the overflow gasket to the overflow elbow, place it at the tub’s overflow opening, and fasten the overflow plate to compress the gasket evenly.
- Cut/fit the waste and overflow pipes to length (if required), then assemble the connections exactly in the order shown.
- Connect the tub’s waste assembly to the house drain (usually via the trap connection), keeping everything aligned without forcing fittings.
- Tighten per instructions (don’t over-torque), wipe away excess sealant/putty, then run a full leak test (fill, drain, and inspect).
Sealing and Waterproofing the Tub Surround
If you want a long-lasting tub surround, think in layers: waterproof behind the tile, then seal the visible joints. Tile and grout aren’t waterproof on their own, so the system behind them matters.
- Install your tile backer so it sits about 1/4 inch above the tub lip, rather than burying it in the flange area.
- Set the bottom row of tile so it sits about 1/8 inch above the tub, leaving room for flexible sealant.
- Use a true waterproofing system for the surround (e.g., bonded waterproof membranes designed for tub surrounds) rather than relying solely on cement board.
- Waterproof at least up to the showerhead height for tub/shower combos (many systems specify this as the minimum).
- After tile and grout cure, seal the tub-to-tile joint and corners with 100% silicone (use flexible sealant at changes of plane, not grout).
Finishing the Surround Walls and Tiles
Once your tub is set and your plumbing checks out, the surround keeps water from seeping into the walls. Think of this stage as building a clean “water management system,” not just making it look pretty.
- Install a proper tile backer (not regular drywall) where the surround will go, and fasten it securely to studs.
- Treat seams correctly (tape/compound or system-approved method) so the wall stays stiff and doesn’t crack tile later.
- Add a real waterproofing layer for the surround (sheet or liquid system), because tile and grout aren’t inherently waterproof.
- Dry-layout your tile so cuts look balanced, and your rows stay level (this saves you from “tiny slivers” at the end).
- Set tile with the right mortar/thinset for your tile and substrate, using spacers for even joints.
- Grout the tile joints after the tile sets, then clean off grout haze once it firms up.
- At corners and where tile meets the tub, finish with flexible silicone (movement joints/change-of-plane), not rigid grout; this area moves from settling, temperature, and tub flex.
- Let the caulk fully cure before heavy water use (most bathroom caulk guidance recommends at least a day).
Testing the New Bathtub for Leaks and Proper Function
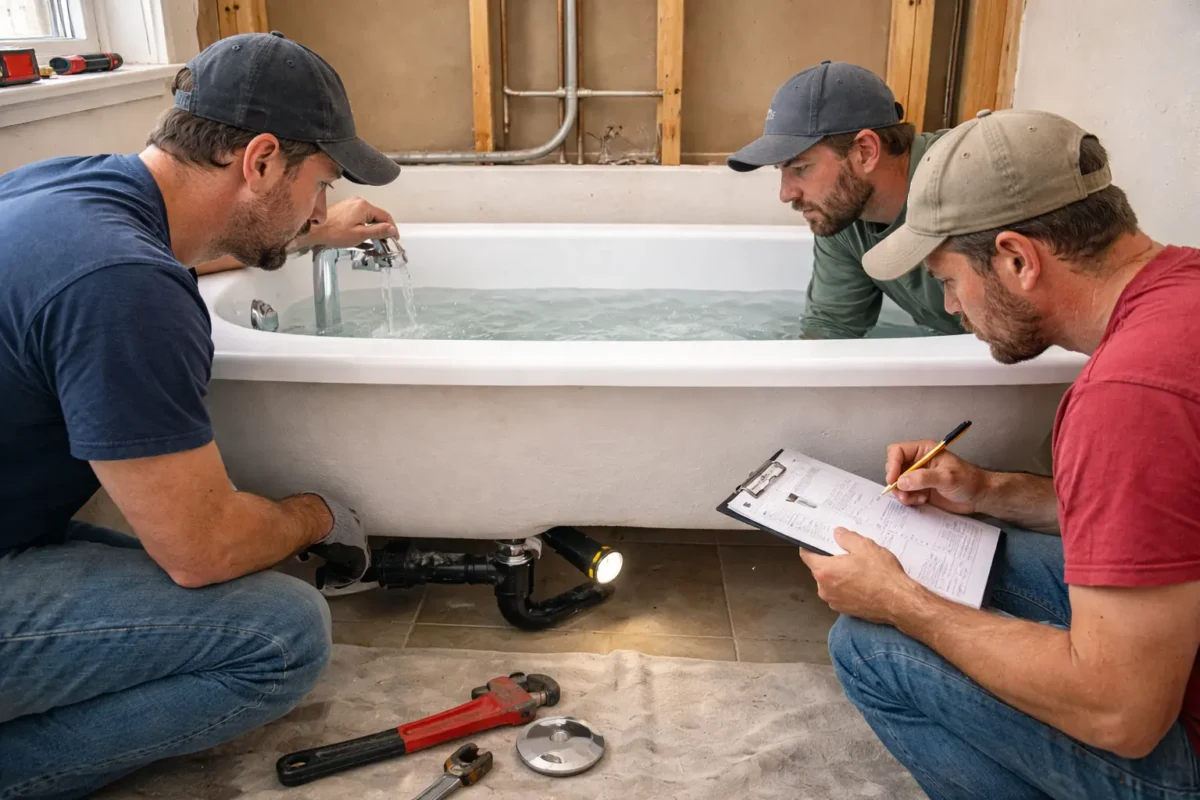
This is the part where you save yourself from the nightmare of “everything looked fine… until the ceiling downstairs stained.” You want to test the tub before you close walls or finish trim, so you can actually see what’s happening.
- Keep the access area open (access panel, back side wall, or ceiling below) so you can watch the plumbing during testing.
- Turn the water on and run both hot and cold to confirm a steady flow and no leaks at any shutoff or fixture connections.
- Fill the tub and visually check around the drain flange and overflow plate for seepage.
- Test the overflow on purpose: run water until it enters the overflow, since overflow gaskets and tubes are common leak points.
- Drain the tub while watching underneath—look for drips at the drain shoe, waste-and-overflow joints, and trap connection.
- Do a second quick test (fill a bit, then drain) after everything sits for 10–15 minutes. Slow leaks often show up after the first run.
- If you see moisture, stop and fix it now (many overflow leaks are caused by gasket misalignment or loose fittings).
Post-Installation Cleanup and Final Touches
After the hard work, a good cleanup makes the bathroom feel “finished,” and it helps you spot any small issues right away. I’d like to treat this as your final quality check.
- Remove all debris (old caulk bits, screws, tile scraps), then vacuum dust from corners and the tub apron area.
- Wipe the tub down with a non-abrasive cleaner to avoid scratching a new finish.
- Clean grout haze from tile once it’s ready (don’t wait too long; the haze can get stubborn).
- Reinstall trim pieces, the overflow cover, and any accessories (spout, shower arm, curtain rod, etc.).
- Seal the tub-to-tile joint neatly and smooth the bead so water can’t sit in gaps, then let it cure before full use.
- Dispose of the old tub the right way; NYC DSNY allows free curbside removal of “large items,” and you can set out up to 6 items per collection day (metal items go with recycling rules).
- Take a few photos of the plumbing through the access area for your records; you’ll thank yourself later if you ever troubleshoot a leak.
Do I need a permit to replace a bathtub in Brooklyn, NYC?
In NYC (including Brooklyn), the permit question depends on what you’re changing: if your bathtub swap involves altering, relocating, rearranging, or permanently removing piping, it must be supervised by a Licensed Master Plumber (LMP), and the LMP is the one who pulls the plumbing permits and arranges inspections.
NYC also explains that plumbing permits and filings are handled through DOB systems and require the proper licensed professional to file.
If you’re doing a straight “like-for-like” replacement (same tub footprint and same plumbing locations), your permit needs may be simpler, but your building rules (especially in multi-unit buildings) can still require approvals and licensed/insured pros.
And if you hire someone for general residential remodeling/repairs (non-plumbing scope) over $200, NYC requires a DCWP home improvement contractor license for that work.
How long does it take to install or replace a bathtub?
For a straightforward replacement where the new tub fits and plumbing lines up, it can take about a day. Angi lists a “completion time” of around 6 hours for the core install steps.
If you need to open walls, repair the subfloor, adjust plumbing, or redo the tile, plan for multiple days, as finishing work takes time.
Also, remember curing time: many bathroom caulks need at least 24 hours before heavy water use. DIY often takes longer than a pro simply because you move more slowly and double-check more.
Should I turn off the water supply before replacing a bathtub?
Yes, you should shut it off, even if you don’t plan to touch supply lines, because it’s easy to bump a live handle or loosen a connection during a demo.
If you have an access panel, turn off the hot and cold shutoff valves there; if you don’t, shut off the home’s main water valve.
Then open a faucet to relieve pressure and confirm the water is truly off. That simple step prevents surprise flooding and makes the whole job less stressful.
Where to Find the Best Brooklyn Contractors
Are you looking for an expert contractor in Brooklyn, NYC? SR General Construction has you covered! Our business is located at 8807 Avenue B, Brooklyn, NY 11236, United States, in the Canarsie area.
Additionally, we offer services at Rockaway Parkway and Ralph Avenue, providing fast access to Flatlands, East Flatbush, Bergen Beach, Brownsville, and the Spring Creek section of East New York.
FAQ
1. Can I install a bathtub myself, or should I hire a pro?
You can DIY a basic swap if the plumbing lines up, and you’re comfortable with demo, leveling, and sealing. If you need plumbing changes or you’re in a multi-unit building with strict rules, a pro is usually the safer move.
2. What’s the standard alcove bathtub size in most NYC bathrooms?
A very common “standard” alcove tub size is about 60 inches long by 30 inches wide (with typical heights around 14–16 inches). Always measure your exact space because “standard” doesn’t mean “universal.”
3. What’s the difference between an alcove tub and a freestanding tub?
An alcove tub fits into three walls and usually has a front apron, which helps lock in the layout. A freestanding tub sits on the floor and needs more clearance and more precise drain planning.
4. How long should I wait before using the tub after caulking?
Many bathroom caulking guides recommend waiting at least 24 hours for the caulk to fully cure before using the tub or shower. Always follow the label on your specific product.
5. Do lead-safety rules matter for bathtub replacement in older Brooklyn homes?
If your home is pre-1978 and you’re disturbing old paint during a demo, lead dust can be a risk. EPA requires lead-safe certified contractors for many paid renovation jobs that disturb lead-based paint, and it’s smart to use lead-safe practices even when doing DIY.