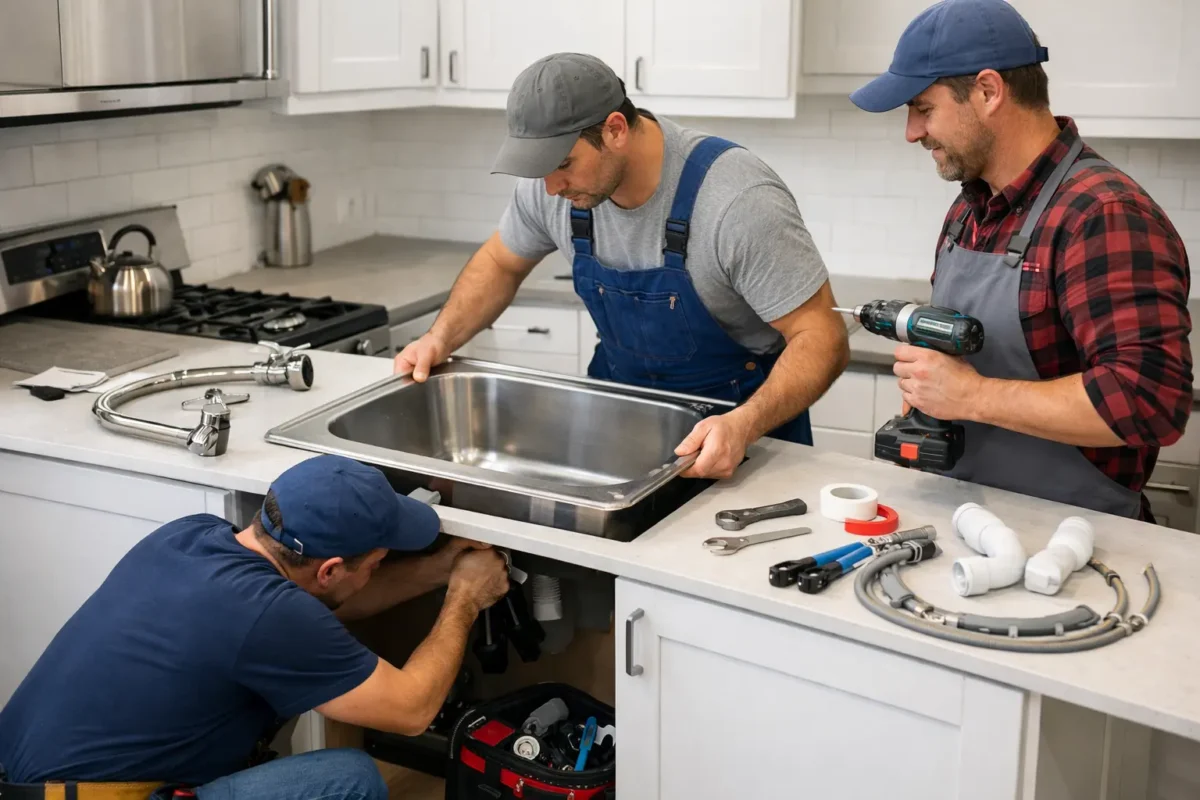
Are you looking for DIY Kitchen Installation? Then you are in the right place?
If you’re planning to install or replace a kitchen sink in your Brooklyn, NYC home, this guide is made just for you. Many homeowners feel confused about tools, plumbing connections, countertop cutting, or local rules, but don’t worry, we’ll walk through everything step by step. In this detailed content, you’ll learn how to choose the right sink, prepare your kitchen space, install the sink safely, and connect plumbing the correct way.
N.B. Do you need kitchen renovation service in Brooklyn? Call SR General Construction NYC for free estimate!
Pre-Checklist of Kitchen Installation
Before you start, a quick checklist saves you from “uh-oh” moments, especially in Brooklyn apartments where access, shutoffs, and older plumbing can catch you off guard. Think of this as your 10-minute setup that prevents a 2-hour headache.
- Confirm your NYC scope (permit vs. no permit). In NYC, simple repairs or direct replacement of a sink or faucet are considered cosmetic work and typically don’t require a permit. But “direct replacement” means you don’t change the hot- or cold-shutoff valves or the fixture trap; if you plan to alter those, pause and check the requirements.
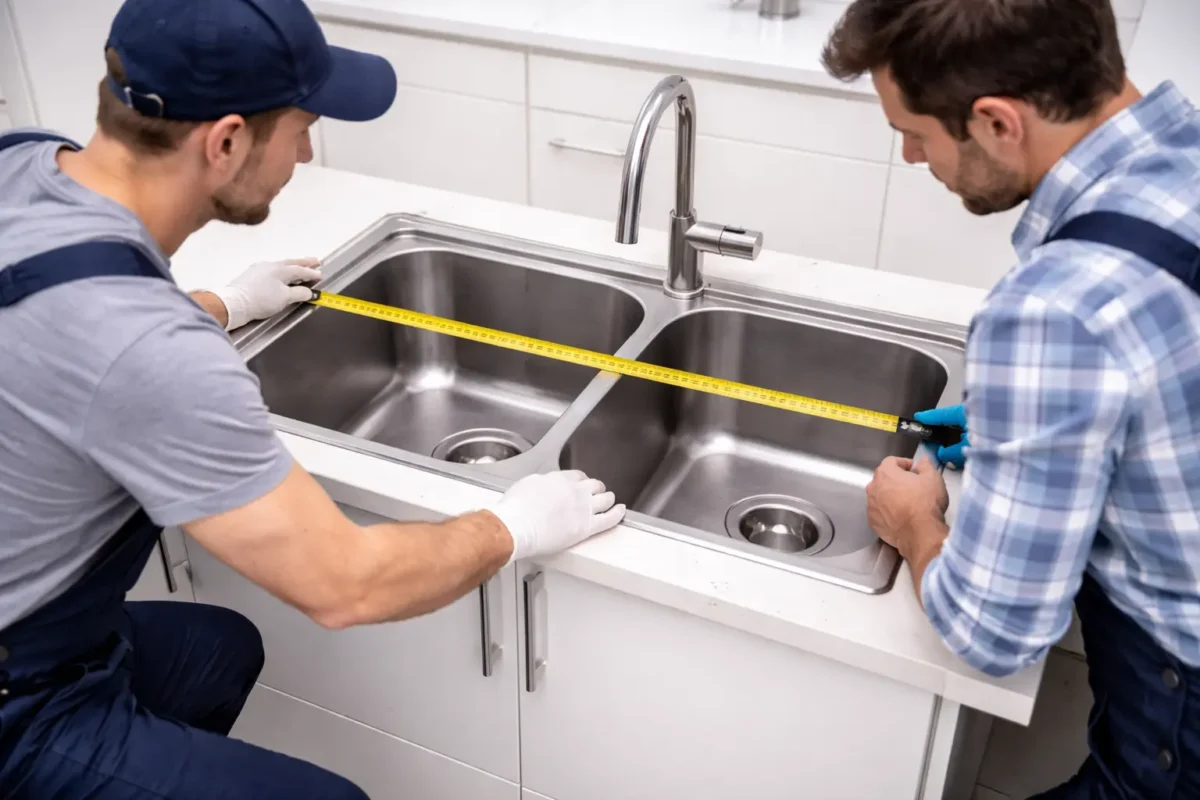
- Measure the location of your current sink and drain. Measure the sink’s dimensions and note where the drain sits (center, rear, offset) so your new sink matches or you’re ready to make adjustments. If the new sink’s size or drain position changes, you may need countertop cutout work and/or plumbing changes.
- Check the drain outlet height if you want a deeper sink. Deep basins and farmhouse sinks can create a real problem if the trap arm is too high to keep a proper slope. A common warning sign is a trap arm height above about 16 inches, which can force a wall-drain adjustment.
- Decide what else you’re replacing while the sink is out. This is the easiest time to swap a faucet, sprayer, soap dispenser, filter tap, or hot-water dispenser because you can clearly reach the hardware. Also, confirm how many pre-drilled holes your sink has so your faucet setup actually fits.
- Plan your shutoff + workspace like a pro. Turn off the hot and cold shutoff valves and open the faucet to relieve pressure before you disconnect anything. Clear the cabinet, lay down towels, and keep a small bucket ready to catch water from lines and the P-trap.
How to Choose the Right Sink for Your Kitchen
Choosing the right sink isn’t just about “pick a style you like”; it’s about matching your countertop, cabinet space, and your Brooklyn plumbing reality. If you choose well now, your installation will feel straightforward instead of like a puzzle.
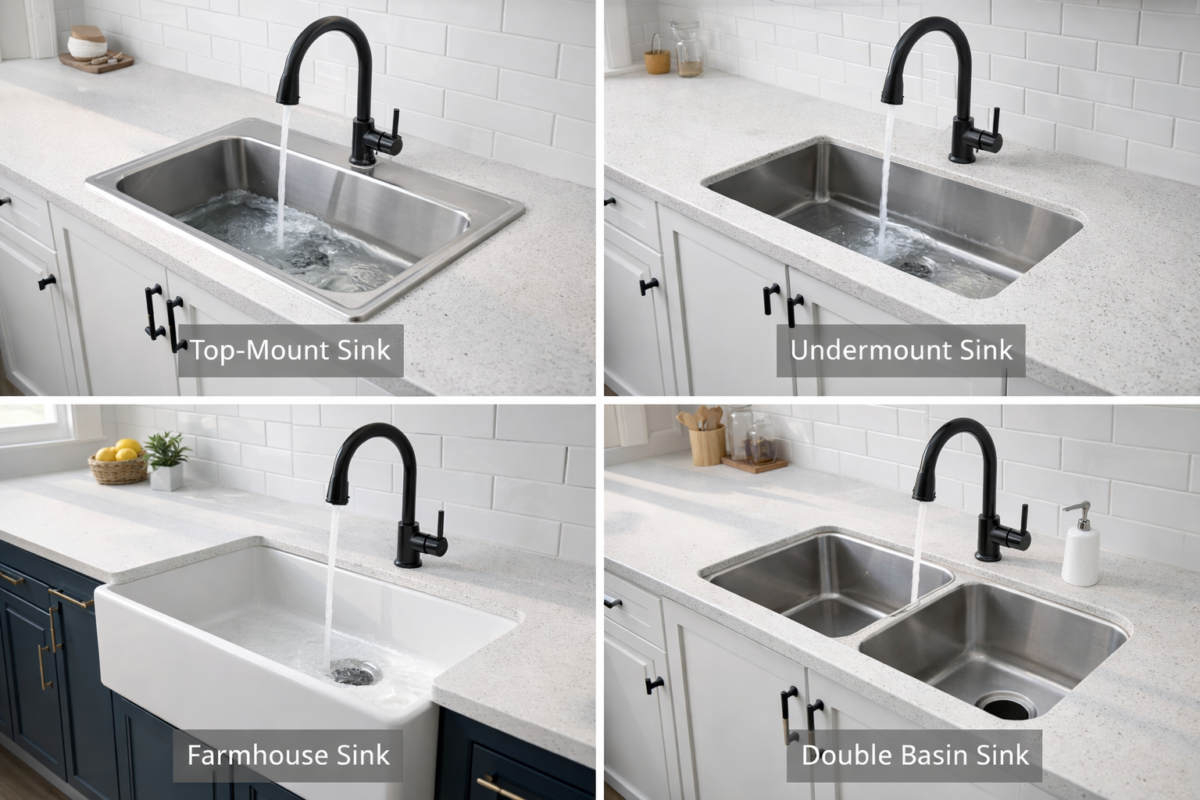
- Start with the mounting type that matches your countertop. Drop-in (top-mount) sinks work on most countertop surfaces and are a common, DIY-friendly choice. Undermount sinks sit under the counter and are generally recommended only for solid-surface and stone countertops (natural or engineered).
- Pick a bowl layout that fits how you cook and wash. Single-bowl sinks give you one big workspace for sheet pans and large pots, while double-bowl sinks make it easy to wash/rinse separately. If you like both benefits, consider an offset double-bowl sink with one side larger for bigger dishes.
- Match the sink size and drain position to what you already have. If your new sink has different dimensions or a drain location, you may need to modify the countertop cutout or adjust plumbing underneath. A quick sketch with measurements (including drain center location) makes shopping and installing much easier.
- Don’t ignore sink depth (it can force plumbing changes). A deeper basin sounds great until the drain no longer lines up with your existing trap arm slope. If you’re upgrading to a deep or apron-front sink, check the drain outlet height first, as relocating it can be a bigger job.
- Choose features that fit your setup and add-ons. Many sinks are designed to be garbage-disposal compatible, and you can also find accessibility-focused options (like ADA-compliant models). Also, confirm the faucet hole count and whether you’re adding accessories, such as a sprayer or soap dispenser.
Required Tools and Materials
If you line these up first, the whole job goes smoother, and you avoid mid-project runs to the hardware store. This list matches what major install guides recommend for sink replacement plus drain reconnection.
- Putty knife.
- Utility knife.
- Tape measure + marker/pencil.
- Safety glasses.
- Work gloves.
- Small bucket + shop towels/rags.
- Adjustable wrench(es).
- Pipe wrench.
- Socket wrench.
- Screwdriver.
- Channel-type pliers.
- Hacksaw or PVC tubing cutter.
- Jigsaw (optional, if you must adjust the cutout).
- Plumber’s putty.
- Silicone sealant/caulk.
- PTFE (thread) tape.
- Drainpipes & fittings (as needed).
- Kitchen drain trap kit / P-trap kit (as needed).
- Sink drain & strainer assembly (per basin).
Step-by-Step Kitchen Sink Installation Tips
In the next section, you’ll follow a simple flow: shut off water, remove the old sink, prep the opening, pre-install the faucet and strainer parts, then set and secure the new sink. After that, reconnect the drain (trap, tailpiece, or continuous waste, if needed) and any dishwasher/disposal lines. You finish by slowly turning the water back on and checking each connection point for leaks while testing drainage.
Remove the Old Sink Cleanly
Before you pull anything apart, set yourself up for a “no-regrets” approach so you don’t get stuck halfway through. If you’re in a Brooklyn apartment, your shut-offs might not be obvious, so plan where you’ll shut the water off before you loosen a single nut.
- Snap a quick photo of your plumbing layout so you can rebuild the same configuration without having to guess later.
- Turn off both the hot and cold shutoff valves (or shut off the main if you can’t find/close them) to stop water at the source.
- Open the faucet to relieve pressure, so any leftover water drains from the lines instead of spraying when you disconnect them.
- Disconnect the supply lines with two wrenches and keep a bucket ready because water trapped in the lines and the drain will spill.
- If you have a garbage disposal or dishwasher hose, unplug/turn off the power and disconnect them so the sink can lift out as one clean unit.
- Loosen the mounting clips, cut the caulk line, push the sink up, then lift it out and scrape off old putty/caulk so the new sink can sit flat.
Prep the Counter Opening
This is the part that makes the rest of the install feel “easy” or “annoying.” Your goal is simple: the sink opening should fit correctly, and the surface should be clean enough for a watertight seal.
- Dry-fit the new sink into the cutout to confirm it drops in without rocking or binding.
- If the new sink is larger, flip it upside down and trace the outline exactly where you want it to sit.
- Draw a second “cut line” inside the outline (about 1/2 inch smaller) so the sink rim actually has something solid to rest on.
- Drill a starter/pilot hole and cut with a jigsaw or circular saw while wearing PPE to keep the cut controlled and reduce chipping.
- Remove every bit of old caulk/putty from the countertop edge, as leftover material can keep the sink from sitting flush and create tiny leak gaps.
- Clean the countertop and sink contact area before sealing (and for pricey stone like granite, consider hiring a pro for cutting).
Pre-Assemble the Sink
You’ll save yourself a lot of cramped, under-cabinet frustration if you build as much as possible before the sink goes into the counter. This is especially true in Brooklyn kitchens where cabinet space is tight, and your hands barely fit behind the bowl.
- Install the faucet and any accessories while the sink is out, as the mounting nuts are much easier to reach from above or from a flat surface.
- Install the drain strainer with a small bead of plumber’s putty and press it firmly so it seals around the opening.
- Secure the rubber gasket(s) and threaded flange under the drain so the strainer assembly locks down watertight from both sides.
- If you’re using a garbage disposal, install the disposal mounting hardware now so you’re not fighting it after the sink is already set.
- Follow your sink’s instructions for things like strainers or plates because some models don’t use putty in the same way (and manufacturers vary).
- Use new, flexible supply hoses and don’t reuse old gaskets, as old rubber can harden and fail to seal properly during a fresh install.
Set, Seal & Secure the Sink
Now you’re doing the part everyone notices; the sink sitting perfectly in place with clean edges and no wobble. Take your time here, because good sealing and even tightening are what prevent the slow “mystery leak” later.
- Run a bead of silicone sealant where the sink will contact the counter, so water can’t creep under the rim during everyday use.
- Lower the sink into the opening and align it squarely so the rim sits evenly all the way around.
- Secure from below by rotating/tightening the clips evenly (drop-in: rotate clips outward; undermount: tighten clip hardware/wingnuts) so the sink pulls down uniformly.
- Wipe away excess silicone right away and clean the edge so you don’t end up scraping dried caulk off your countertop later.
- If the sink doesn’t sit flat, add extra clips to achieve more even pressure, as uneven pressure can leave gaps or cause a slight warp.
- Let the silicone cure for the time listed on the product label (some installers recommend about 24 hours) before heavy use or aggressive cleaning.
Drain Plumbing Done Right
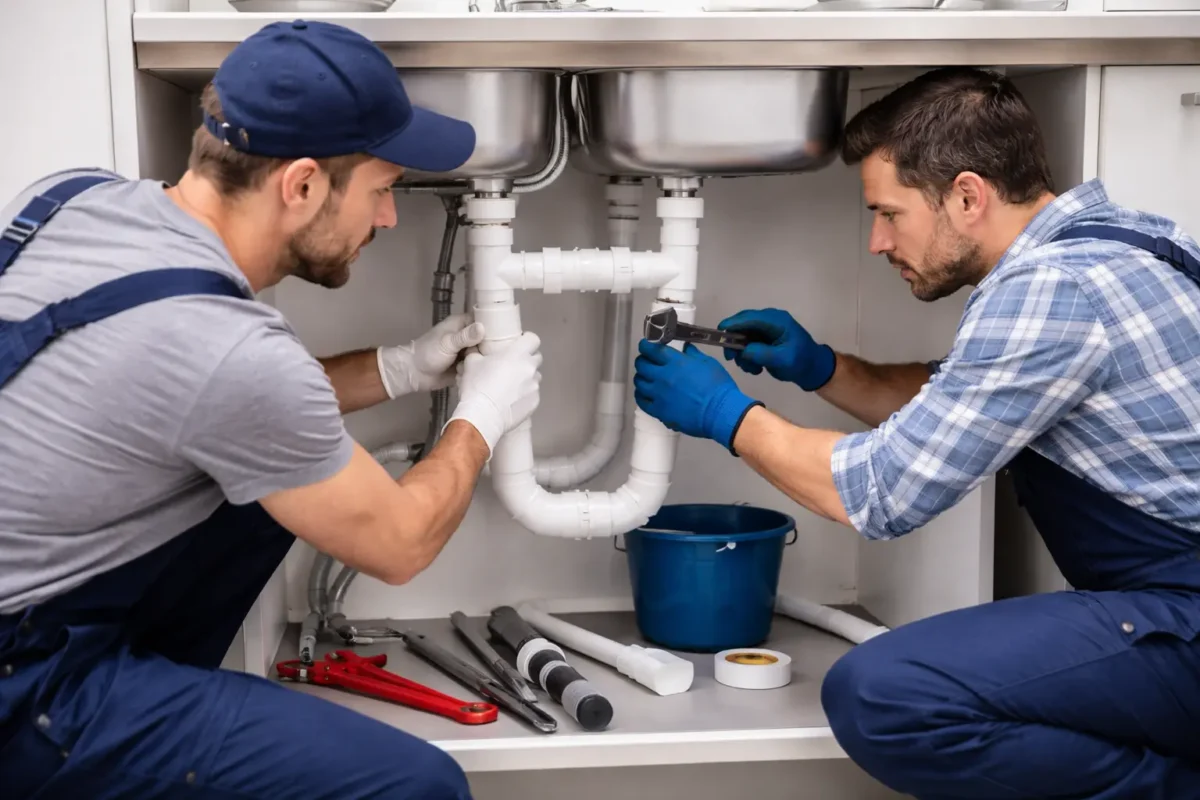
The drain is where most DIY installs get annoying; not because it’s “hard,” but because alignment is picky. If you treat the drain like a small puzzle and test-fit before final tightening, you’ll avoid leaks and slow draining.
- Check the trap arm height and keep proper slope (about 1/4 inch per foot) so water flows to the sanitary tee without sitting in the line.
- If your trap arm height is over about 16 inches and you choose a deeper sink, plan ahead because you may need to lower the wall drain to maintain slope.
- Reconnect the drain tailpiece/disposal outlet to the P-trap and wall drain, and keep a bucket under the work area for leftover water.
- If pipes don’t line up, measure and trim the tailpiece, then add a washer + slip nut before tightening so the joint seals correctly instead of cross-threading.
- Reconnect the dishwasher drain and disposal discharge lines (if you have them), then reattach the P-trap to complete the drainage path.
- Run water and check every connection, then leave a paper towel under the drain for a few days to catch slow leaks you might miss on day one.
Dishwasher + Garbage Disposal Connections
If your sink setup includes a dishwasher and/or garbage disposal, this is the step that prevents the most “why is it backing up?” headaches later. Take it slow, because one missed detail (like a knockout plug) can stop drainage instantly.
- Kill power first (seriously). Turn off the dishwasher and disposer circuit breakers so you’re not working around live wiring.
- Decide on backflow protection: air gap or high loop. NYC code allows a deck-mounted air gap or routing the hose up high and fastening it under the counter/sink rim.
- If you’re connecting the dishwasher to a new disposal, remove the inlet plug. Many disposals ship with a dishwasher inlet “knockout” plug; if you don’t remove it, the dishwasher may not drain properly.
- Clamp the dishwasher hose to the correct port. Slide the hose fully onto the disposal’s dishwasher inlet (or the sink drain port/air gap fitting) and tighten it with a hose clamp.
- Create and secure a proper high loop (when allowed). Route the drain hose as high as possible under the countertop and fasten it so it can’t sag later.
- Confirm the hose path is smooth and kink-free. A tight bend behind the cabinet can pinch flow, so keep the run gentle before you button everything up.
Final Testing + Local Compliance in Brooklyn
You’re basically done, but don’t rush the “test and verify” part, because a slow drip under a Brooklyn sink can turn into cabinet damage fast. This is also where you ensure your work aligns with local rules.
- Let the sealant cure before heavy use. Silicone needs a cure time (often 24–72 hours), so avoid soaking the rim right away if you just caulked it.
- Do a full-basin leak test. Fill the sink, hold water for a few minutes, then drain while you watch every joint under the cabinet.
- Test the dishwasher drain path. Run a short rinse cycle and confirm it drains cleanly without backing up at the sink.
- Test the garbage disposal correctly. Run cold water, turn the disposer on, and check for leaks at the mounting ring, discharge tube, and slip joints.
- Know when a permit is NOT needed (direct replacement). NYC DOB says simple repairs or direct replacement of sinks doesn’t require a permit as long as you don’t change the shutoff valves or the fixture trap.
- If you changed plumbing beyond that, treat it as permit territory. When work requires a permit, DOB explains it must be filed through DOB NOW by a qualified professional (PE/RA or Department-licensed plumber), and NYC contractors doing home-improvement work over $200 need the proper DCWP license.
How Much Does Sink Installation Cost in Brooklyn, NYC
For a straightforward kitchen sink install, national pricing typically falls in the $200–$650 range, with old-sink removal adding $20–$300, depending on the setup. In practice, Brooklyn pricing usually skews higher because NYC plumber labor commonly runs about $150–$250 per hour, and access (tight cabinets, old piping, co-op rules) can add time. For a mid-range “basic install” starting point, Homewyse estimates $472–$569 per sink (Jan 2026), before more complex work like countertop modifications or drain rerouting. The fastest way to stay on budget is to keep it a true replacement: same sink style, same drain location, same shutoffs/trap.
What sink size fits my sink base cabinet (and how do I measure it correctly)
Measure the sink base cabinet left-to-right gable-to-gable, outside edge to outside edge, because that’s the “minimum cabinet size” most sink specs reference. A practical rule many sink guides use is: your cabinet should be about 3 inches wider than the sink bowl, then you confirm the manufacturer’s listed minimum cabinet size. Also, measure your current counter cutout if you’re replacing an existing sink; the cutout size can limit what fits, even if the cabinet is wide enough.
What’s the best sealant for sink installation
For sealing the sink rim to the countertop, a quality 100% silicone is usually the best pick because it’s waterproof and designed for high-moisture seams. For the basket strainer/drain flange, plumbers’ putty is commonly used because it forms a compressible seal and doesn’t need a cure time; but you avoid it on certain plastics and use a non-staining option (or silicone) on porous stone when needed. The “best” sealant is ultimately the one your sink/drain manufacturer calls for, so always match what the installation sheet specifies.
Where to Find the Best Brooklyn Contractors
Are you looking for an expert contractor in Brooklyn, NYC? SR General Construction has you covered! Our business is located at 8807 Avenue B, Brooklyn, NY 11236, United States, in the Canarsie area.
Additionally, we offer services at Rockaway Parkway and Ralph Avenue, providing fast access to Flatlands, East Flatbush, Bergen Beach, Brownsville, and the Spring Creek section of East New York.
FAQ
1. Can I install a kitchen sink myself in Brooklyn?
Yes, if it’s a like-for-like swap and you’re comfortable with basic plumbing steps like shutoffs, drain fittings, and leak checks.
2. What does NYC mean by “direct replacement” for a sink?
It means replacing the fixture without altering the hot- or cold-shutoff valves or the fixture trap.
3. When would I need an LAA or DOB filing for plumbing work?
If your work goes beyond a simple replacement (for example, more involved plumbing changes), NYC uses a Limited Alteration Application (LAA) process for certain plumbing repairs/replacements.
4. If I hire someone, do they need a license in NYC?
For home-improvement work over $200, contractors generally need an NYC Home Improvement Contractor License (separate from plumbing licensure rules).
5. What sink type is easiest for DIY installation?
A drop-in (top-mount) sink is usually the most DIY-friendly because it rests on the countertop cutout.