Which is best for your bathroom remodeling project: grout or caulk?
If you’re planning a bathroom remodel in Brooklyn, this question comes up almost immediately, and for good reason. Grout and caulk are not competitors; they are partners, and choosing the right one for the right place is what separates a long-lasting bathroom from one that develops cracks, leaks, or mold within a few years.
Here’s the short and honest answer:
- Grout is better for filling the spaces between tiles, where strength and stability matter.
- Caulk is better for sealing joints, corners, and edges, where movement and water exposure are unavoidable.
In this guide, we’ll break down what grout and caulk really do, where each one belongs in a bathroom remodel, and how homeowners and contractors in Brooklyn can make the smartest choice for durability, waterproofing, and long-term performance.
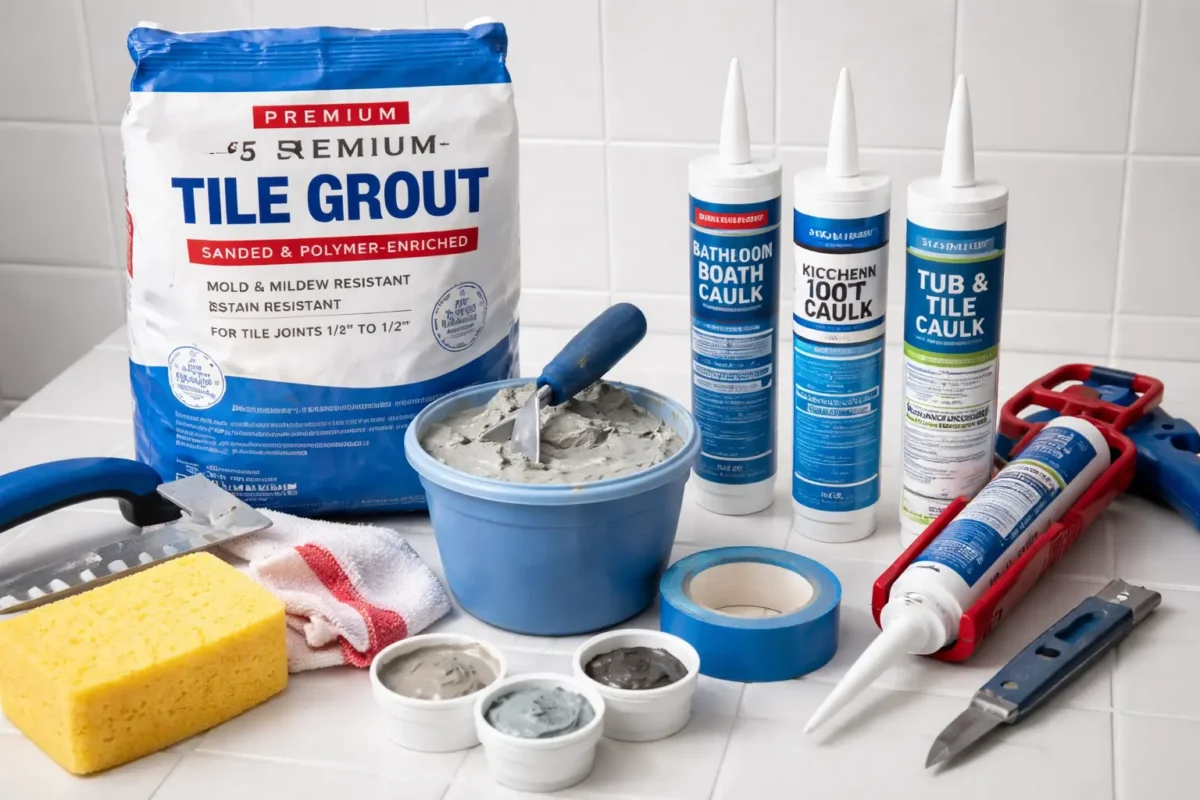
What Is Grout and Why Your Bathroom Tiles Need It
Grout is a concrete-like material that you spread between tiles to fill the joints and protect what’s underneath. It locks the tiles in place and helps keep water and grime out of the gaps, which is especially important in wet areas like showers and bathroom floors. Once it cures, grout becomes rock-hard, so it works best where the surface won’t flex or move. Some grout types may need sealing to reduce staining and moisture absorption.
What Is Caulk and How Does It Seal Your Bathroom
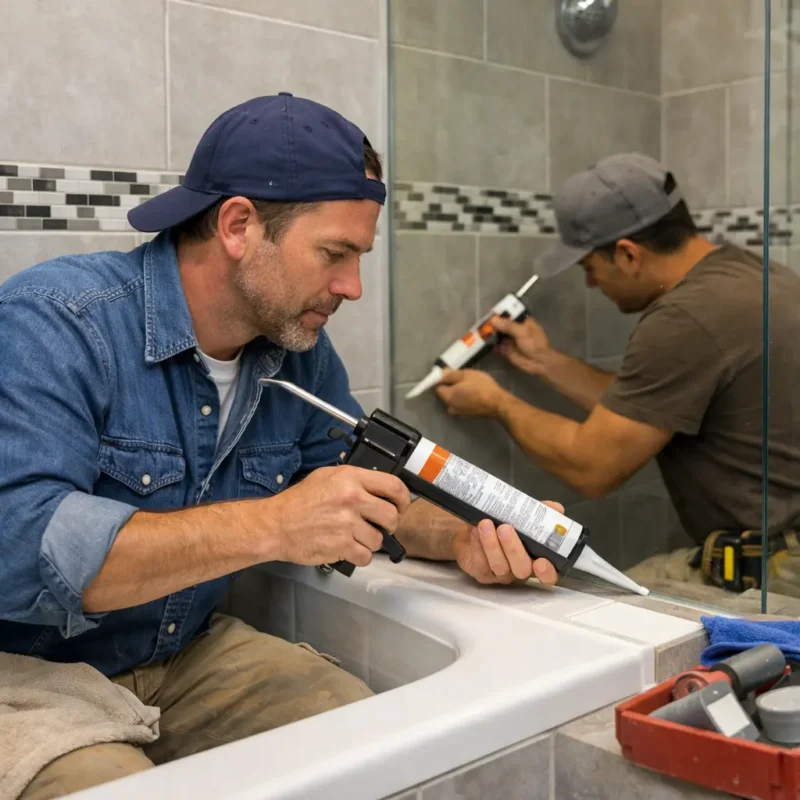
Caulk is a flexible sealant that you apply in gaps where two surfaces meet and may move independently (like corners or where tile meets a tub). Instead of turning rock-hard like grout, the caulk stays a bit stretchy, so it can handle small shifts without cracking. In bathrooms, silicone caulk is the go-to for a watertight seal, especially around showers and tubs. When caulk starts to harden, shrink, or peel, that’s usually your sign that it’s time to remove and replace it.
N.B. Do you need bathroom renovation service in Brooklyn? Call SR General Construction NYC for free estimate!
What is the difference between grout and caulk?
| Factor | Grout | Caulk |
|---|---|---|
| Best use | Fills joints between tiles and helps tie the tile surface together. | Seals joints at corners/edges and where tile meets other materials (tub, shower pan, vanity, trim). |
| Flexibility | Rigid after curing; can crack if the joint moves. | Flexible; designed to handle movement at changes of plane. |
| Water performance | Helps block gaps, but many grout types are more porous and may need sealing. | Forms a tight seal; silicone is commonly used for wet areas like showers. |
| Materials & types | Often cement-based; common types include sanded and unsanded. | Common types include silicone, acrylic/latex, and hybrids depending on the job. |
| How it’s applied | Typically comes as powder; you mix it and spread it with a float. | Comes ready in a tube; you apply it with a caulk gun and tool the bead. |
| Maintenance & replacement | Can last a long time, but repairs are more work (removing grout is tougher). | Usually easier to remove and replace when it fails (shrinking/cracking over time). |
Which Is Best for Your Bathroom Remodelling Project
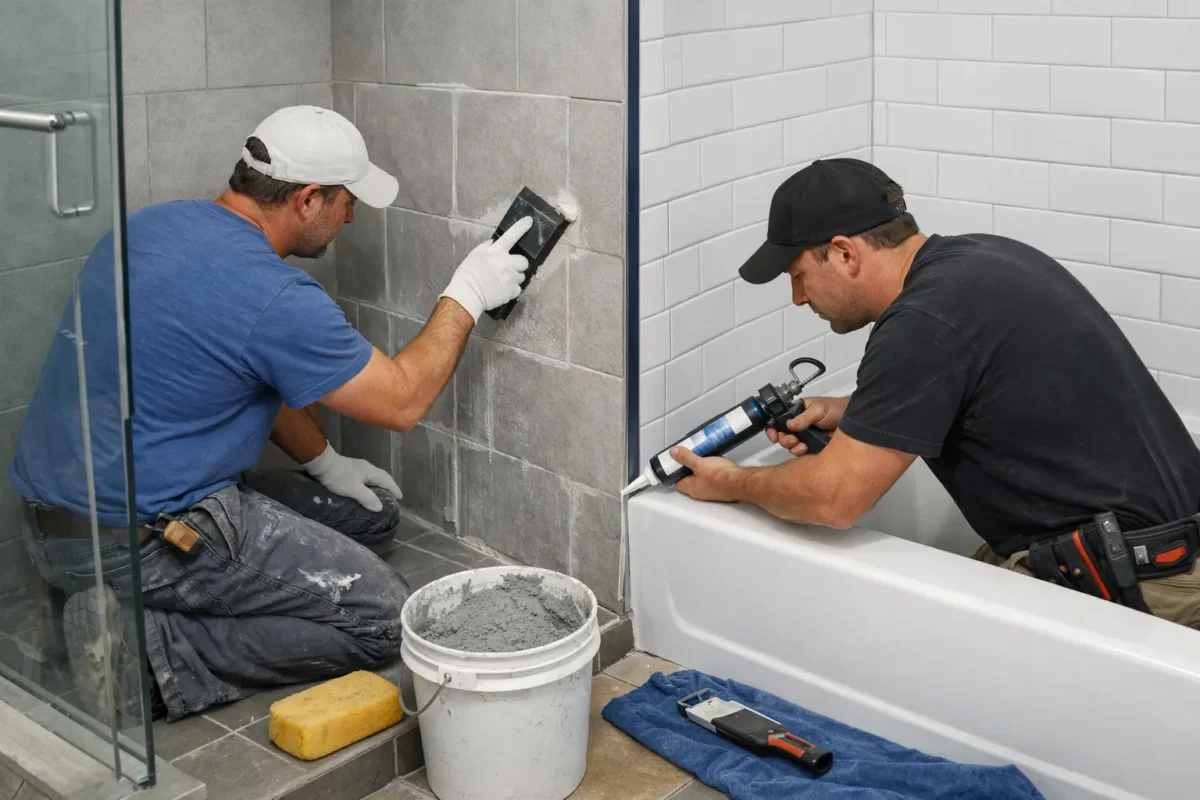
For most bathroom remodels, you need both, not one. Use grout between tiles for strength and a clean finish, then use silicone caulk in corners and where tile meets the tub or shower pan to prevent cracks and leaks. In Brooklyn homes, where buildings can shift over time, using caulk in those moving joints can help prevent early failure.
Grout and Caulk: Key Differences in Material and Purpose
Grout (best for tile-to-tile joints):
- Hardens rock-solid and helps stabilize the tiled surface.
- Designed to fill gaps between tiles on walls and floors.
- Often comes as a powder and usually requires mixing before use.
- Comes in common types like sanded vs. unsanded, chosen by joint width and tile type.
Caulk (best for corners, edges, and transitions):
- Stays flexible to handle movement without cracking.
- Used at changes of plane and where tile meets other materials (tub, pan, vanity).
- For wet zones, pros commonly choose silicone caulk for a watertight seal.
- Easier to remove and replace when it eventually shrinks or fails.
Where Should You Use Grout in Your Bathroom Remodel?
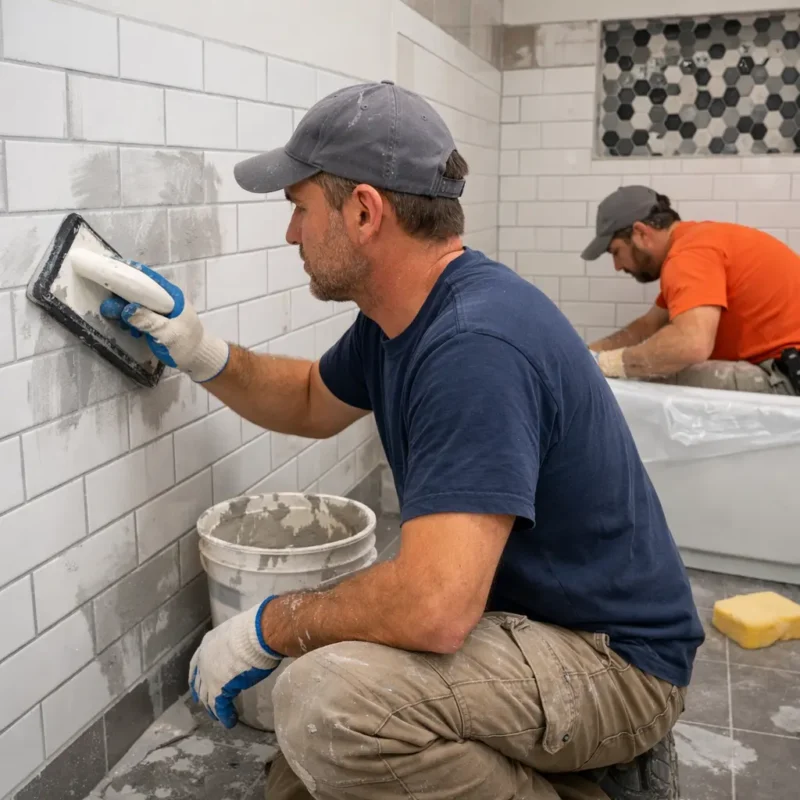
Use grout between tiles on your bathroom floor, shower walls, tub surround walls, and any tiled backsplash, because grout is made to fill tile-to-tile joints and cure hard. It’s the right choice wherever the tiled surface should act like a single “panel,” not a moving seam. If you’re tiling a shower, grout belongs on the field of the walls and floor, not in the inside corners or where the tile meets the tub/shower base. Most standard cement-based grouts are more porous than you think, so sealing and routine cleaning help keep stains and mildew under control.
Where Should You Use Caulk in Your Bathroom Remodel?
Use caulk in corners and transitions; places where surfaces meet and may move a little, like wall-to-wall corners, wall-to-floor, and where tile meets the tub or shower pan. Tile industry movement-joint guidance (EJ171) exists for a reason: buildings shift, materials expand/contract, and rigid grout can crack at those “change of plane” joints. In wet zones, 100% silicone is commonly specified because it stays flexible and seals water well when installed correctly. When caulk starts cracking, peeling, or growing stubborn mildew, you remove it fully and re-caulk to restore the waterproof seal.
Pros and Cons of Using Grout for Bathroom Projects
Grout is what gives tile work that finished, professional look, and it also helps the tile surface act strong and stable. But grout has its limits, especially in wet bathrooms, so use it in the right spots and maintain it properly.
Pros
- Locks tiles in place: Grout fills tile joints and helps stabilize the tiled surface.
- Handles foot traffic: Once cured, grout becomes rigid, making it well-suited for bathroom floors.
- Clean, consistent finish: Grout lines create a uniform, “built-in” look across the tile field.
- Lots of color choices: You can match grout to tile or use contrast for design.
- Options for different joints: Sanded vs. unsanded (and other types) help you fit different joint widths and tile styles.
- Long service life in the right location: In stable tile-to-tile joints, grout can last a long time with good installation and maintenance.
Cons
- Can stain or grow mildew: Many grouts are porous and may need to be sealed and regularly cleaned.
- Cracks where there’s movement: Grout is rigid, so corners and changes of plane are risk zones.
- Repairs take effort: Removing and regrouting is more work than replacing caulk.
- Installation mistakes show fast: Wrong mixing, timing, or cleanup can weaken joints or leave haze.
Pros and Cons of Using Caulk for Bathroom Projects
Caulk is your bathroom’s “flexible seal”—it protects the seams where water loves to sneak in. It’s also the material pros lean on in corners because it moves with the building instead of cracking.
Pros
- Stays flexible: Great for corners and changes of plane where small movement is normal.
- Watertight sealing: Sealants are used to block liquids and air at joints; in bathrooms, that means fewer leaks behind tile.
- Perfect for transitions: Works where tile meets tubs, pans, vanities, trim, glass, and other materials.
- Silicone performs well in wet areas: Many bathroom guides recommend it for its moisture resistance and durability.
- Easier to replace: When it fails, you cut it out and reapply—usually simpler than regrouting.
- Can be spec-driven for pros: Many commercial silicones are designed for corners/changes of plane and may conform to ASTM C920 performance classes.
Cons
- Not structural: Caulk doesn’t support tile as grout does, so it’s not a replacement for grout between tiles.
- It can shrink/peel over time, especially if prep is poor or the joint stays constantly wet.
- Mildew can still happen: “Mold-resistant” helps, but bad ventilation and soap scum can still cause issues.
- Application is unforgiving: A messy bead looks rough fast, so clean prep and careful tooling matter.
Design Impact: Grout Lines vs. Caulk Lines in Your Bathroom
| Design factor | Grout lines | Caulk lines |
|---|---|---|
| Where you’ll see it | Between tiles across floors and walls (the “tile field”). | Corners, edges, and transitions (tub/shower pan, vanity, trim). |
| Visual role | Defines the tile pattern; can highlight or soften a layout. | Meant to disappear; usually a thin, clean sealing bead. |
| Color options | Many color choices; you can match or contrast your tile. | Often clear/white, or color-matched options depending on brand. |
| Texture & finish | More matte and slightly textured once cured. | Smooth, slightly glossy/rubbery when cured (especially silicone). |
| How it ages visually | Can stain or darken if porous and not maintained. | Can discolor or mildew if moisture sits on the bead and cleaning is ignored. |
| Best “look” strategy | Pick grout color based on tile style + how much you want lines to show. | Choose a neat, thin bead and a color that blends with grout/tile. |
How Long Do Grout and Caulk Last in Wet Areas?
In wet areas like showers, grout typically lasts about 8 to 20 years, depending on the grout type and where it’s installed; high-moisture zones usually shorten that lifespan.
For caulk, many pros treat ~5 years as a practical replacement benchmark in bathrooms, since moisture and cleaning can break down the seal over time. If you use high-quality silicone and install it correctly, with some guidance notes, it can last much longer, up to around 20 years in ideal conditions. Your ventilation, cleaning habits, and whether water sits on the joint every day will decide what you actually get.
Common Grouting Mistakes
Grout looks simple, but small mistakes can leave you with weak joints, haze, or uneven color. The good news: once you know the common slip-ups, you can avoid most of them on your first try.
- Using the wrong grout type for the joint: You might pick sanded/unsanded incorrectly, or choose a grout that doesn’t fit your tile and joint width. That can lead to cracking, poor filling, or a finish that just doesn’t look right.
- Adding too much water while mixing: Extra water makes grout easier to spread, but it can weaken the final cure and cause problems like shrinking or powdery joints. Stick to the bag directions so the grout cures to a dense, strong consistency.
- Spreading grout unevenly or at the wrong angle: If your float angle and pressure vary, your joints won’t pack evenly, and you’ll see low spots or gaps. Those weak areas can collect water and grime faster in bathrooms.
- Cleaning too aggressively during wipe-down: Scrubbing hard with a sponge can pull grout out of the joints while it’s still soft. Instead, use light passes and let the grout firm up as recommended.
- Messing up the timing (too early or too late): If you wipe too soon, you can wash grout out; if you wait too long, you can trap haze on the tile surface. Timing is part of the “skill” of grouting; follow the product’s working time and clean-up window.
Common Caulking Mistakes
Caulk is forgiving in the tube, but not forgiving on the wall. Most failures stem from poor prep, the wrong product choice, or rushing the finish.
- Caulking over old caulk (or dirty surfaces): New caulk won’t bond well to leftover residue, soap film, or grease. Remove the old bead completely and clean the joint so the new sealant actually sticks.
- Using the wrong caulk in wet areas: In showers and tub transitions, you usually want a bathroom-rated, waterproof sealant (often silicone) rather than basic painter’s caulk. If the label doesn’t fit “kitchen & bath” or “waterproof,” you’re likely signing up to redo it early.
- Cutting the tip too big and laying a fat bead: A huge opening dumps too much caulk, making it hard to control and harder to tool neatly. Cut small first; you can always open it up a little more if you need.
- Not tooling quickly enough: Many silicones skin over too quickly, so if you wait too long, the bead drags and looks lumpy. Use the tool within the product’s recommended window to achieve a clean, sealed profile.
- Letting water hit the joint before it fully cures: A bead can feel “dry” on top but still be curing underneath. If the seam gets soaked too early, it can loosen and fail—so respect the cure time before using the shower.
Cost Differences Between Grout and Caulk
For grout materials, common pricing breaks down like this: 1-lb bags cost about $6–$10, 5-lb bags about $7–$25, and 25-lb bags about $15–$35 on average (type and brand vary). For caulk, Angi lists about $3–$12 per tube for paintable caulk, and notes DIY caulking can run about $0.05–$0.20 per linear foot, plus $10–$30 for a caulk gun/knife/tape. If you’re paying a pro to recaulk a tub/shower, a common range is $65–$300, mostly driven by removal and clean finishing work.
Which is easier to apply: grout or caulk?
For most homeowners, caulk is easier to apply because it comes ready-to-use in a tube, so you don’t have to mix, pack joints, or wash haze off tile. That said, running a straight bead and tooling it clean takes a little practice, and DIYers often trip over basic technique.
Grout is more work because you mix it, force it into dozens (or hundreds) of joints, then clean and time your wipe-down correctly. If you want the simplest “weekend win,” caulk usually feels faster, while grout rewards patience and good timing.
How often should I replace or repair bathroom grout and caulk?
I tell most Brooklyn homeowners to inspect grout and caulk every 6–12 months, because small gaps turn into leaks fast in wet areas. If your caulk is cracked, peeling, or stays moldy even after cleaning, it’s time to replace it; many guides recommend replacing it every 5 years, sooner if it fails. For cement-based grout, plan to reseal regularly; many sources suggest about every 1–2 years, and high-moisture showers may need 6–12 months, depending on use and the sealer you picked. If grout is cracked, missing, or soft, repair it promptly (and don’t “patch” corners with grout; those joints usually need flexible sealant).
Where to Find the Best Brooklyn Contractors
Are you looking for an expert contractor in Brooklyn, NYC? SR General Construction has you covered! Our business is located at 8807 Avenue B, Brooklyn, NY 11236, United States, in the Canarsie area.
Additionally, we offer services at Rockaway Parkway and Ralph Avenue, providing fast access to Flatlands, East Flatbush, Bergen Beach, Brownsville, and the Spring Creek section of East New York.
FAQ
1. Can I use caulk as grout between tiles?
You can, but you shouldn’t because caulk isn’t designed to bond and perform like grout in tile-to-tile joints, so it tends to fail sooner. Grout is the right material for the spaces between tiles.
2. Should I grout or caulk shower corners?
Use caulk in shower corners (the “change of plane”), because corners move and rigid grout often cracks there. When you see cracked corner grout, the usual fix is to remove it and caulk the joint.
3. How often should I reseal grout in a shower?
A common guideline is every 1–2 years, but busy showers and harsh cleaning can push that closer to 6–12 months. The simplest rule is: if water darkens the grout quickly, it’s time to reseal.
4. What’s the difference between sanded and unsanded grout?
Sanded grout is typically used for wider joints (often over 1/8 inch) and is more durable in those gaps. Unsanded grout is used for narrow joints (often under 1/8 inch) and is friendlier to scratch-prone tile surfaces.
5. What is ASTM C920, and does it matter for bathroom caulk?
ASTM C920 is a performance standard for elastomeric joint sealants (the “serious” stuff used where movement matters). If you want contractor-grade durability in wet, moving joints, looking for a sealant that meets C920 is a smart filter.