Do you know what a Shower Enclosure is and Why It’s Important? A shower enclosure is more than just a design element. It’s the structure that defines your shower space, keeps water where it belongs, and helps protect the rest of your bathroom from water damage. A proper shower enclosure can make daily life easier and more enjoyable.
In this detailed guide, we’ll take you step by step through everything you need to know about shower enclosures, from what they are and the different types available, to how to install one yourself if you’re feeling handy, and when it’s best to call a professional.
What Is a Shower Enclosure?
A shower enclosure is a defined shower space that uses glass (or other panels) and a door to keep water inside the shower area. Most enclosures sit on a shower tray/pan or a properly sloped, waterproofed shower floor so water drains the right way. People choose them to reduce splashes, protect walls and floors, and give the bathroom a cleaner look.
What are the Key Components of a Shower Enclosure
Before you install an enclosure, it helps to know what parts you’re actually putting together. When you understand the components, you can measure better, buy the right kit, and avoid leaks later.
- Shower tray / base (or shower pan): It’s the base you stand on, and it guides water toward the drain instead of letting it spread across the bathroom floor. In some setups (such as curbless showers), the “base” is a waterproofed, sloped floor rather than a raised tray.
- Glass panels (fixed or side panels): These panels form the “walls” of the enclosure and help contain spray. Most shower enclosures use safety glazing (typically tempered safety glass) designed for shower doors and enclosures.
- Shower door (hinged, pivot, or sliding): The door lets you enter easily while still sealing off the shower area. The style matters in tight Brooklyn bathrooms; sliding doors save space, while pivot/hinged doors need swing clearance.
- Wall profiles / U-channels (mounting channels): These are metal channels that anchor the glass to the wall and, sometimes, to the floor, providing stability for the panel. They create a clean attachment point so the glass sits securely without drilling into the glass itself.
- Seals, sweeps, and gaskets: These flexible strips close small gaps around the door edges and bottom so water doesn’t escape. If you ever see puddles outside the shower, a worn sweep or seal is often the first thing to check.
- Silicone sealant (waterproof sealing): Silicone seals the edges where the frame or channels meet the tile and where the enclosure meets the tray/pan. A clean, dry surface helps silicone bond properly, which is why prep work matters as much as the final bead.
Why Install a Shower Enclosure?
A shower enclosure helps you control water, so your bathroom floor stays drier and safer. It also protects tile, drywall, and trim from repeated moisture exposure, helping reduce long-term damage and mold problems. Many homeowners like the clean look; glass enclosures can make a bathroom feel brighter and more modern.
What are the Required Tools and Materials
If you’re planning a DIY install, having the right tools upfront saves a lot of frustration. Most manufacturers expect basic hand tools, along with careful measuring and leveling.
- Tape measure.
- Pencil or marker.
- Spirit level (or laser level).
- Drill.
- Tile/masonry drill bits.
- Screwdrivers.
- Allen keys (often included with hardware kits).
- Adjustable wrench / spanner.
- Utility knife.
- Caulk gun.
- 100% silicone sealant (bathroom/kitchen grade).
- Wall plugs/anchors and screws (correct type for tile/wall).
- Shims.
- Safety glasses.
- Work gloves.
What to Consider Before Shower Enclosure Installation
Quick reality check: shower enclosures look simple, but a few small mistakes can cause big leaks or a door that won’t close right. Think through these points before you drill your first hole, especially in older Brooklyn bathrooms where walls aren’t always perfectly straight.
- Measure the opening carefully (top, middle, bottom): Shower openings can vary because walls may not be perfectly parallel, so one quick measurement isn’t enough. If your kit has an “adjustment range,” matching it to your real measurements helps everything fit without forcing parts.
- Check that the walls are plumb and the tray/pan is level: If the tray isn’t level or the wall isn’t plumb, gaps form fast, and water finds them. Many installation guides specifically state that you should verify the tray is level and the walls are vertical before you start.
- Pick the right door style for your space: Pivot or hinged doors need enough room to swing without hitting a toilet, vanity, or radiator; common obstacles in NYC bathrooms. Sliding doors save space, but they require clean track alignment and smooth rollers.
- Know that tempered safety glass can’t be cut: This is a big one: if the glass is the wrong size, you usually can’t trim it on-site like wood. That’s why accurate measuring (and sometimes professional measuring) matters, especially for frameless setups.
- Plan for proper sealing (and cure time): Silicone only sticks well when the surface is clean and dry, so you’ll want to remove old residue and wipe everything down first. After sealing, you typically need to let the silicone cure before heavy water exposure, or the bead can fail early.
- Follow the manufacturer’s instructions (even for “standard” installs): Different kits use different channel systems, hole locations, and sealing steps, and that’s where DIY installs often go wrong. Many installation manuals literally tell you to read the instructions first, so you understand the sequence and required tools.
- In Brooklyn/NYC, confirm building rules and whether permits apply: A simple door swap might not need permits, but bathroom projects can trigger approvals if you’re changing plumbing, waterproofing systems, or doing broader renovation work. NYC’s Department of Buildings notes that plans and permits may be required for kitchen/bath renovations depending on the scope, so it’s smart to check before you start.
How to Install Shower Enclosure: Step-by-Step Guide
| Step 1: Preparing the Bathroom for Installation |
| Step 2: Installing the Shower Base or Tray |
| Step 3: Assembling the Shower Enclosure Frame |
| Step 4: Installing the Glass Panels and Door |
| Step 5: Sealing and Waterproofing the Enclosure |
| Step 6: Final Adjustments and Safety Checks |
Step 1: Preparing the Bathroom for Installation
- Clear the shower area completely and protect the tub/tray edge or tiles with painter’s tape to prevent chipping while working.
- Check your shower enclosure kit against the parts list before you start; missing parts can stop the job halfway.
- Make sure the shower tray/base is already installed and perfectly level, as an unlevel base can create gaps and leaks later.
- Dry-fit or “mock place” the wall channels/brackets to confirm door swing/slide clearance (important in tight Brooklyn bathrooms).
- Mark drilling points carefully, then create a small dimple at each mark so the bit doesn’t wander on tile.
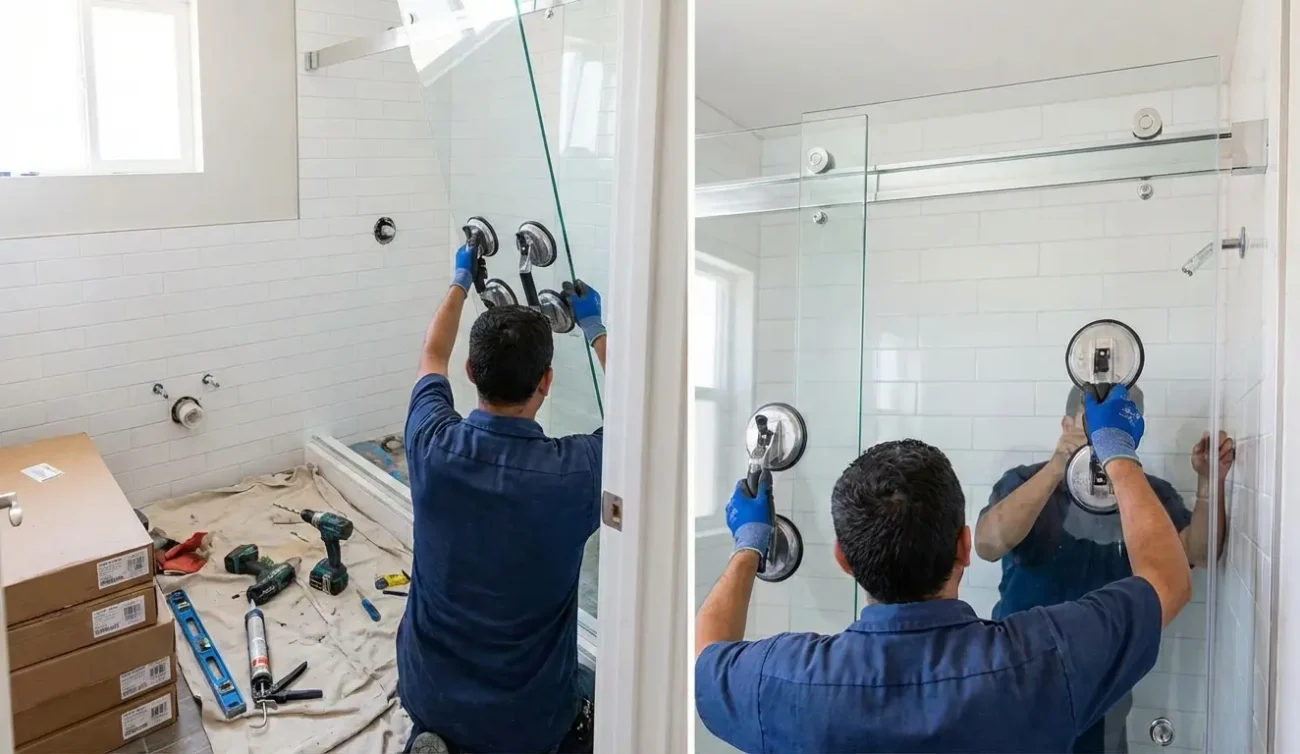
- Plan for safe handling: glass doors are heavy and awkward; arrange a helper and avoid bumping them against hard surfaces.
Step 2: Installing the Shower Base or Tray
- Choose the exact tray position and verify the floor area is reasonably level before you set anything down.
- Place the tray temporarily, mark the waste/drain opening, then remove the tray so you can prep the drain and access space below.
- Check there’s enough clearance for the waste/trap and pipework, and fix/strengthen the subfloor if needed before bedding the tray.
- Fit the waste and trap to the tray according to the manufacturer’s instructions, and use silicone around the waste to help create a watertight seal.
- Support the tray fully (often with a mortar/cement bed), because many trays need full support to stay level and avoid flexing.
- Set the tray into the bed and level the top edge (remember: many trays have a built-in fall for drainage, so level the rim, not the underside).
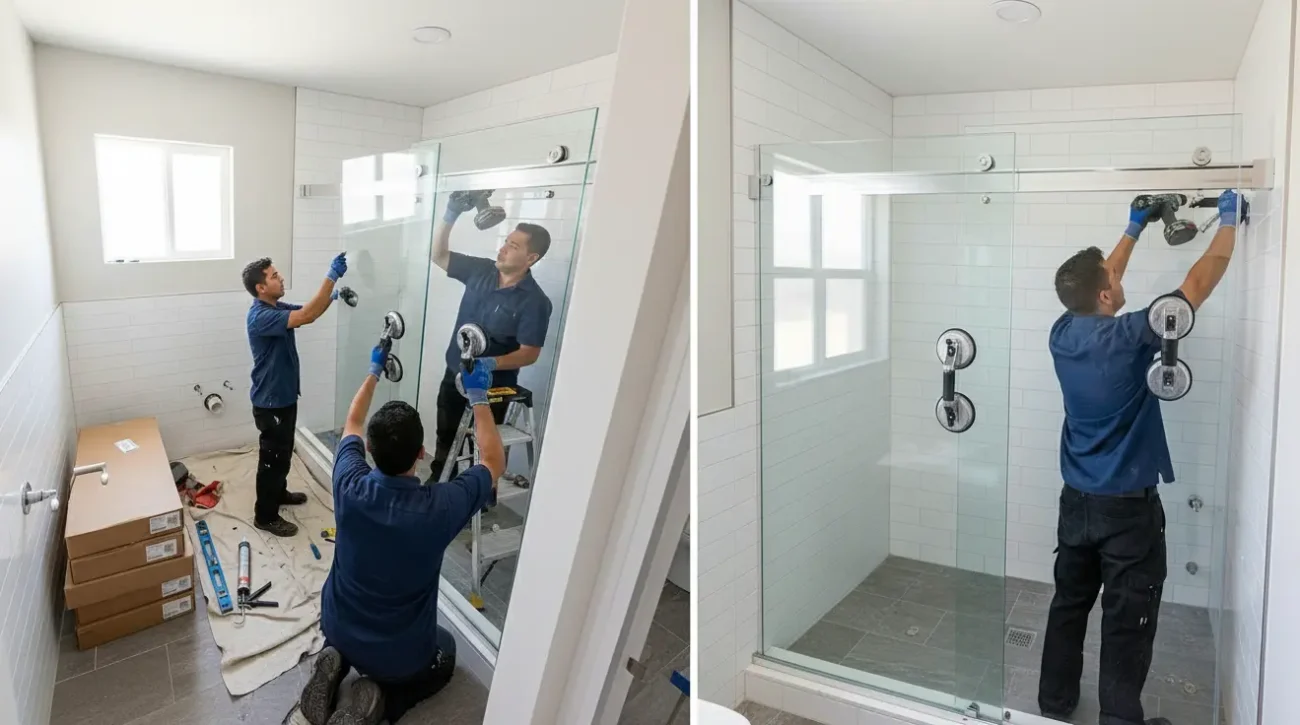
Step 3: Assembling the Shower Enclosure Frame
- Position the vertical wall brackets/channels where the enclosure meets the tray edge, then use a level to keep them perfectly plumb before marking holes.
- Drill through the tile with the correct bit, add wall anchors/appropriate fixings for your wall type, then screw the brackets/channels firmly in place.
- Run a thin bead of silicone along the back of the wall brackets/channels before fixing to help block water from seeping behind them.
- Assemble the frame one side at a time and use a helper; most frames go together more safely when one person stabilizes the glass.
- Slide the sealing strips onto the fixed glass panels, then fasten the panels into the bottom and top frame sections as shown in your kit.
- Don’t improvise the order; each brand’s frame system is a little different, so follow the manufacturer’s sequence for a clean fit.
Step 4: Installing the Glass Panels and Door
- Carefully move the assembled frame onto the tray and seat it flat—look for any gaps along the base before you tighten anything.
- Slide fixed panels/frame ends into the wall brackets/channels, then double-check plumb and level so the door won’t bind later.
- For sliding doors, attach the rollers (spring-loaded rollers usually go at the bottom) and tighten by hand so you don’t crack or stress the glass.
- Hang sliding doors by seating the top rollers first, then compress/engage the bottom rollers into the lower track or recess.
- For hinged/pivot doors, place the door into the jamb/hinge rail, check the strike edge for plumb, then drill pilot holes and secure the hinge rail.
- Install handles and door seals (some seals use magnets at the door joints), and make sure the closure line is even top to bottom.
Step 5: Sealing and Waterproofing the Enclosure
- Clean and dry all contact areas first; silicone won’t bond well to dusty tile, soap film, or damp surfaces.
- Seal the outside perimeter of the enclosure frame and the base where it meets the tray to stop water from escaping onto the bathroom floor.
- Follow your kit’s sealing rules: many framed enclosures avoid sealing the inside so any trapped water can drain out, while some kits call for sealing certain inside edges (like the base track/jamb).
- Apply a smooth, continuous bead (no gaps), then tool it right away (a wet finger or caulk tool works) for a clean, watertight finish.
- Add or confirm the door sweep/drip rail so water runs back into the shower instead of dripping out.
- Let the silicone fully cure before using the shower; many guides recommend waiting at least 24 hours.
Step 6: Final Adjustments and Safety Checks
- Check the door edge with a level and make small alignment adjustments before final tightening (this is what makes the door seal well).
- For sliding doors, confirm the gap between doors is even and adjust roller brackets if needed so the doors glide smoothly.
- Tighten fasteners to “snug,” not extreme; overtightening can damage hardware or stress glass and seals.
- Install any roller covers/frame caps so water doesn’t sit on fixings and cause rust over time.
- Do a controlled water test (a short spray along door edges and base) and watch where the first drops escape; then correct with alignment or targeted sealing.
- Treat glass like a safety component: use a helper, avoid impacts, and remember shower enclosures are subject to mandatory safety glazing rules for tempered glass.
Types of Shower Enclosures
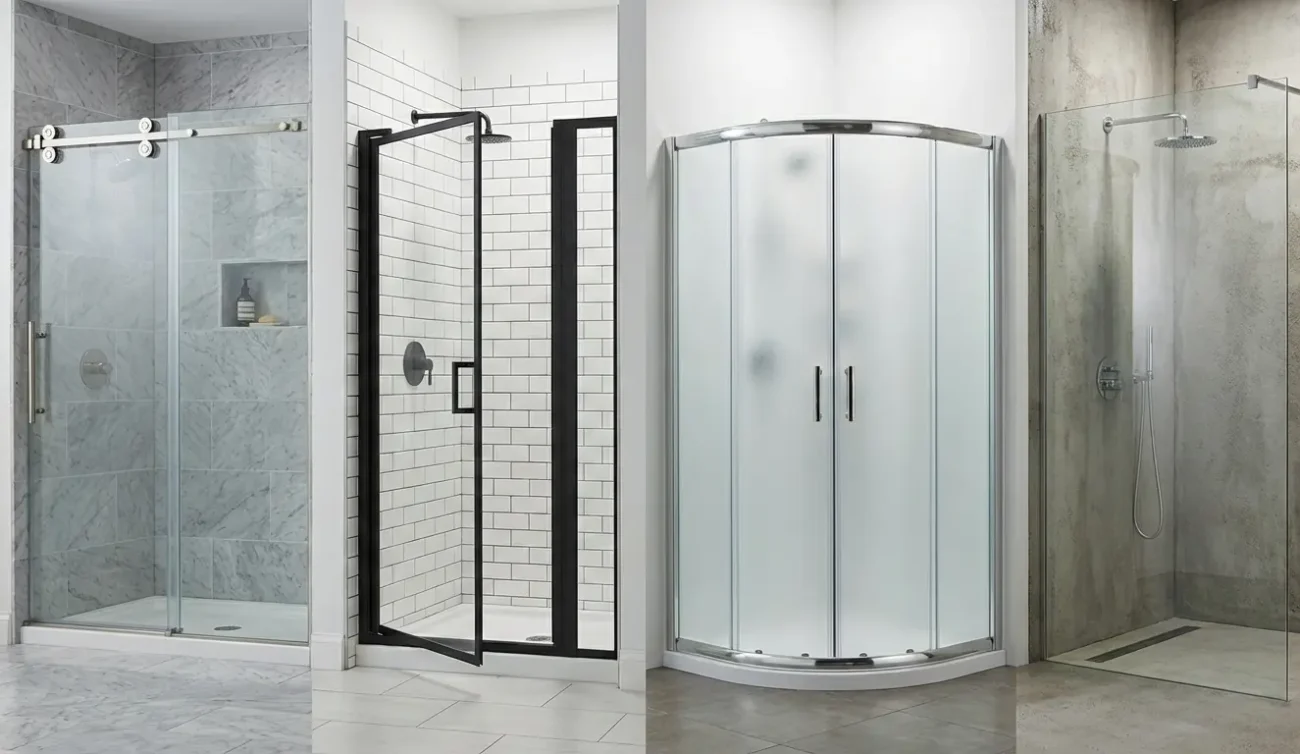
If you’ve been shopping around, you’ve probably noticed that “shower enclosure” can mean a few different layouts and door styles. The best one for you depends on your bathroom shape, how much space you have, and how you like to enter the shower.
- Glass enclosure (often a walk-in / custom glass setup): This style uses glass panels to “wall off” the shower area, creating a very open, modern feel. Many glass enclosures use tempered safety glass and can also work well for curbless, easy-entry showers.
- Curved/rounded-corner enclosure (often called “quadrant” style): This enclosure sits in a corner and features a curved front, often with a curved sliding door. It’s a smart way to use corner space without the sharp footprint of a square enclosure.
- Square corner enclosure: A corner enclosure forms a square using two bathroom walls and two glass sides, which helps save floor space. It’s common in bathrooms that need both a tub and a separate shower area.
- Neo-angle (angled corner enclosure): Neo-angle enclosures sit in a corner but use a flat panel at a 45° angle to create a “cut corner” entry. It’s often a great compromise when you want a corner shower that feels roomier than a standard square shower.
- Alcove / in-line enclosure (three walls + a door): This is the classic layout where your shower sits between three walls, with a door or a door + fixed panel across the front. It’s a popular choice in NYC bathrooms because it works well in long, narrow spaces.
- Tub-and-shower enclosure (tub doors / bathtub enclosure): This setup adds glass doors or panels to a bathtub so you can shower without a curtain. It’s still a practical space-saver for smaller bathrooms.
- Steam shower enclosure: Steam setups usually require a tighter, more enclosed design to retain steam, often going higher and sealing more aggressively than a standard shower door. Some manufacturers specifically describe steam doors as framed options designed to create a tight seal.
Framed vs Frame-less Shower Enclosures
| Feature | Framed Shower Enclosure | Frameless Shower Enclosure |
|---|---|---|
| Look & style | More traditional; visible frame outlines the glass. | Clean, modern “open” look with minimal hardware. |
| Water control | Frame helps create a tighter, more forgiving seal. | Relies more on precise alignment, seals, and silicone. |
| Ease of cleaning | Tracks can collect soap film and grime over time. | Fewer tracks/edges, usually easier to wipe down. |
| DIY-friendliness | Often easier for DIYers and more adjustable. | Usually harder for DIY; measurements matter more. |
| Cost (typical trend) | Lower overall cost in many installs. | Higher overall cost in many installs. |
| Best for | Budget remodels, rentals, faster installs, uneven walls. | High-end remodels, “spa” look, easy-clean priorities. |
Which is better for me: a framed shower enclosure or a frameless one?
If you want an easier install, stronger “built-in” sealing, and a lower price, framed is usually the safer bet. If you want a clean, high-end look and you don’t mind paying more (and measuring more carefully), frameless is often worth it. In older Brooklyn bathrooms where walls are a little out of plumb, a pro measurement can save you from expensive surprises.
How to Choose the Right Shower Enclosure for Your Bathroom
Choosing an enclosure gets much easier when you match it to your space and how you actually use the bathroom every day. Here’s what I’d look at first if I were in your shoes.
- Your bathroom layout (corner, alcove, or open wall): A corner enclosure saves floor space, while an alcove/in-line setup works well when you already have three shower walls. If your bathroom is tight (common in Brooklyn), layout alone can quickly narrow the options.
- Door style and clearance (sliding vs pivot vs folding): Sliding doors are great when you don’t have swing space in front of the shower. Pivot or hinged doors can feel wider and more “luxurious,” but you need room for the door to open comfortably.
- Framed vs frameless (budget + cleaning + install difficulty): Framed doors are typically more affordable and easier for many DIYers to install. Frameless/trackless styles look sleek and are often easier to clean, but they tend to cost more and can be trickier to install.
- Wall and base conditions (level, plumb, and “adjustment range”): If your walls are out of plumb, you may need shims or a door system designed to handle small differences. Some brands tell you exactly how much “out-of-plumb” variation their doors can accommodate, so it’s worth checking before you buy.
- Glass safety and quality (tempered safety glass matters): Shower doors and enclosures are commonly made with tempered safety glass to reduce the risk of breakage. In the U.S., shower doors/enclosures are subject to federal safety glazing requirements for architectural products, so reputable brands take safety glass seriously.
- Special features (steam, accessibility, and easy-clean coatings): If you’re building a steam shower, you’ll want a door/enclosure designed to seal tightly and hold in steam. If accessibility matters, a glass enclosure can also pair well with curbless designs to make entry easier.
How to Measure Your Space and Plan the Layout
Measure only after your walls are finished (tile or surround installed), then take the opening width at the base, middle, and top, and use the smallest measurement as your guide. Measure height from the threshold/curb up to where the glass will end, and double-check both sides if the walls aren’t perfectly even. Use a level to spot out-of-plumb walls early, because that affects which enclosure (and adjustment range) will work. Finally, plan the door path: make sure a swinging door won’t hit your vanity or toilet, and ensure a sliding door has the required track space.
How much does it cost to install a shower enclosure in Brooklyn, NYC?
In Brooklyn, the installed cost usually depends on the enclosure style: a framed door often costs around $400–$1,100, while a semi-frameless setup is commonly $500–$1,550. Frameless doors typically run $600–$1,900, and custom frameless builds can jump to $1,400–$3,300 because the glass is cut to fit and the hardware is heavier-duty.
If you’re choosing a corner/neo-angle/curved enclosure, a common range is about $900–$2,000 due to extra panels and hardware. For a quick “reality check,” HomeAdvisor’s 2025 average sits around $958 (common range: $530–$1,389), and Brooklyn homes often lean toward the higher end when space is tight, or the glass needs custom sizing.
Common Mistakes to Avoid
A shower enclosure looks simple, but small mistakes can cause leaks, cracked tile, or a door that never closes properly. Here are the big ones I see people make (and how to avoid them).
- Measure only once (or only at one height): measure the opening at multiple spots (top/middle/bottom) and use the smallest number, especially in older Brooklyn bathrooms, where walls can be uneven. If you order the wrong size, you’ll end up fighting gaps, leaks, or a door that won’t fit at all.
- Skipping the “plumb and level” checks: If the walls aren’t plumb, the door can swing open by itself, rub the frame, or leave a splash gap. Even a shower tray/base that’s slightly out of level can throw off the whole enclosure and cause water to escape where it shouldn’t.
- Drilling tile the wrong way: Rushing the drill step can crack tile, chip edges, or weaken your mounting points. Use the correct drill bits and fastening method for your wall type (tile over brick, cement board, plywood, etc.).
- Trying to install heavy glass without help: Glass doors can be awkward and heavy, and bumping an edge can damage the glass or the tile. Many step-by-step install guides recommend having a helper during the door-hanging stage for safety and control.
- Over-tightening screws and hardware: Over-tightening can crack tile, crush channels, or stress the glass and hinges. Tighten slowly and evenly, and stop as soon as everything feels snug and aligned.
- Caulking the wrong places (and blocking drainage paths): Some setups need silicone in specific edges and seams, but manufacturers may avoid silicone under certain tracks so water can drain properly—always follow your kit instructions. If your door track has weep holes/drainage channels, don’t seal them shut, or you can trap water and cause overflow leaks.
- Using the shower before the silicone fully cures: Silicone can feel “dry” fast, but it often needs about 24–48 hours to cure well enough for regular water exposure (check your product label). If you shower too soon, you can weaken the seal and create early leaks or mold-prone gaps.
Where to Find the Best Brooklyn Contractors
Are you looking for an expert contractor in Brooklyn, NYC? SR General Construction has you covered! Our business is located at 8807 Avenue B, Brooklyn, NY 11236, United States, in the Canarsie area.
Additionally, we offer services at Rockaway Parkway and Ralph Avenue, providing fast access to Flatlands, East Flatbush, Bergen Beach, Brownsville, and the Spring Creek section of East New York.
FAQ
1. Can I install a shower enclosure myself, or should I hire a pro?
A framed shower door is often more DIY-friendly, while frameless installations demand more precision because the glass is heavier and less forgiving. If your walls are out of plumb or you’re drilling expensive tile, a pro can prevent costly mistakes.
2. What’s the difference between a shower door and a shower enclosure?
A shower door is the moving entry panel, while a shower enclosure usually means the full setup (panels + door + frame/channel/hardware). Many “enclosure kits” include the tracks/jambs and fixed panels along with the door.
3. What glass thickness is best for framed vs frameless?
Framed doors often use thinner glass because the metal frame supports it, while frameless doors typically use thicker glass for stiffness. Many guides describe 3/8-inch as a common minimum for frameless, with 1/2-inch as a thicker premium option.
4. What if my bathroom walls aren’t perfectly plumb?
That’s common in older Brooklyn buildings, and it affects alignment and sealing. Some installations require filler/adjustment pieces to ensure the door sits correctly and seals tightly.
5. Which is better for small Brooklyn bathrooms: sliding or hinged?
Sliding doors save space because they don’t swing out into the room, which helps near vanities and toilets. Hinged doors can feel wider and more upscale, but you need clear floor space for the swing.