Are you looking for a roofing solution that’s durable, weather-resistant, and easy to maintain? Torch-down roofing might be the perfect choice for you. This roofing system is known for its exceptional strength and ability to withstand harsh conditions, making it an ideal option for both residential and commercial buildings.
In this post, we’ll explore what torch down roofing is, why it’s a smart choice for your Brooklyn home, and what makes it stand out compared to other roofing systems. You’ll learn about its components, the installation process, the benefits and drawbacks, and how to maintain it for a long-lasting roof. Whether you’re considering a new roof or looking to upgrade, this guide provides all the essential details to make an informed decision.
Key Information
- Torch-down roofing is ideal for flat and low-slope roofs. It offers durability and weather resistance.
- Modified bitumen, fiberglass reinforcement, and mineral granules create a waterproof, flexible, and UV-protected roofing system.
- Multiple-layer systems (two or three layers) provide enhanced durability and protection against harsh conditions.
- Energy efficiency is improved with reflective coatings that reduce heat absorption and lower cooling costs.
- Minimal maintenance is required, with regular inspections ensuring long-term durability.
- Torch-down roofing is unsuitable for steep roofs due to its complex installation methods.
- Installation costs range from $3.50 to $8.50 per square foot, depending on material and complexity.
- Waterproofing is guaranteed by the heat-bonded layers, creating a seamless barrier against leaks.
- Punctures from sharp objects or heavy foot traffic can damage the roof, requiring regular upkeep.
- Professional installation is essential due to the specialized tools (such as a propane torch) and safety risks involved.
What is Torch Down Roofing?
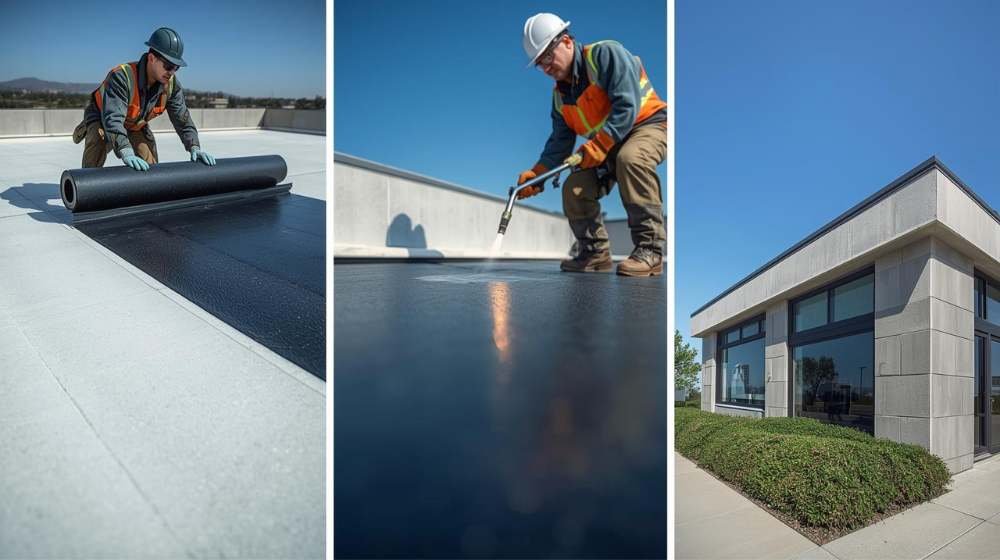
Torch-down roofing is a durable and reliable roofing system often used for flat and low-sloped roofs. It consists of layers of modified bitumen applied using heat, which creates a waterproof and seamless barrier. This roofing system is known for its resistance to extreme weather conditions. It offers long-term protection. It’s an ideal choice for both commercial and residential buildings that need a sturdy, low-maintenance roof.
What are the components and materials of torch-down roofing?
Torch-down roofing is made from a combination of materials designed to provide durability, flexibility, and water resistance. Below are the key components and materials used in the system:
- Modified Bitumen: Modified bitumen is the primary material used in torch-down roofing, made by combining asphalt with polymers. This gives it added flexibility, heat resistance, and long-lasting durability. It creates a strong, waterproof membrane that protects the roof from leaks and water damage.
- Fiberglass or Polyester Reinforcement: These materials are used as the base reinforcement layer within the roofing system. They add strength and flexibility, preventing tears and ensuring the membrane can expand and contract with temperature changes. The reinforced mat also helps the roof withstand wear and tear over time.
- Adhesive Layer: The adhesive layer binds the modified bitumen to the roof deck. It is applied using heat from a propane torch, which activates the adhesive, creating a solid bond between the roof membrane and the deck. This layer ensures that water cannot seep beneath the roofing material.
- Mineral Granules: Mineral granules are added to the top of the roofing membrane to offer UV protection and improve durability. These granules also provide a finished appearance. It helps protect the roof from sun damage, reduces heat absorption, and increases the overall lifespan of the roofing system.
- Flashing: Flashing is used around roof penetrations, such as vents or chimneys, to prevent water from leaking through seams. It helps create a watertight seal at critical points on the roof, which ensures that moisture does not get trapped in vulnerable areas. Flashing is typically made from modified bitumen or metal.
- Protective Coating (Optional): A protective coating can be applied to the top layer of the torch-down roofing. This coating helps improve the roof’s resistance to UV rays, which reduces the effects of sun damage. It also provides added protection against environmental elements and increases the lifespan of the roof.
Types of Torch Down Roofing
Torch-down roofing comes in several variations, each designed to meet specific needs and environmental conditions. Below are the five main types:
Single-Ply Torch Down Roofing
- Description: This system involves a single layer of modified bitumen applied to the roof deck.
- Features:
- Single-layer installation
- Faster installation process
- Lower upfront cost
- Ideal for small-scale roofs
- Benefits:
- Cost-effective for small roofs
- Quick installation process
- Suitable for residential use
- Provides basic waterproofing
- Materials: Modified bitumen sheets, fiberglass, or polyester reinforcement.
Two-Layer Torch Down Roofing
- Description: Two layers of modified bitumen are installed. It offers added durability and protection.
- Features:
- Two layers of bitumen.
- Increased protection against the elements.
- Enhanced waterproofing.
- Stronger structure
- Benefits:
- Longer lifespan than single-ply systems
- Higher durability in extreme weather
- Better resistance to punctures and wear
- Ideal for larger residential and commercial roofs
- Materials: Modified bitumen, fiberglass or polyester reinforcement, adhesive layer.
Three-Layer Torch Down Roofing
- Description: The three-layer system adds an extra layer of protection and reinforcement.
- Features:
- Three layers of modified bitumen
- Maximum protection
- Best for high-traffic roofs
- Strong resistance to extreme weather
- Benefits:
- Provides superior durability and longevity
- Ideal for high-traffic or commercial buildings
- Exceptional waterproofing
- Best for roofs in harsh climates
- Materials: Modified bitumen, fiberglass or polyester reinforcement, adhesive, and top granules.

SBS Modified Bitumen Roofing
- Description: This version uses styrene-butadiene-styrene (SBS) polymer for increased flexibility.
- Features:
- Highly flexible material
- Resistant to temperature fluctuations
- Suitable for cold climates
- Strong tear resistance
- Benefits:
- Great for buildings in regions with extreme temperature changes
- Flexible and crack-resistant
- Easy to install and maintain
- Enhanced lifespan
- Materials: Modified bitumen with SBS, polyester, or fiberglass reinforcement.
APP Modified Bitumen Roofing
- Description: The APP system uses atactic polypropylene (APP) to make the roof more heat-resistant.
- Features:
- Heat-resistant material
- UV protection
- Suitable for warm climates
- Long-lasting durability
- Benefits:
- Excellent performance in hot climates
- Highly resistant to UV damage
- Provides superior water resistance
- Long-lasting protection against extreme heat
- Materials: Modified bitumen with APP, polyester, or fiberglass reinforcement.
Pros and Cons of Torch Down Roofing
Understanding the pros and cons of torch-down roofing is crucial when deciding whether it’s the right fit for your home or building. While it offers many advantages, there are also some limitations to consider. Let’s take a closer look at both sides.
Advantages of Torch Down Roofing
- Durability: Torch-down roofing is built to last for decades. The material withstands harsh weather conditions, including heavy rain, snow, and high winds. It provides long-term protection for your home.
- Water Resistance: One of the key benefits of torch-down roofing is its superior water resistance. The multiple layers of modified bitumen form a seamless, waterproof barrier that reduces the risk of leaks.
- Low Maintenance: Torch-down roofing requires minimal maintenance. Once installed, it is relatively easy to maintain with only occasional inspections to ensure its integrity.
- UV Protection: The granules on the top layer of the roofing material protect the surface from UV rays. This increases the roof’s longevity and reduces the risk of damage from the sun’s heat.
- Energy Efficiency: Torch-down roofing, especially with reflective coatings, improves your home’s energy efficiency by reflecting heat away from the building. This lowers cooling costs in warmer climates.
- Cost-Effective: Compared to other roofing options, torch-down roofing is generally more affordable. It offers good value for the durability and protection it provides.
- Easy Installation: The installation process of torch-down roofing is straightforward, especially with the single-ply system. It requires less time and labor than more complex roofing systems.
Disadvantages of Torch Down Roofing
- Installation Complexity: Installing torch-down roofing requires specialized equipment, such as a propane torch, and should be done by professionals. The open flame poses a risk if not handled correctly.
- Not Suitable for Steep Roofs: Torch-down roofing is most effective on flat or low-slope roofs. It is not ideal for steeply pitched roofs, as the installation process may be more challenging.
- Potential for Punctures: While durable, torch-down roofing can still be punctured by sharp objects or heavy foot traffic. Regular maintenance and inspections are needed to prevent damage.
- Limited Aesthetic Options: Torch-down roofing offers fewer aesthetic choices compared to other roofing materials, such as shingles or metal. This can be a concern for homeowners who are focused on maintaining a good curb appeal.
- High Initial Cost: While torch-down roofing is cost-effective in the long run, the upfront installation cost can be higher than other basic roofing materials like asphalt shingles.
Common Torch Down Roofing Problems and Solutions
Torch-down roofing is a highly durable system, but like any roofing material, it can experience problems over time. Understanding these common issues and knowing how to address them can help prolong the lifespan of your roof. Below are some of the most common problems with torch-down roofing, along with their solutions.
- Leaks at Seams: Leaks often occur at the seams where two sheets of modified bitumen meet. These seams can weaken over time, allowing water to get inside.
- Solution: Inspect the seams regularly and reseal any gaps with a high-quality bitumen sealant. If necessary, use a propane torch to melt and reseal the seams.
- Blistering: Blistering can develop when air or moisture becomes trapped under the roofing layers. This creates bubbles or blisters that can eventually burst. It causes leaks.
- Solution: To fix blistering, carefully cut the blister open, remove any trapped moisture, and patch the area with a new layer of modified bitumen. Ensure the area is properly sealed.
- Punctures and Tears: Punctures and tears may occur from sharp objects or heavy foot traffic. These weak points can lead to water infiltration.
- Solution: Patch small punctures by cutting a piece of modified bitumen, then apply adhesive, and securely bond it to the damaged area. Larger tears may require a full repair with a new layer of bitumen.
- Granule Loss: The loss of mineral granules from the top layer can lead to UV damage and premature wear. This usually happens due to age or extreme weather conditions.
- Solution: If granule loss is significant, consider applying a new layer of modified bitumen with granules to restore the protective surface. This will also help improve the roof’s UV resistance.
- Cracking: Cracks in the roof surface can develop from exposure to extreme temperature changes, which cause the material to expand and contract. These cracks allow moisture to penetrate.
- Solution: For cracks, use a high-quality roofing adhesive or sealant to fill the gap. It is important to monitor the area for any further damage and reseal as needed.
- Improper Installation: If the roofing system is not installed properly, it can lead to various issues, including poor adhesion and water leakage.
- Solution: To fix improper installation, hire a professional roofing contractor to reapply the system correctly. Proper installation is key to ensuring long-term roof performance.
- Standing Water: Water pooling or standing on the roof can result in leaks and membrane damage. This problem usually occurs on flat roofs where drainage is inadequate.
- Solution: Check for proper drainage by ensuring that the roof slope is correct. If necessary, add drainage systems or reconfigure the roof slope to ensure water flows off properly.
How to Install a Torch Down Roofing System
Torch-down roof installation involves several key steps that ensure a durable and watertight result. While it is best left to professionals, here is an overview of the installation process for those interested in understanding the steps involved.
- Prepare the Roof Deck: Begin by thoroughly cleaning the roof deck. Remove any debris, old roofing materials, and dirt that could prevent proper adhesion. The surface should be dry, smooth, and clean to allow for a strong bond.
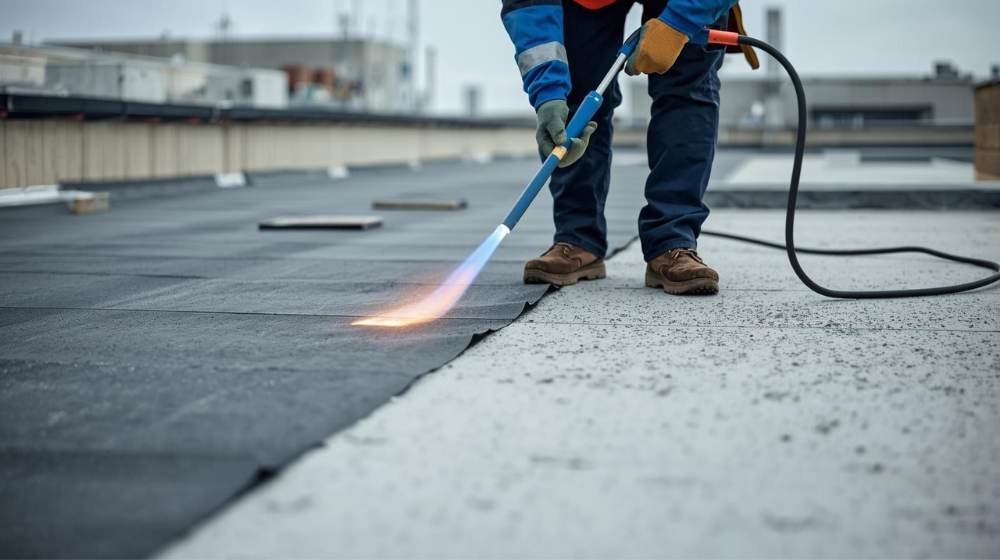
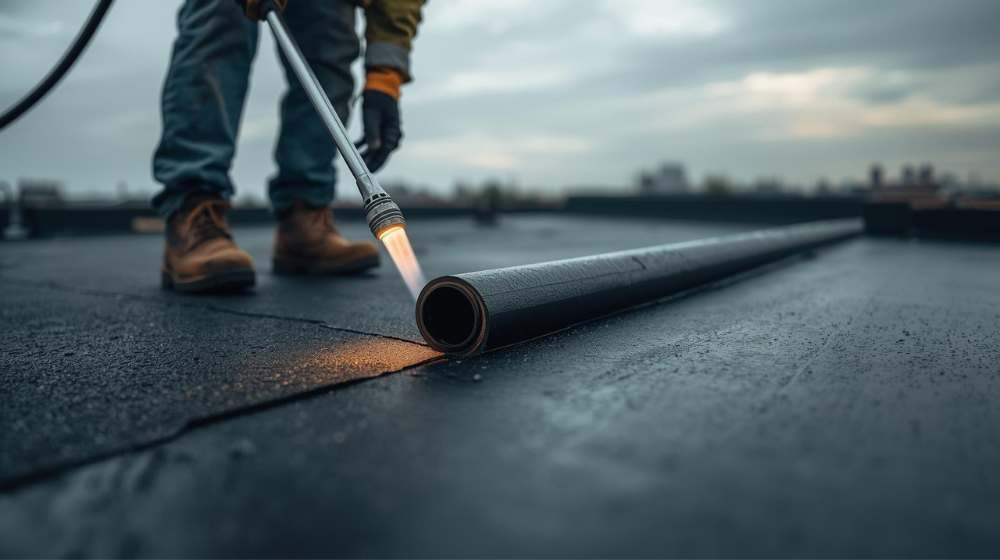
- Install the Base Sheet: Unroll the base sheet of modified bitumen over the roof deck. Heat it with a propane torch to activate the adhesive and bond it to the deck. The base sheet forms the foundation of the roofing system and provides stability.
- Apply the First Layer of Bitumen: Once the base sheet is in place, unroll the first layer of modified bitumen. Heat it using the torch, which allows it to fully adhere to the base sheet. Be careful to avoid overheating, as this can damage the material.
- Lay Additional Layers: If using a multi-ply system, apply additional layers of modified bitumen. Each layer must be thoroughly heated and bonded to the layer beneath it. Ensure that each layer overlaps the previous one to maintain a seamless, waterproof seal.
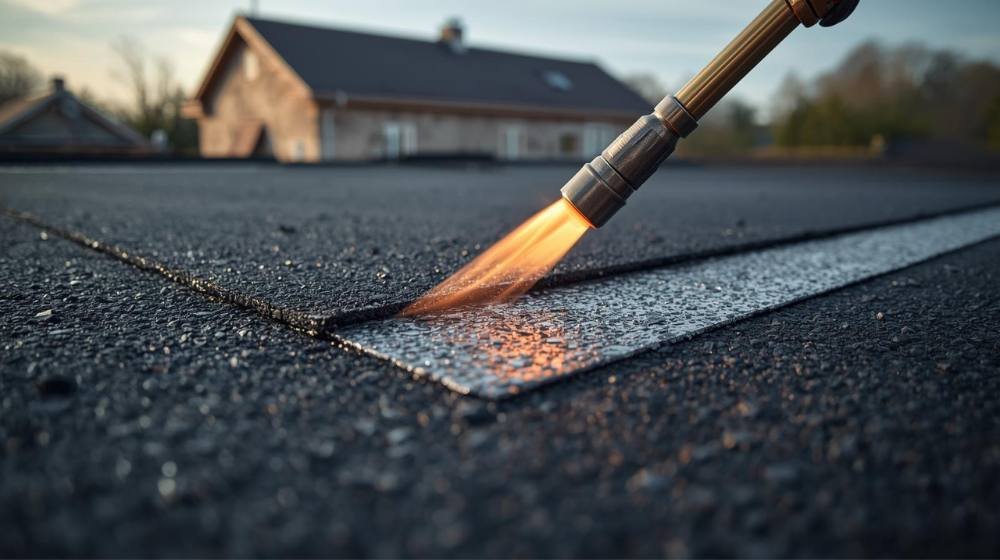
- Seal the Seams: After applying the layers, focus on sealing the seams between the sheets. Use a torch to heat the seams and press them together to ensure a watertight bond. This step is crucial for preventing leaks at the joints.
- Apply Flashing Around Penetrations: Flashing should be installed around roof penetrations such as vents, chimneys, and skylights. The flashing should be sealed with modified bitumen to prevent water from seeping into these vulnerable areas. Ensure all edges are properly sealed.
- Finish with the Top Layer: Finally, apply a top layer of modified bitumen with granules or a reflective coating. This will provide UV protection and a finished appearance. The top layer also protects the roof from environmental damage and helps reflect sunlight, thereby reducing heat.
How to Repair a Torch Down Roof
Repairing a torch-down roof requires careful attention to ensure that the roof remains watertight and durable. Below are the steps for fixing common issues that might arise with torch-down roofing.
- Locate the Damage: The first step is to identify the damage, such as leaks, cracks, or punctures. Inspect the roof carefully, and check seams and areas with visible damage. Mark the problem areas for easy reference.
- Clean the Damaged Area: Before making any repairs, thoroughly clean the damaged area. Remove dirt, debris, or old roofing material from the damaged section. This ensures proper adhesion for the new materials.
- Cut and Prepare the Patch: Cut a piece of modified bitumen that is slightly larger than the damaged area. Use a utility knife to trim the patch to fit the exact shape of the damage. Ensure the edges of the patch overlap the damaged area to achieve a secure bond.
- Apply Adhesive: Apply a layer of roofing adhesive or heat the area with a propane torch. The adhesive will bond the patch to the roof surface. Be careful not to overheat the material, as this can cause further damage.
- Place the Patch: After applying the adhesive, position the patch over the damaged area. Press down firmly to ensure the patch is securely attached. Allow the adhesive to cure according to the manufacturer’s recommendations.
- Seal the Edges: After the patch is in place, seal the edges of the repair with a roofing sealant. This will help prevent water from seeping under the patch. Make sure the sealant covers the entire perimeter of the patch.
- Inspect the Repair: After the repair is complete, inspect the patched area to ensure it is secure and stable. Check for any signs of leaking or gaps. Perform a water test to verify that the repair is watertight and effective.
How Much Does Torch Down Roofing Installation Cost (per sq. ft.) in Brooklyn?
When considering torch-down roofing for your Brooklyn property, one of the first factors to evaluate is the cost of installation. The cost can vary depending on the type of torch-down roofing you choose, the materials used, and the complexity of the installation. Below is an estimate of the typical costs associated with different types of torch-down roofing installation.
| Torch Down Roof Type | Material Cost (per sq. ft.) | Labor Cost (per sq. ft.) | Total Cost (per sq. ft.) |
| Single-Ply System | $1.50 – $2.50 | $2.00 – $3.00 | $3.50 – $5.50 |
| Two-Layer System | $2.00 – $3.00 | $2.50 – $3.50 | $4.50 – $6.50 |
| Three-Layer System | $3.00 – $4.00 | $3.00 – $4.50 | $6.00 – $8.50 |
| SBS Modified Bitumen | $2.50 – $3.50 | $2.50 – $4.00 | $5.00 – $7.50 |
| APP Modified Bitumen | $2.50 – $3.50 | $2.50 – $4.00 | $5.00 – $7.50 |
Torch Down Roofing vs. Other Roofing Options
When deciding between torch-down roofing and other roofing materials, it’s essential to understand how they compare across key factors. Below is a comparison between torch-down roofing and six other popular roofing options:
| Roof Type | Durability | Water Resistance | Energy Efficiency | Installation Complexity | Cost |
| Torch Down Roofing | High | Excellent | Good | Moderate | $3.50 – $8.50 |
| Asphalt Shingles | Moderate | Moderate | Low | Easy | $1.50 – $4.00 |
| Metal Roofing | High | Good | Excellent | Moderate | $5.00 – $10.00 |
| Flat Membrane (TPO) | Moderate | Good | Moderate | Easy | $2.50 – $5.50 |
| Slate Roofing | Very High | Excellent | Good | Complex | $10.00 – $20.00 |
| Wood Shingles | Moderate | Moderate | Low | Easy | $4.00 – $8.00 |
| Clay Tiles | Very High | Excellent | Good | Complex | $7.00 – $15.00 |
When Torch Down Roofing May Not Be the Best Option
While torch-down roofing is a strong and durable choice for many properties, it may not be the right fit for every situation. Consider these factors before opting for this roofing system:
- High-Pitched Roofs: Torch-down roofing works best on flat or low-slope roofs.
- Budget Constraints: The initial installation cost may be higher than that of asphalt shingles.
- Heavy Foot Traffic: The material may be prone to punctures from excessive foot traffic.
- Aesthetic Concerns: Torch-down roofing offers fewer aesthetic options compared to shingles or metal roofing.
- DIY Installation: The installation requires specialized tools and skills, making it unsuitable for DIY projects.
Additional Information
What is Torch Down Roof Coating?
Torch Down Roof Coating is a protective layer applied to the top of a Torch Down Roofing system. It helps enhance the roof’s durability by offering extra protection against UV rays and environmental damage. The coating also improves the roof’s waterproofing, making it more resistant to leaks.
What is Modified Bitumen Torch Down Roofing?
Modified Bitumen Torch-Down Roofing is a flat roofing system composed of asphalt combined with polymers. The layers are applied using a propane torch to melt the material, which creates a strong, watertight seal. It provides durability, flexibility, and resistance to extreme weather conditions.
How Long Does the Torch Down Roof Last?
A torch-down roof can last anywhere from 20 to 30 years with proper maintenance. Its lifespan depends on factors like weather conditions, roof traffic, and quality of installation. Regular inspections and maintenance can extend the roof’s durability.
How to Choose the Right Torch Down Roofing for Your Home: Expert’s Guide
In this section, we present an expert’s guide on how to choose the right torch-down roofing for your home. Here are key considerations to help make the best decision for your roof:
- Assess Roof Size and Slope: Larger or more complex roofs may benefit from a multi-layer system.
- Consider Climate: Choose SBS for colder climates and APP for warmer climates.
- Evaluate Budget: Single-layer systems are more affordable, but multi-layer systems offer longer durability.
- Professional Installation: Ensure you hire a skilled professional for proper installation.
- Inspect the Existing Roof Condition: Ensure the current deck is in good condition before installation.
- Check Local Building Codes: Ensure your roofing choice complies with local regulations.
Why should you choose a professional roofing contractor?
Are you looking for an expert roofing contractor in Brooklyn, NYC? SR General Construction has you covered! Our business is located at 8807 Avenue B, Brooklyn, NY 11236, United States, in the Canarsie area.
We proudly serve all areas of Brooklyn with high-quality, durable roofing solutions. From new installations to repairs and maintenance, we provide the best service at affordable prices. Contact us and experience why we’re Brooklyn’s roofing experts!
FAQ
1. What is torch-down roofing?
Torch-down roofing is a flat roofing system in which modified bitumen sheets are applied using heat. This process creates a waterproof and durable surface.
2. How long does a torch-down roof last?
Torch-down roofing typically lasts between 20 and 30 years with proper maintenance. The lifespan depends on factors such as weather and maintenance.
3. What are the benefits of torch-down roofing?
Torch-down roofing provides long-lasting durability, water resistance, and UV protection. It requires minimal maintenance over its lifespan.
4. Is torch-down roofing suitable for steep roofs?
No, torch-down roofing is designed primarily for flat or low-slope roofs. The installation process is less effective on steeply pitched roofs.
5. Are there different types of torch-down roofing?
Yes, torch-down roofing comes in single-ply, two-layer, three-layer, SBS, and APP variations. Each type offers different levels of protection and durability.
6. How much does torch-down roofing cost?
The cost of torch-down roofing generally ranges from $3.50 to $8.50 per square foot. Pricing depends on the materials used and the complexity of the installation.