How to remove asphalt shingles safely and efficiently with tools, tips, time estimates, and cleanup strategies included. Whether your shingles are curling, cracked, or just outdated, you’ll be ready to rip them off without ripping apart your sanity (or your roof).
Most people dread removing asphalt shingles because it’s physically demanding, messy, and one wrong move can damage the roof deck or worse, cause injury. Hiring pros is expensive, but doing it yourself can feel overwhelming without the right process or tools.
Ready to rip off those shingles without ripping up your roof? Let’s Remove Asphalt Shingles. Get Roofing Cost Calculation For Your New Or Old Roof.
Understanding Asphalt Shingles: What You’re Dealing With
Types of Asphalt Shingles
Before you begin ripping off old shingles, you need to know what type you’re dealing with. There are three main types:
3-Tab Shingles
- Flat and uniform.
- Lightweight, easy to remove.
- Common on older homes and sheds.
Architectural Shingles
- Thicker, layered, dimensional look.
- Heavier and more durable.
- May take longer to remove due to overlapping design.
Luxury Shingles
- Expect heavy labor and extra time for removal.
- Mimic wood shake or slate.
- Extremely durable and dense.
Common Reasons for Removal
You might need to remove your asphalt shingles for one or more of these reasons:
- Cracking or Curling: Often from age, sun, or improper ventilation.
- Leaks or Water Damage: Usually from compromised flashing or torn shingles.
- Roof Upgrade: Replacing with metal or tile? Tear-off is a must.
- Building Code Limits: Most areas allow only two layers of shingles.
Best Time of Year to Remove Asphalt Shingles
Timing your roof work can save you from big headaches and hospital visits.
Ideal Seasons
- Spring and Fall: These are the sweet spots. Temperatures are moderate, shingles are flexible, and you’re not racing against snow or intense sun.
- Avoid Summer Heat: Shingles soften in heat and become gooey, making removal harder and more dangerous.
- Avoid Wet/Winter Conditions: Ice and slick surfaces make roof work very risky.
Pro Tip: Watch the weather. You’ll need a few dry, calm days in a row.
Prepping for the Project: Time, Tools, and Planning
A successful roofing tear-off starts on the ground. Preparation ensures safety, efficiency, and minimal cleanup nightmares.
Safety Gear & Tools Checklist
| Tool/Gear | Purpose | Estimated Cost |
|---|---|---|
| Roofing Shovel | Pry off shingles & nails | $40–$60 |
| Pry Bar | Tight corners & detail work | $15–$25 |
| Claw Hammer | Nail removal | $10–$30 |
| Ladder + Stabilizer | Safe climbing | $100–$200 |
| Roof Harness & Anchor | Fall protection | $100–$150 |
| Gloves, Helmet, Safety Glasses | Protection gear | $50 |
| Magnetic Nail Sweeper | Cleanup nails from yard | $40–$100 |
| Tarps | Cover plants, collect debris | $15–$50 |
Tip: Rent specialty tools if you’re on a budget local hardware stores usually offer daily or weekly rentals.
Estimating Time and Labor
- Small roof (under 1,500 sq ft): Plan for 1–2 days.
- Larger or steep roofs: 3–4 days or more.
- Multiple layers of shingles: Add at least one extra day.
Work at a steady, safe pace. This is not a job to rush.
Checking Local Codes and Permits
Call your city’s building office or visit their website.
Ask:
- Do I need a permit?
- How many shingle layers are allowed?
- Will there be inspections?
Skipping this step can result in fines or having to redo the job.
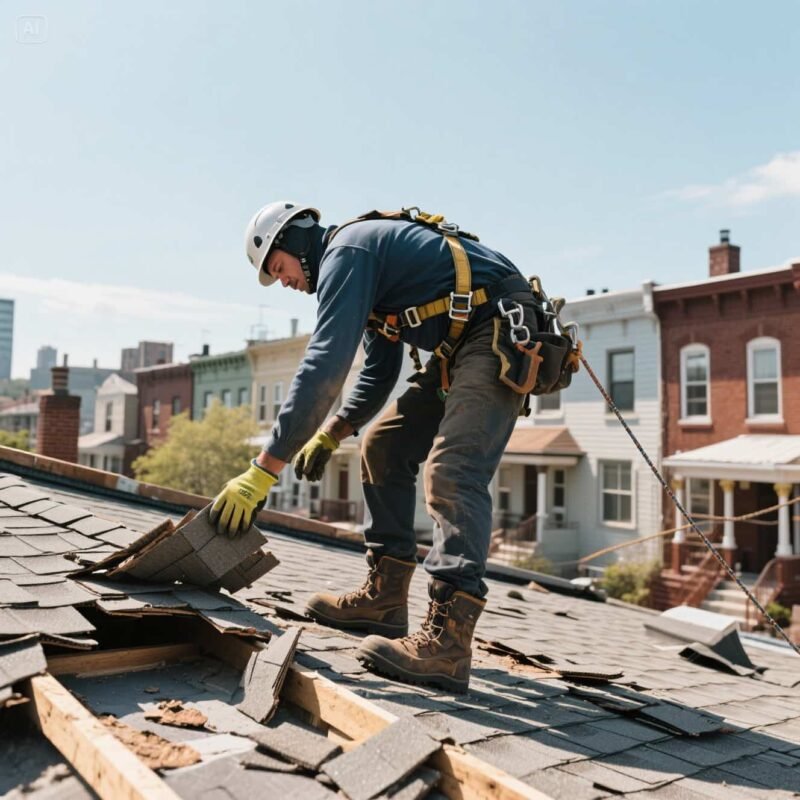
How To Remove Asphalt Shingles Safety First: Protecting Yourself and Your Property
https://www.youtube.com/watch?v=3wOYxizLYiA
Ladder and Roof Safety Protocols
Set up your ladder on flat ground. Attach a stabilizer bar to the top. Always keep three points of contact two hands and one foot, or two feet and one hand.
On the roof:
- Wear a harness clipped to a secure anchor.
- Use roof jacks and planks on steep roofs.
- Never work alone.
Fall Protection and Weather Considerations
Avoid working in bad weather. Wet or icy roofs are dangerous. Wear shoes with good grip and make sure your safety gear is in good condition.
Protect Landscaping and Gutters
- Cover shrubs and flowers with tarps.
- Lay plywood over AC units and patio doors.
- Remove or shield gutters they can be damaged by falling debris.
Step 1 – Prepare the Work Area & Protect Landscaping
- Spread tarps under roof edges to catch falling debris.
- Cover plants, patio furniture, and AC units with plastic or plywood.
- Block off access to pets and children.
Remove or shield gutters they can easily get bent by falling shingle bundles.
Step 2 – Start at the Peak: How to Begin Right
- Begin at the ridge cap (roof peak).
- Work downward shingles are laid in overlapping layers from top to bottom.
- Use your roofing shovel to pry under the first row.
Peeling downward prevents nail damage and shingle tearing.
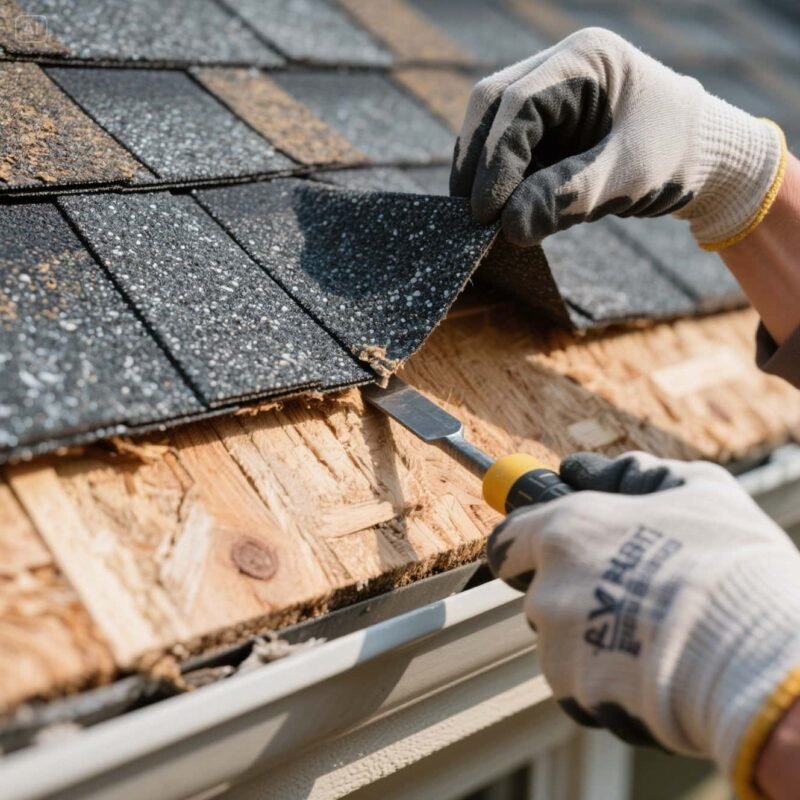
Step 3 – Removing Shingles with the Right Tools
Use your roofing shovel or shingle scraper to wedge under the tabs and lift upward. This should pop both shingles and most nails.
For Tough Nails:
- Use a claw hammer or pry bar.
- If nails snap off, pound them flat into the deck (do not leave them sticking out).
For Multi-Layer Roofs:
- Remove one layer at a time.
- Be extra cautious not to gouge or puncture the wood decking.
Step 4 – Managing Nails, Flashing & Layers
- Go section by section to stay organized.
- Flashing (metal pieces around chimneys or valleys) should only be removed if:
- It’s rusted, bent, or damaged.
- It doesn’t match the new roof layout.
- Sort nails and flashing into buckets for cleanup or recycling.
Step 5 – Cleanup: Tarps, Dumpsters, Magnetic Sweep
- Collect shingles into heavy-duty contractor bags or wheelbarrows.
- Use a magnetic sweeper on:
- Lawn
- Flower beds
- Driveways
- Sidewalks
Dumpster Rentals:
- 10- to 20-yard dumpsters work best.
- Place near the house, but not directly under eaves.
- Cost: $300–$500/week depending on your area.
Step 6 – Inspecting Deck & Underlayment for Rot
Once shingles are off:
- Check for water stains, mold, or soft spots.
- Tap with a hammer hollow sounds = rot.
- Replace rotted plywood sections.
- Peel up torn or soaked underlayment and replace it.
Clean, dry decking is your blank canvas for the next roofing layer.
How to remove shingles without damaging them?
Begin at the top row and work your way down to avoid disturbing lower layers. Slide the pry bar under the shingle to locate and lift the nails without tearing the material. Rock it slowly to release the nail grip instead of forcing it this helps prevent cracks or edge damage. Once the nails are out, slide the shingle free. Be sure to work in cool weather, as shingles are more brittle in extreme heat or cold.
Avoid rushing the process tearing or folding shingles can ruin their waterproofing and make them unusable. Keep a container nearby for removed nails and debris to keep your work area safe and organized.
What’s the Best Way to Remove Asphalt Shingles from a Roof Without Causing Damage?
For DIYers:
DIYer looking to remove asphalt shingles without breaking or damaging them, the key is patience and the right tools. Start at the top of the roof and work your way down. Use a flat pry bar or roofing shovel to lift the edges of each shingle and gently locate the nails underneath. Don’t rush prying too hard or fast can crack or crease the material.
Once you’ve found a nail, rock the tool back and forth to loosen it and carefully pull it out. Then slide the shingle out slowly, keeping it flat to avoid bending. Stack them neatly if you plan to reuse them. Cool, dry weather is best shingles are more manageable and less likely to tear.
This method is ideal for small roof repairs, patch jobs, or replacing a section without buying new materials. It saves money and teaches you valuable roof maintenance skills. Just be cautious on the roof, wear proper gear, and work slowly.
For Contractors:
Contractors aiming to preserve asphalt shingles during removal should focus on efficiency without sacrificing care. Begin at the ridge cap and systematically work down. Use a flat pry bar to lift the shingle tab, then ease the bar under to expose each nail. Rock it gently to extract nails without snapping or creasing the shingle.
Working row by row ensures the underlayment and overlapping tabs stay intact. Slide the shingle out flat and stack them immediately on a tarp to prevent dirt, curling, or damage. A roofing shovel can help speed up large sections, but use it with control to avoid gouging or splitting the material.
Always schedule removals during moderate temperatures mid-50s to mid-70s Fahrenheit to avoid cracking cold shingles or stretching hot ones. This technique is especially useful when salvaging high-quality materials for partial repairs, insurance work, or historic restorations.
Clients appreciate contractors who minimize waste and preserve usable material. This approach saves budget, reduces landfill waste, and adds a professional touch to your roofing service.
Top 5 Shingle Removal Tools (Reviewed)
| Tool | Pros | Cons |
|---|---|---|
| AJC Shingle Remover | Lightweight, great leverage | Small head |
| Bully Tools 91110 | Built tough, wide blade | Heavy |
| Razorback Roof Shovel | Long reach, ergonomic grip | More expensive |
| Stanley Wonder Bar | Great for corners & flashing | Not for bulk removal |
| Neiko Magnetic Sweeper | Easy cleanup, height adjustable | Doesn’t work well on gravel |
Want a shortcut? Use a roofing tear-off shovel with serrated teeth to remove multiple layers at once.
DIY Shingle Removal Planning Checklist
- Roofing harness, gloves, and helmet
- Shovel, pry bar, claw hammer
- Ladder with stabilizer
- Dumpster or disposal plan
- Weather forecast clear for 3+ days
- Tarps for ground and foliage
- Permit acquired (if needed)
- Help lined up (don’t go solo!)
Print this and tape it to your garage door it’ll keep you organized and sane.
What Comes Next: Reroofing or Repair Planning
Prepping the Surface
- Sweep the deck clean.
- Hammer down stray nails.
- Lay ice and water shield if required.
- Add fresh underlayment.
Choosing Replacement Materials
Pick your new roof based on climate, cost, and appearance:
- Asphalt shingles: Most common.
- Metal roofing: Durable, good for snow.
- Tile or slate: Expensive but long-lasting.
Match your choice to the home’s look and your budget.
Budget Breakdown: DIY vs Hiring a Contractor
Tools, Dumpsters, Time, and Labor
| Task | DIY | Contractor |
|---|---|---|
| Tools | $300 (can reuse) | Included |
| Dumpster | $350 | Included |
| Labor | Free | $2,500–$6,000 |
| Cleanup | Time-intensive | Handled |
| Total (avg) | ~$700 | $3,500+ |
Common Mistakes to Avoid While Removing Asphalt Shingles
- Skipping permits
- Not using safety harnesses
- Working alone or in poor weather
- Damaging decking or flashing from rushing
- Ignoring nails left in deck (they’ll puncture new shingles)
Skipping Permits or Safety Gear
- Always check city rules before starting.
- Don’t go up without a harness or helmet.
Damaging the Decking or Gutters
- Go slow around flashing and edges.
- Don’t rip lift shingles carefully.
Environmental Considerations
Can Asphalt Shingles Be Recycled? Environmental Impact
Yes, and they should be. Shingles contain asphalt, which can be ground and reused in paving roads.
Local Drop-off and Recycling Facilities
- Search “shingle recycling near me”
- Ask your local landfill
- Use resources like Earth911.com
Many centers offer pickup if you’re disposing of 2+ tons.
Call your city landfill or a roofing supply store they’ll point you to the right place.
Tools Comparison Table
| Tool | Purpose | Price | Pros | Cons |
| Roofing Shovel | Lift & scrape | $30–$60 | Fast | Heavy |
| Pry Bar | Detail work | $10–$20 | Precise | Slow |
| Magnetic Sweeper | Nail cleanup | $40–$100 | Easy | Not for rough ground |
What to Do Next: Reroofing Tips & Material Choices
Before laying your new shingles:
- Sweep off all debris
- Nail down any raised decking spots
- Lay ice and water barrier
- Roll out new underlayment
Popular Roofing Options:
- Asphalt Shingles: Budget-friendly, decent lifespan.
- Metal Roofing: Long-lasting, great for snowy areas.
- Tile/Slate: Premium and heavy, but built to last decades.
Match your roofing material with local climate, HOA rules, and personal style.
Expert Tips and Warnings: Lessons from Roofers
- Never remove shingles in wet conditions falls are the #1 roofing injury.
- Always inspect the roof deck before reinstalling shingles.
- Use roof jacks and planks on steep slopes.
- Keep a first-aid kit nearby, just in case.
FAQs
How long does it take to remove asphalt shingles?
Usually 1–3 days for a full roof.
What’s the safest way to remove shingles from a steep roof?
Use a harness, roof jacks, and never work alone.
Can I remove shingles in cold or wet weather?
Not safely. Wait for dry, calm days.
Do I need a permit?
Yes, in most cities.
Can I reuse the underlayment?
Only if it’s dry and undamaged.
How do I get rid of old shingles?
Dumpster or recycling drop-off.
What if I find mold or rot?
Replace all damaged sections.
Can I remove shingles without hurting flashing?
Yes, if you’re slow and careful.
На данном портале есть возможность почерпнуть немало практичной информации.
На этой платформе собраны статьи и рекомендации на различный вкус.
Читатель имеете возможность изучить как общую базу, так и узкопрофильные разработки.
Наш ресурс может оказаться полезным новичкам в их обучении.
https://rsc-infobuh.ru/economika/77-bezopasnost-v-onlayn-kazino-kakie-litsenzii-i-sertifikaty-garantiruyut-chestnuyu-igru.html
Также на сайте часто добавляются актуальные обновления.
Советуем внимательно изучить размещённую здесь коллекцию.
Таким образом, данный ресурс считается ценным источником знаний.
На данном портале есть возможность отыскать много практичной материалов.
Тут собраны публикации и рекомендации на различный вкус.
Вы сможете найти и базовую базу, так и специализированные данные.
Данный ресурс пригодится экспертам в их деятельности.
https://spinninrecords.com/profile/repuhouse
Более того здесь периодически публикуются новые обновления.
Предлагаем подробно просмотреть доступную здесь базу.
Таким образом, этот сайт представляет собой полезным местом знаний.